Mixed Kreations

The Creative Life & Journey Of A DIY'ER

  • Home
  • Diy Projects
    • Handmade Cross Projects
    • Holiday & Seasonal Projects
    • Mason Jars
    • Fun Upcyled Shutters & Spindles
    • Texas Projects
    • Upcycled Cans
    • Wood Projects
    • Jewelry Tutorials
  • Quick and Easy Recipes
  • Shop Mixed Kreations
    • Etsy Shop
    • Mixed Kreations Amazon Influencer
  • DISCLOSURES STATEMENT & PRIVACY POLICY
  • About Me
  • Recommendations
You are here: Home / DIY/Craft Projects / repurposed/upcycled / Diy Animal Print Soap Dispenser

Diy Animal Print Soap Dispenser

October 12, 2015 By: Linda @ Mixed Kreations17 Comments

If you enjoyed this post, don't forget to pin it for later!

29 shares
  • Share
  • Tweet

 Diy Animal Print Soap Dispenser  

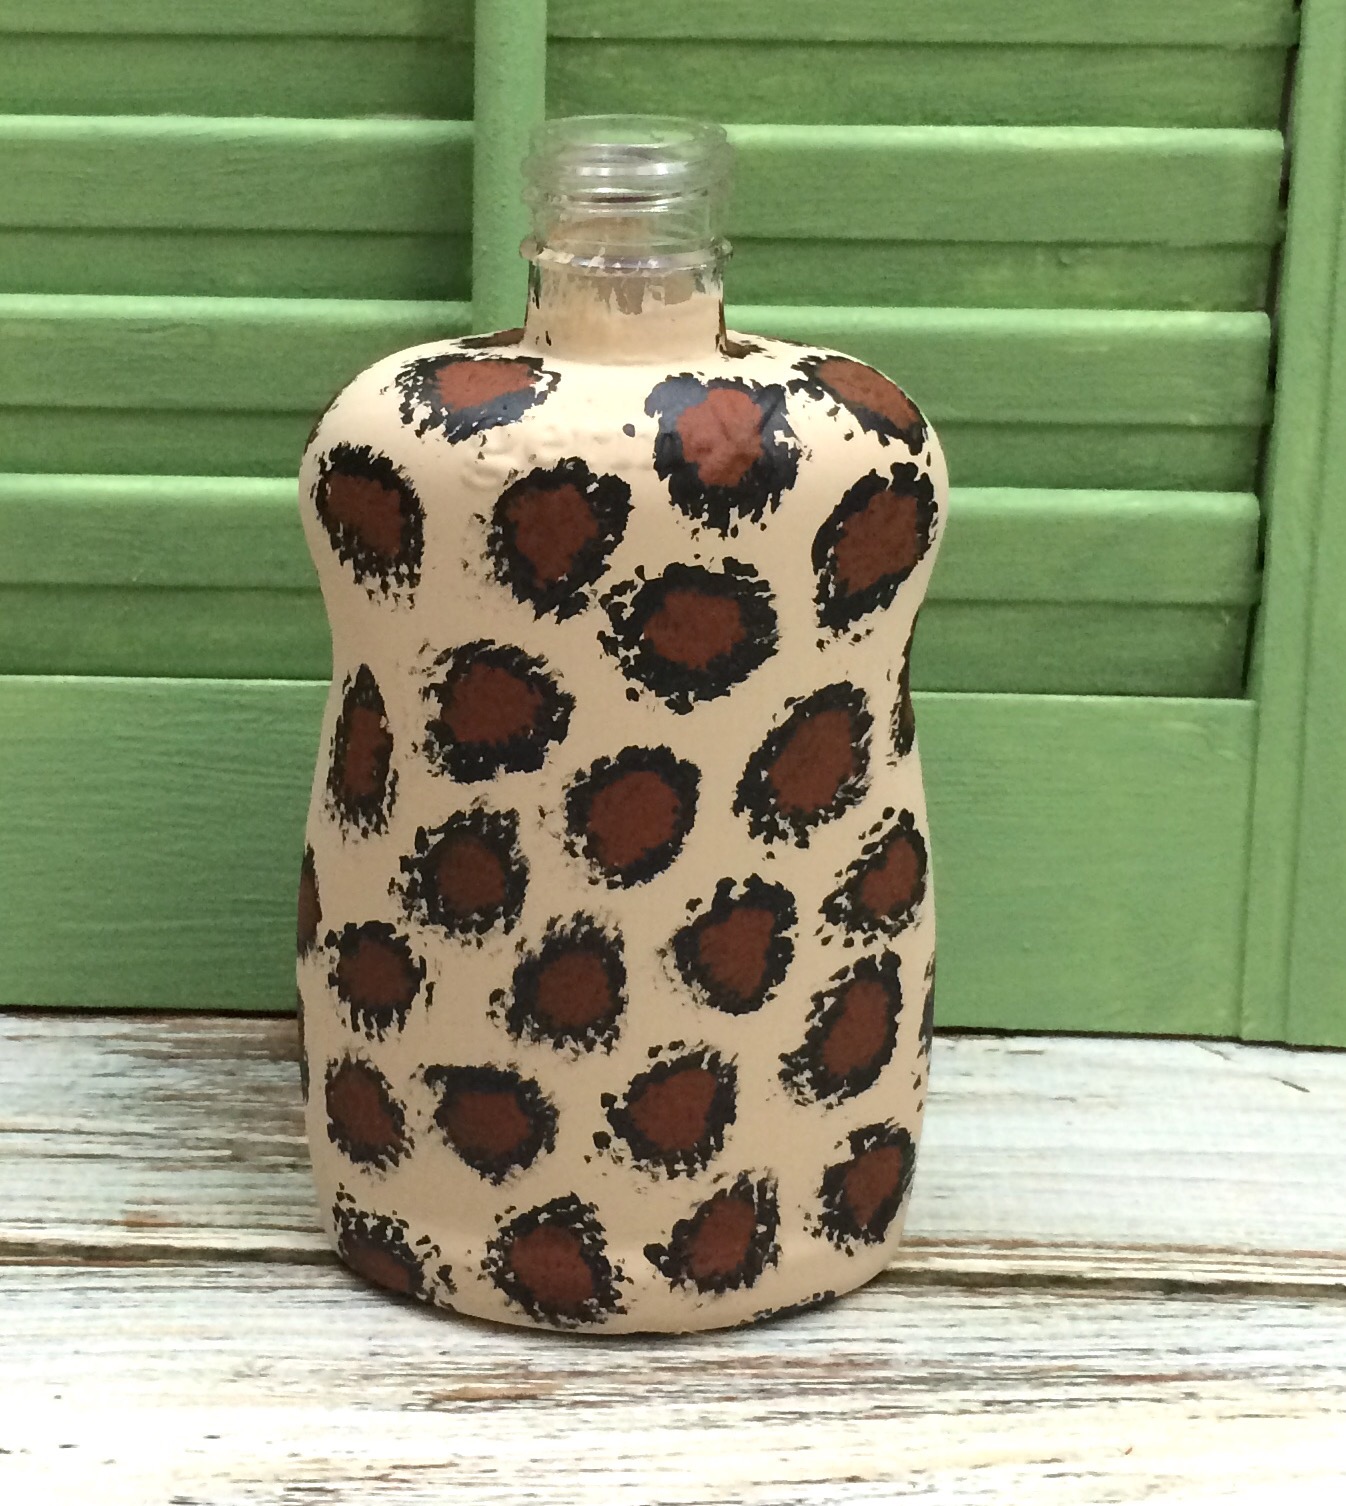
Easy Animal Print Soap Dispenser 

I have been wanting an animal print soap dispenser for the guest bathroom, so when a disposable soap dispenser became available I decided to make my own. 

This diy soap dispenser was so easy to make, and I think it turned out super cute. I had everything on hand so it cost me nothing to make. 

 how to make an animal print soap dispenser  

how to make an animal print soap dispenser  

Start off by giving your empty soap dispenser two coats of the tan color paint letting dry between each coat. 

how to make an animal print soap dispenser 

Using a paint brush start dabbing on black spots of paint fairly close together.

 how to make an animal print soap dispenser  

Once the black spots of your animal print soap dispenser is dry start adding some burnt umber paint to the center of each black spot.   


Let dry throughly. 


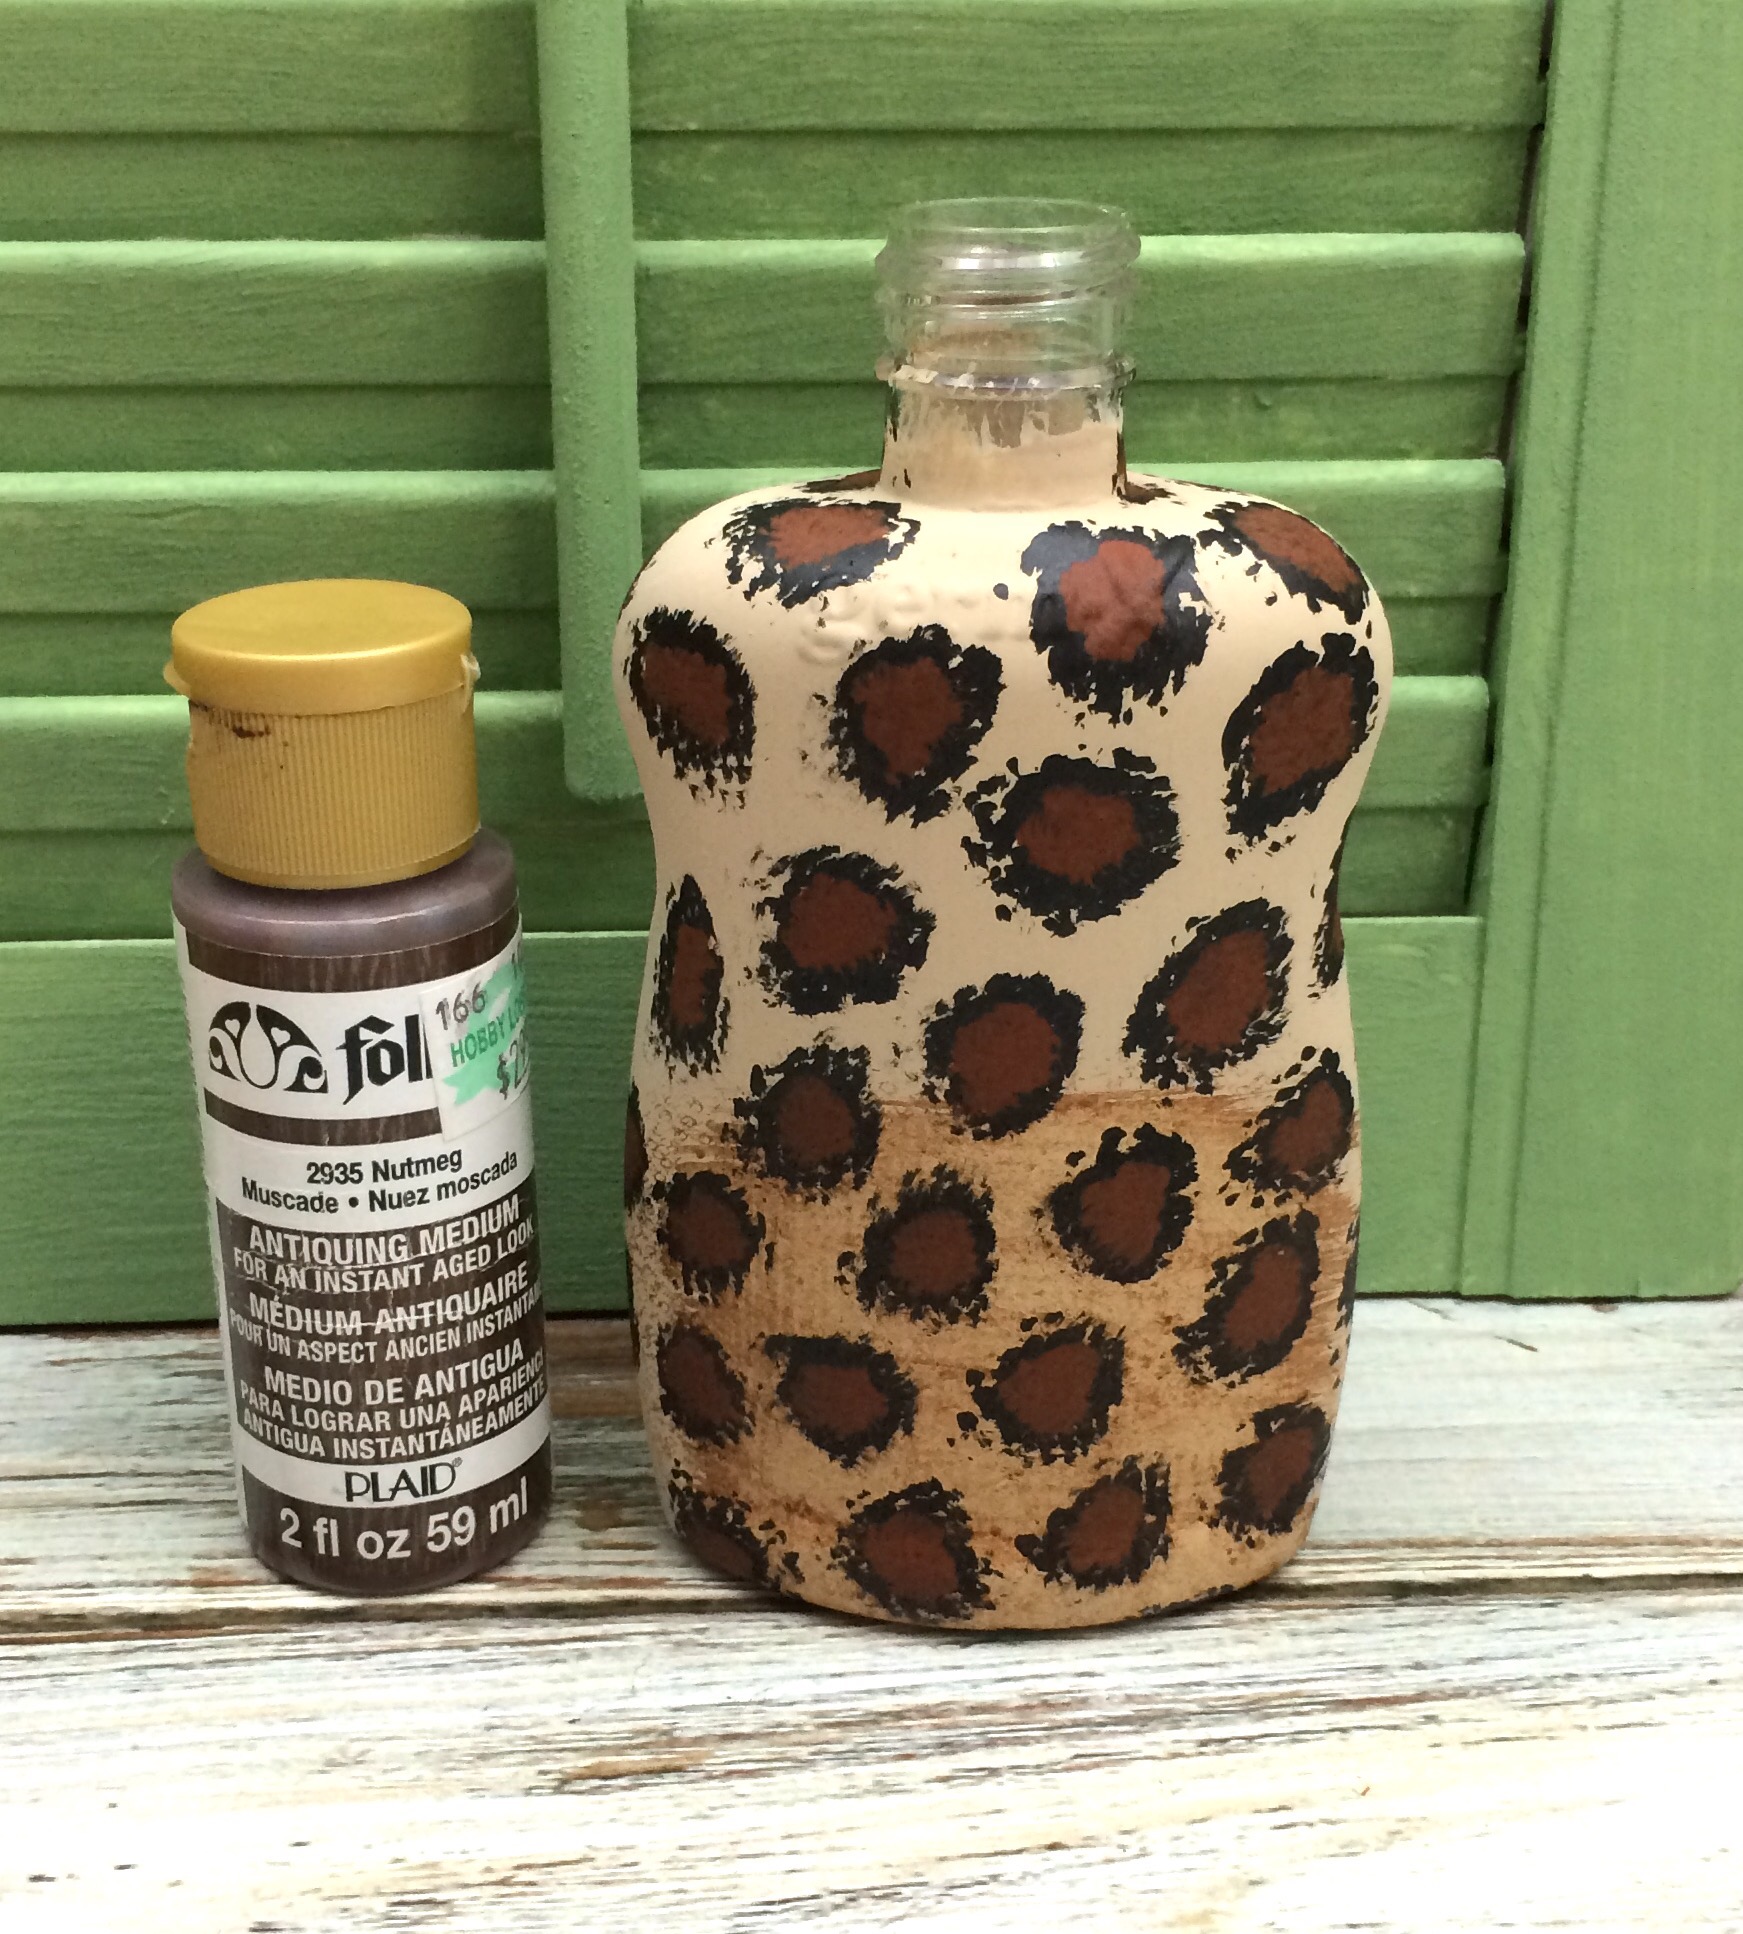
Now water down a dab of your antiquing medium and working a section at a time. 
 

how to make an animal print soap dispenser  

Brush on and gently wipe off with a clean rag. 

Diy Animal Print Soap Dispenser  

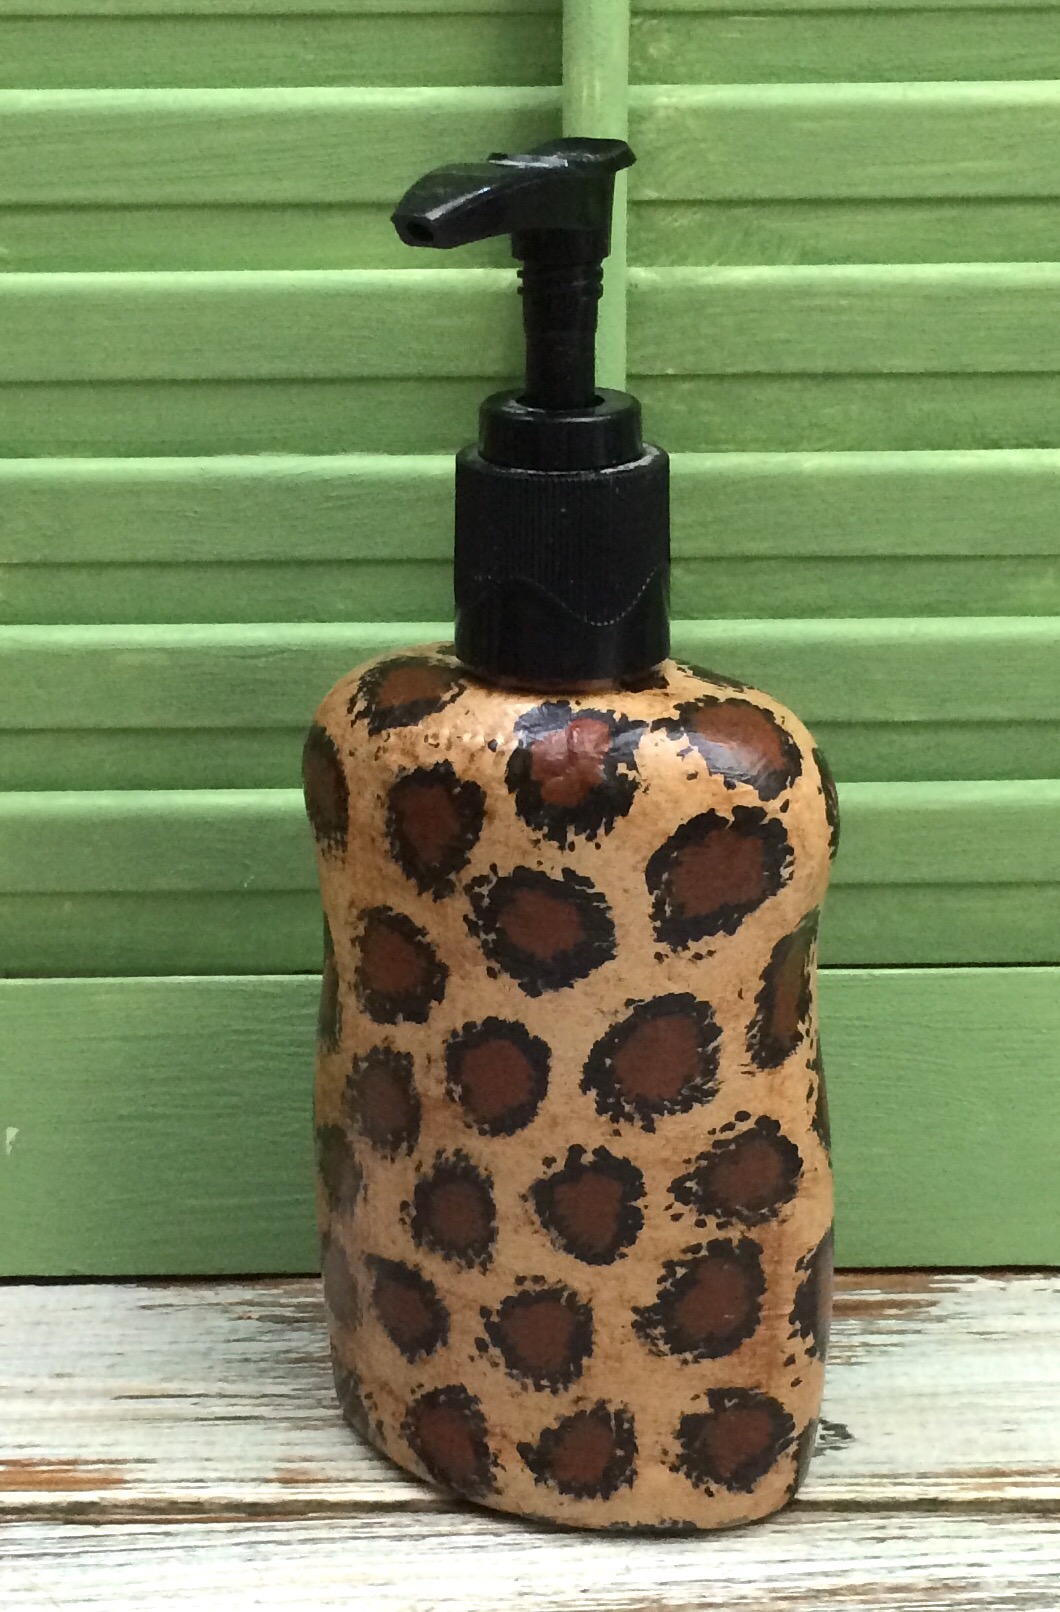
Once dry seal your soap dispenser with two coats of Mod Podge. Letting each coat dry throughly. 


Fill your bottle with soap and your good to go. Wasn’t that easy? 


*This post contains affiliate links, if you click on an affiliate link & buy something I may receive a small commission at no extra charge to you. The affiliate money I earn helps pay the expenses to keep this site running. Please read my disclosure for more info. Thanks so much for your support!*

Materials Needed For This Project

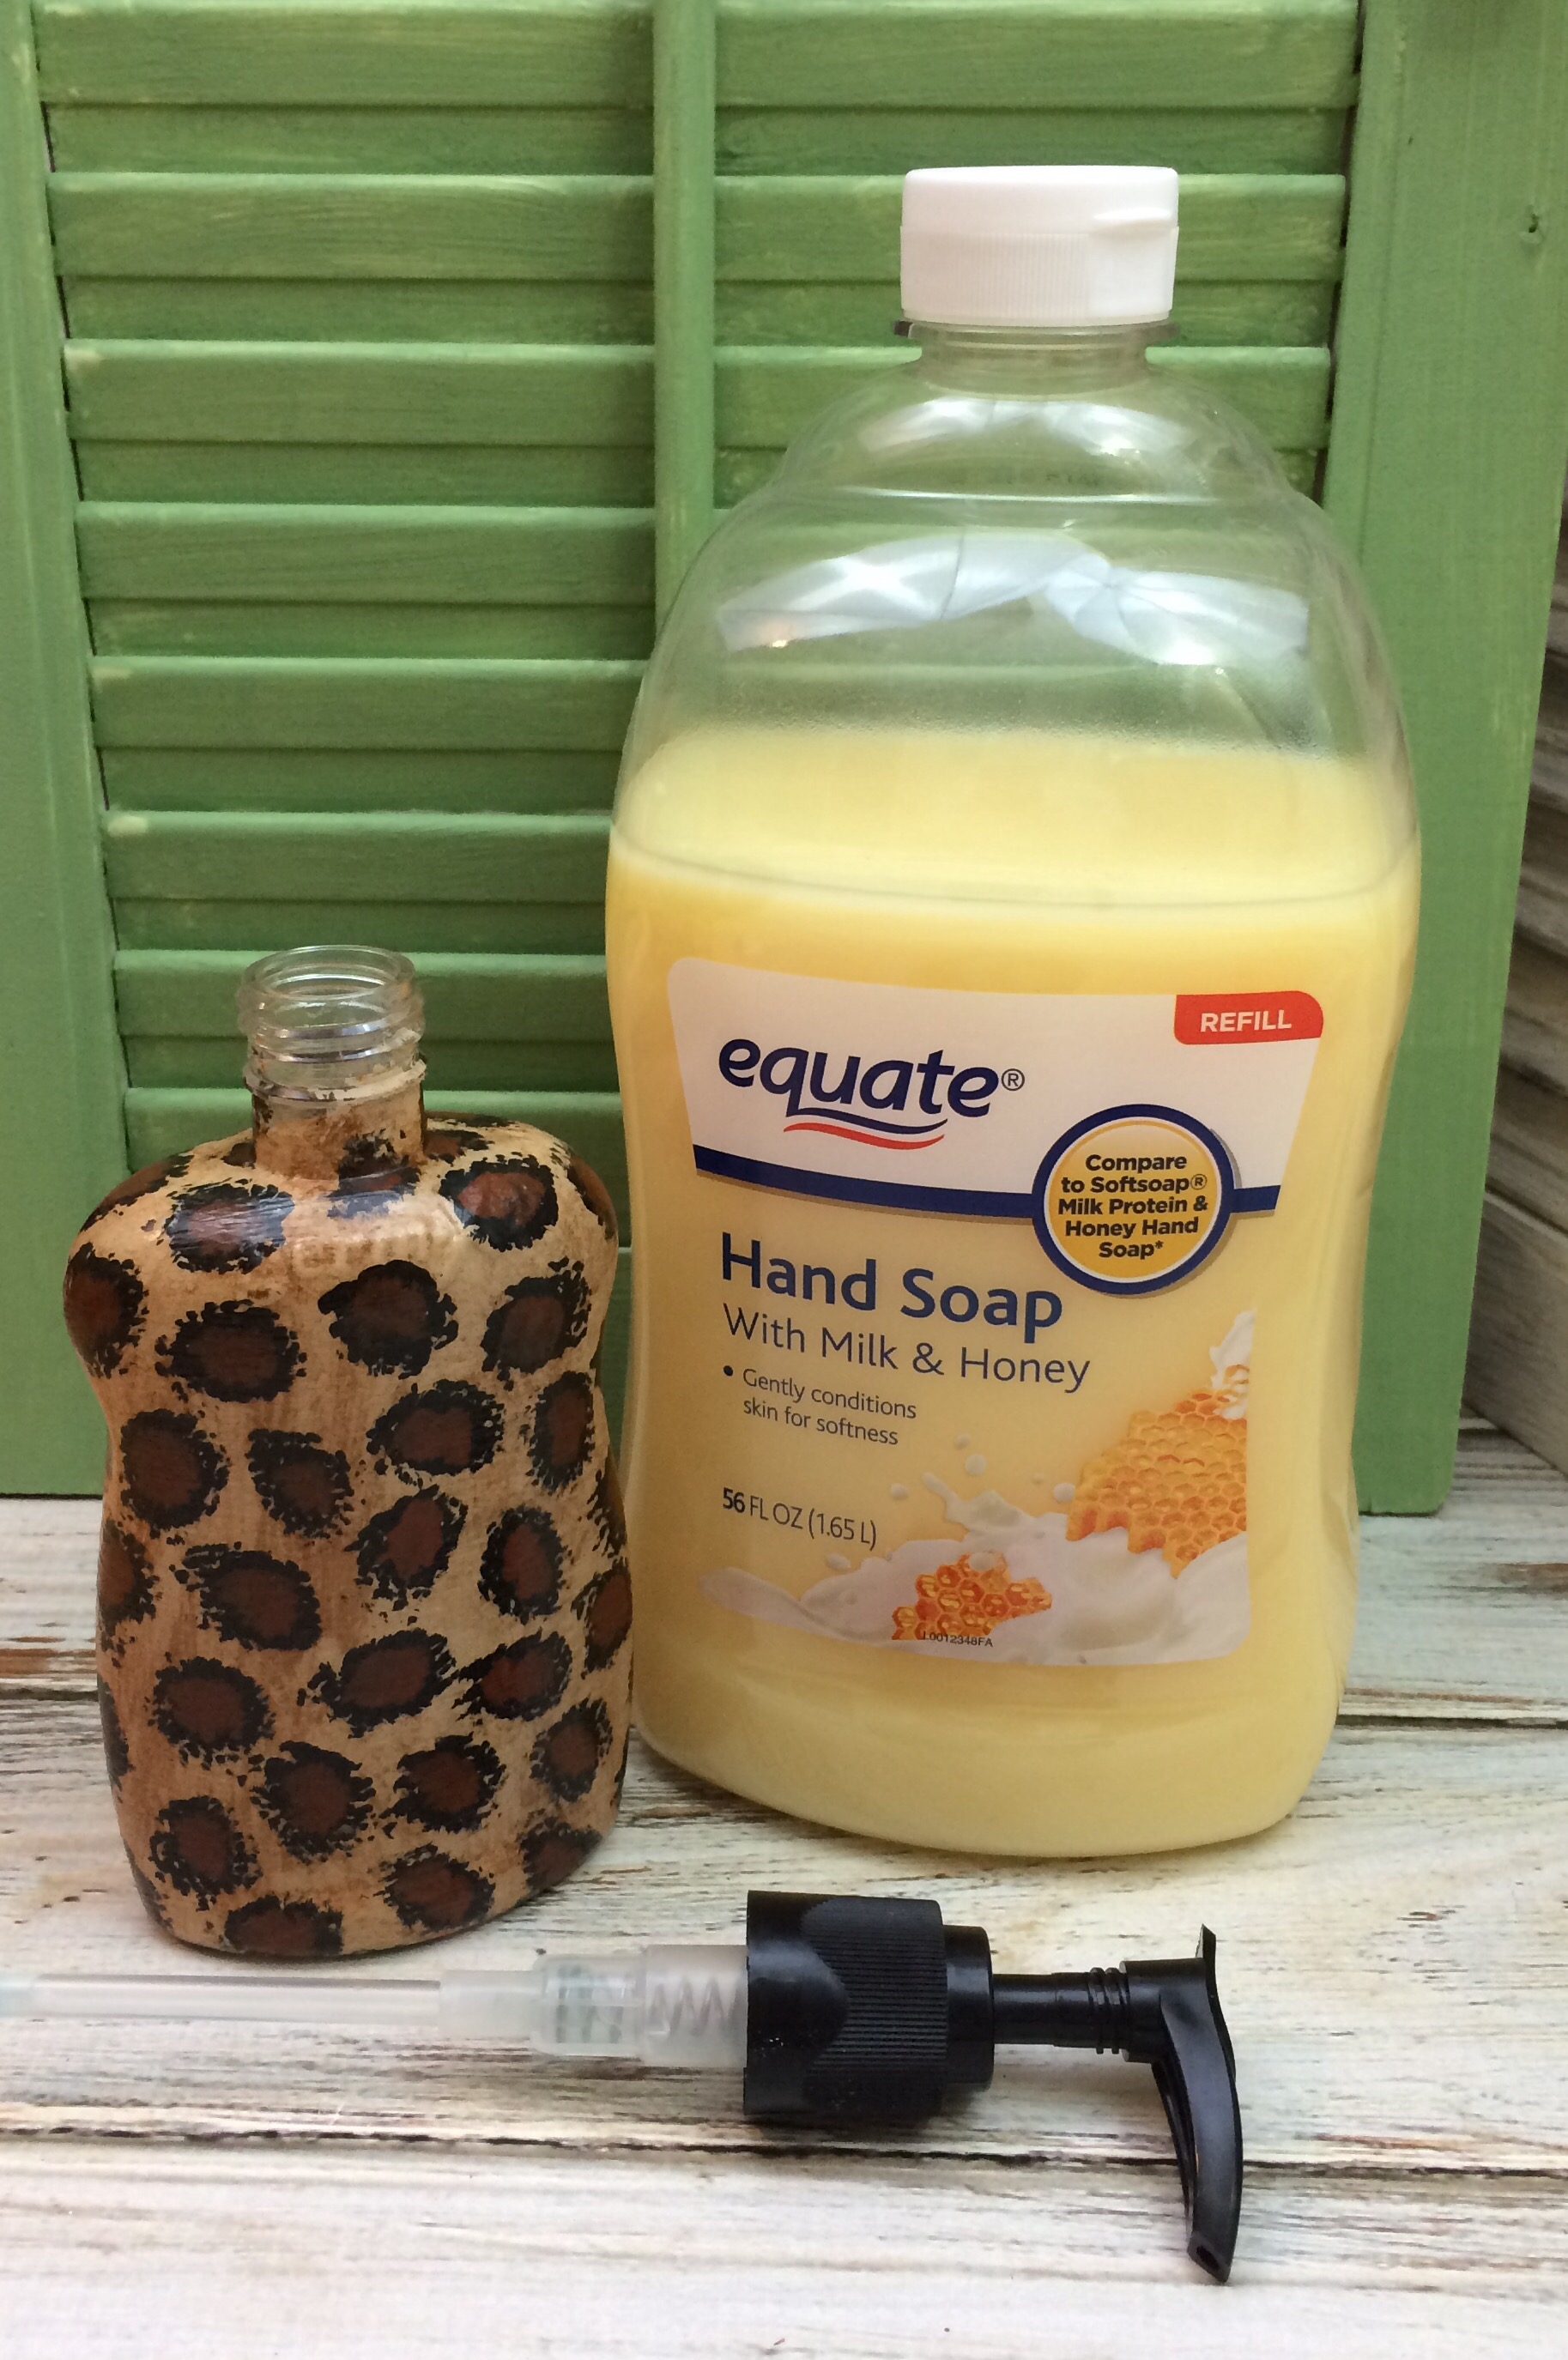
  • One empty plastic hand soap dispenser 
  • Acrylic paints, black, burnt umber, light tan
  • Antiquing gel
  • Mod Podge
  • Paint brushes
  • Liquid soap

Do you like to turn trash into treasures?  

If you enjoyed this post, don't forget to pin it for later!

29 shares
  • Share
  • Tweet

If you enjoyed this post, would you mind taking the time to:
  • Share, or Pin for later reference.
  • Follow me on Facebook, Twitter, Pinterest
  • Leave a comment
Thank you so much for taking the time to comment. I love hearing from my readers, and appreciate the kind words.

Comments

  1. carol says

    October 22, 2015 at 9:48 am

    Very cute project. I love the way these turned out.
    carol recently posted…Autumn Makeover for My Front EntryMy Profile

    Reply
    • Linda @ Mixed Kreations says

      October 23, 2015 at 3:21 am

      Thank you Carol! I wanted a soap dispenser to match my theme.

      Reply
  2. Renee Fuller says

    October 23, 2015 at 7:36 pm

    What a great idea for the ugly store bought soap dispenser!
    Renee Fuller recently posted…Build a wood L-shaped desk for under $50My Profile

    Reply
    • Linda @ Mixed Kreations says

      October 25, 2015 at 9:34 am

      Thanks Renee! I think it turned out pretty cute, and it matches my decor c

      Reply
  3. Sharon Rowe says

    October 26, 2015 at 4:31 pm

    This is an awesome idea! It is one of those things that you say why didn’t I think of that! I love the black plunger, I have never seen one black before and was wondering if this was something you would consider painting to get the right colour or do you think this would be too fiddly?
    Thanks for writing this awesome post!
    Sharon Rowe recently posted…Monday Madness {Oct 26th}My Profile

    Reply
    • Linda @ Mixed Kreations says

      October 28, 2015 at 11:02 am

      Thanks Sharon! My soap dispenser came with the black pump, I don’t think if you painted it that it would withstand the pumping action and the paint would wear off pretty quick.

      Reply
  4. Laurie says

    November 14, 2015 at 7:06 pm

    How fun and creative and a great job on the animal print! Thank you so much for taking the time to share your project with us at Snickerdoodle Sunday!
    ~Laurie
    Laurie recently posted…Snickerdoodle Sunday #107My Profile

    Reply
    • Linda @ Mixed Kreations says

      November 14, 2015 at 7:27 pm

      Thanks you Laurie!

      Reply
  5. Denise/DIY Crush says

    November 17, 2015 at 8:29 pm

    Oh I love, love, love this!! I have been meaning to do something like this like forever!! Thanks for linking up to my DIY Crush party! I pinned it as well! Can’t wait to see what you will link up Thursday!!
    Denise/DIY Crush recently posted…Free Knit Pajama Sewing PatternMy Profile

    Reply
    • Linda @ Mixed Kreations says

      November 18, 2015 at 7:24 am

      Thank you Denise! I love the animal print and that’s what I have in my guest bath, and needed a soap dispenser to match and couldn’t find what I wanted so I just made my own (-;

      Reply
  6. pili says

    March 23, 2016 at 6:18 pm

    I love it, Linda!! When I first saw it I thought it was a napkin but then as I kept reading I realized you hand painted it, so cool!!
    Thank you so much for sharing it with us at #2usestuesday, I hope you are having a great week!

    Reply
    • Linda @ Mixed Kreations says

      March 24, 2016 at 2:20 pm

      Thanks you Pili! I wanted a soap dispenser to match my theme in the guest bath and couldn’t find one I liked so I decided to make my own. And very happy how it turned out. Now I’m working on another project for the bathroom, but not going to tell what it is. Hope to have it ready before long.

      Reply
  7. Mary-the boondocks blog says

    August 28, 2016 at 10:39 am

    Linda this is a great idea. I love the technique you used with the antiquing agent. I’ve never seen that before. I also like the idea of being able to reuse the soap dispenser instead of throwing it out. Now you have this one for your bathroom and it matches all your decor.

    Reply
    • Linda @ Mixed Kreations says

      August 28, 2016 at 2:42 pm

      Thanks Mary! I love my antiquing gel, I use it a lot. When something just isn’t quite dark enough or look aged enough for me I break out the antiquing gel. Soon I will have another project that I’m working on in my guest bath to show, and I used the antiquing gel as well.

      Reply
  8. FLORENCE @ VintageSouthernPicks says

    March 30, 2017 at 3:50 pm

    Wow! That is so fun and cute! I love it! Pinning.

    Reply
    • Linda @ Mixed Kreations says

      April 4, 2017 at 7:09 am

      Thank you Florence! And I got exactly what I wanted. 😉

      Reply

Trackbacks

  1. How To Make A Shabby Animal Print Valiance - Mixed Kreations says:
    June 9, 2016 at 7:01 am

    […] first thought was to make one for my craft room, then I thought why not make the animal print Valiance for the guest bath. It will match the shower curtain I made and the other animal print […]

    Reply

Leave a Reply Cancel reply

Your email address will not be published. Required fields are marked *

CommentLuv badgeShow more posts

This site uses Akismet to reduce spam. Learn how your comment data is processed.

Thanks for sharing your thoughts and comments! I read and appreciate every single one!

Follow Mixed Kreations

Facebooktwitterpinterestyoutubeinstagram

My Favorites on Amazon

My Amazon Influencer Shop

Homemade Chalk Paint

diy chalk paint

How to Make Rusty Cans

how to make rusty cans

How to Make a Flag From a Wood Shutter

how to make a 2 sided american flag

Easter Egg Jar

How to make a Easter egg jar

Diy Texas Tile Coasters

Texas Tile Coasters

Update a Thrift Store Find

How to Update a Hanging Box in 4 easy steps

Categories

By Kelli & Crystal From Learn To Blog Hangouts

#LearntoBlog Hangouts

Dominate Course

LearntoBlog
Featured on Hometalk.com
Rakuten Affiliate Network Welcome Program
Grow and Make

Dollar Tree

Creative Fabrica Font Bundles

Font Banner - Free Fonts

Featured At

Featured At

Mixed Kreations featured in Country sampler

Featured at

mixed kreations is featured in Bella Crafts online magazine
The Pin Junkie

Canva Photo Editing

Amazon Affiliates

I am a participant in the Amazon Services LLC Associates Program, an affiliate advertising program designed to provide a means for sites to earn advertising fees by advertising and linking to Amazon.com.

Disclosures Statement

This policy is valid from 19 July 2013 This blog is a personal blog written and edited by me. For questions about this blog, please contact Linda @ ldkeesee@mixedkreations.com. This blog accepts forms of cash advertising, sponsorship, paid insertions or other forms of compensation. The compensation received will never influence the content, topics or posts made in this blog. All advertising is in the form of advertisements generated by a third party ad network. Those advertisements will be identified as paid advertisements. The owner(s) of this blog is compensated to provide opinion on products, services, websites and various other topics. Even though the owner(s) of this blog receives compensation for our posts or advertisements, we always give our honest opinions, findings, beliefs, or experiences on those topics or products. The views and opinions expressed on this blog are purely the bloggers' own. Any product claim, statistic, quote or other representation about a product or service should be verified with the manufacturer, provider or party in question. This blog does not contain any content which might present a conflict of interest. To get your own policy, go to http://www.disclosurepolicy.org

Copyright © 2023 · Modern Blogger Pro Theme By, Pretty Darn Cute Design