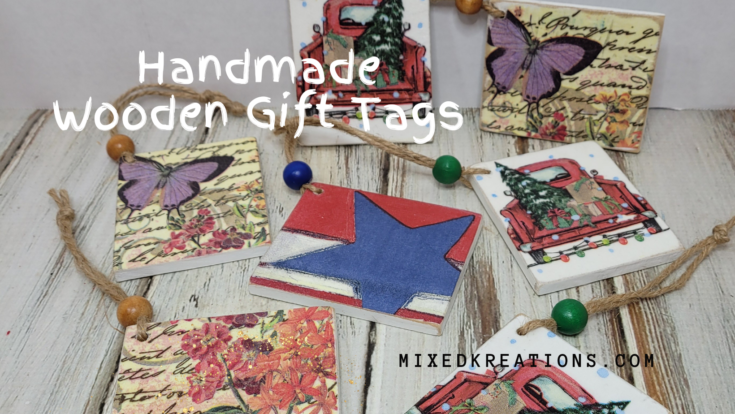
…to remove the excess napkins and to distress the edges. Then add a coat of Mod Podge to seal and protect. Once dry drill a hole in the corner of each handmade wooden gift tag. Attach some jute, and a wood bead. That’s it for these super cute and easy handmade wooden gift tags that can be made for any occasion of gift giving. Supplies for Handmade Gift Tags ¼” thick wood cut down to 2 1/2” x 3” for this project Variety of two-ply paper napkins Whit…
Search Results for: Mod podge
3 Snowmen in a Can
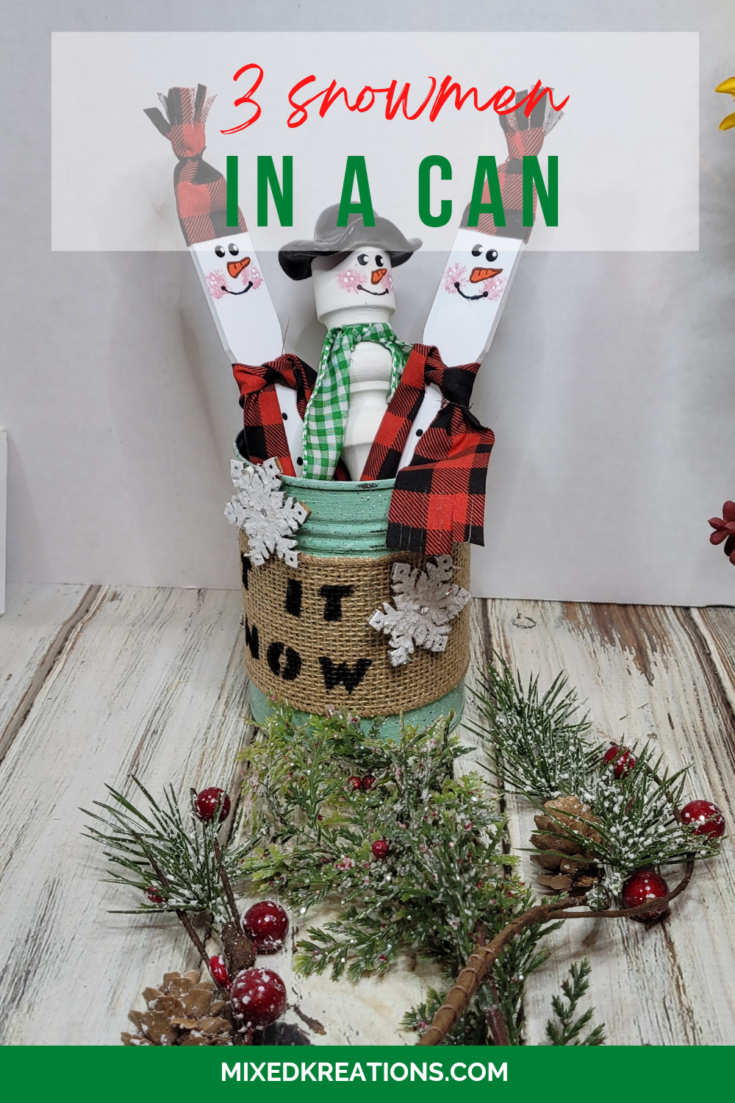
…aint and an old tooth brush I splattered the can then gave it two coats of Mod Podge. While the can was drying, I grabbed some burlap ribbon that was cut just long enough to go all the way around the can and stenciled the words “Let it snow” on the ribbon. I found some wood snowflakes that I decided to add to the can so I added a light coat of Mod Podge then sprinkled some fake snowflakes over them to give them some sparkle. Next the stenciled rib…
Wood Spindle Snowman
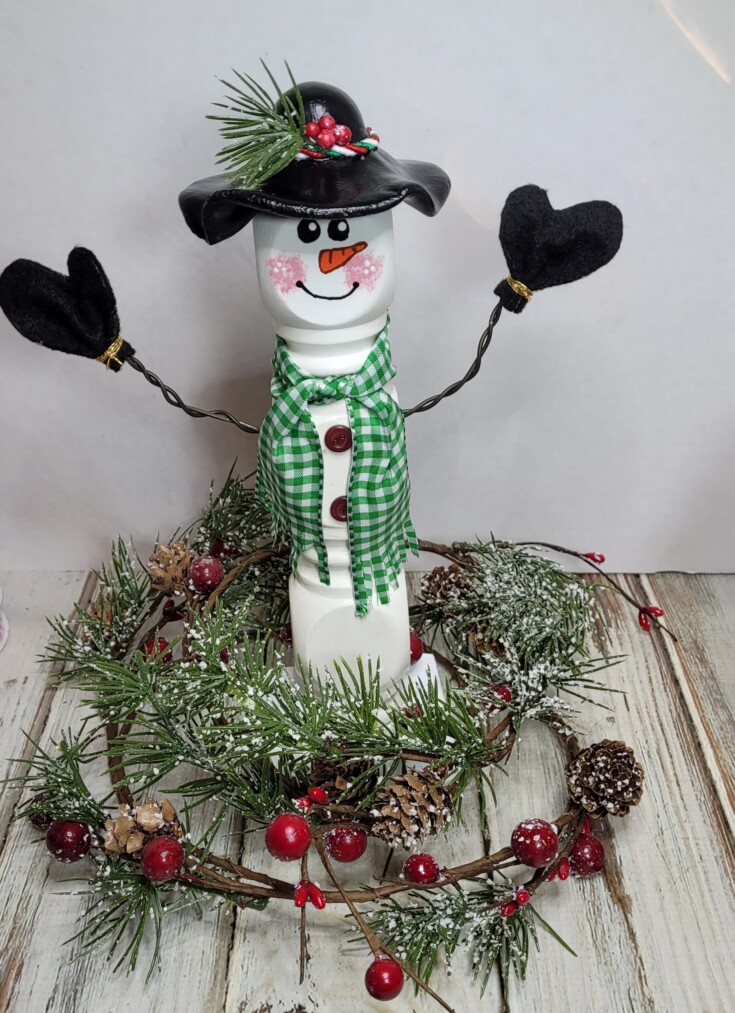
…snowman using wood glue. Once the glue was dry, I added a couple coats of Mod Podge to the base. That’s it for this cute wood spindle snowman. Isn’t he adorable? Supplies for Wood Spindle Snowman Wood spindle White chalk paint Black, orange, rose pink, burnt sienna acrylic paint Paintbrushes Annealed wire Wire Cutters Pliers Ribbon Hot glue 2 buttons Air-dry clap Gold thread Greenery with berries Scissors Christmas twine Wood Base Black felt Mod…
Reversible Fall Décor
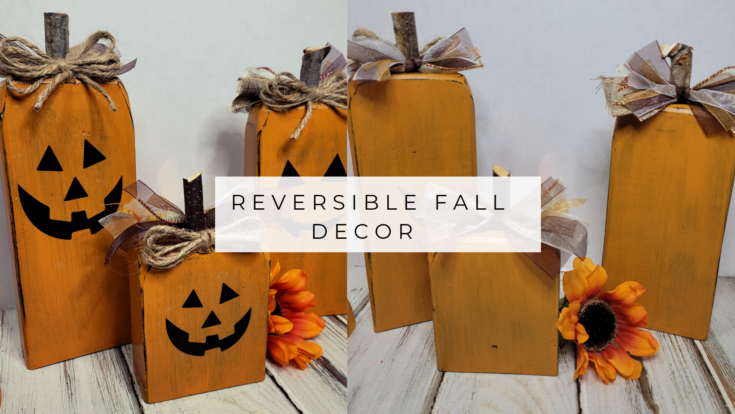
…. The wood around the faces were a little bit lighter but once I added the Mod Podge it wasn’t noticeable. I found a bag of wood stems at the Dollar Tree so I bought them instead of cutting my own. Using a drill, I drilled the holes in the top of my reversible fall décor. Then applied wood glue in the holes and added my stems. Next, came by bows. Twine bows for the Halloween side of my décor and a messy bow of mixed ribbons for the fall and Thanks…
How to Upcycle a Table With Paint and a Napkin
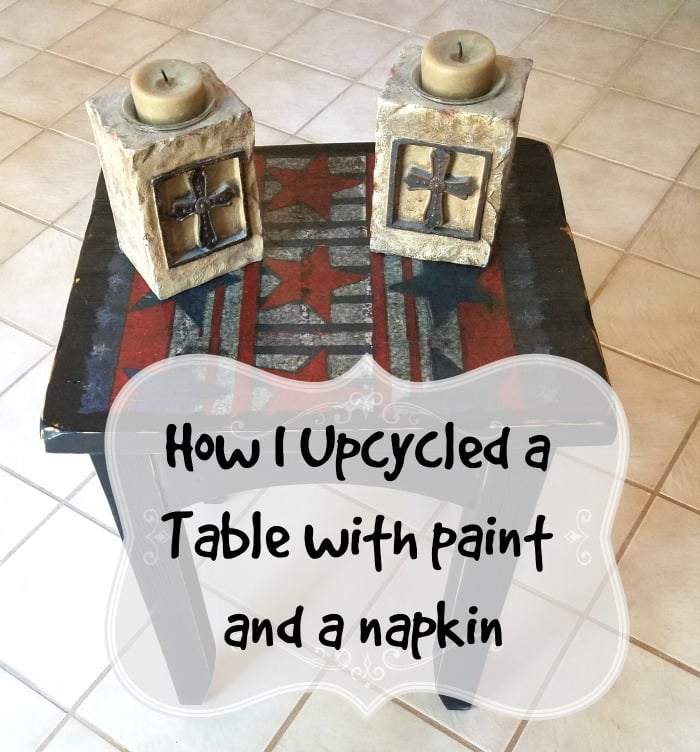
…ed edges. I positioned the napkins in place then starting on one end using Mod Podge underneath to stick it down in place. Trying to get it as smooth as possible without wrinkles which is very hard to do. No worries I will take care of the wrinkles later. After letting this dry thoroughly, I then took the little table to the garage. Using my course sandpaper, I roughed up the edges so that some of the wood underneath showed through. Next, I lightl…
Diy Snowman Lantern Made From A Glass Jar
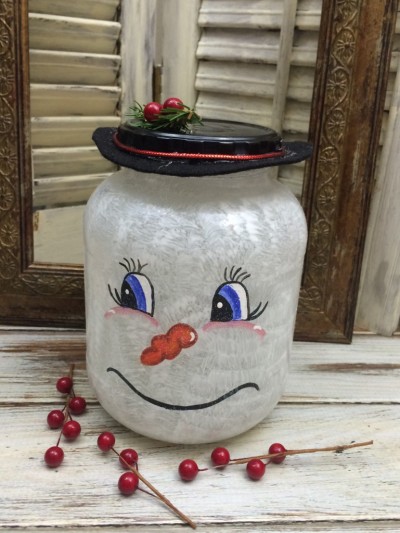
…e bit of white acrylic paint with some Mod Podge. About two tablespoons of Mod Podge to 1/2 teaspoon of white paint. Using a paint brush or a sponge start dapping the paint mixture on the outside of your glass jar. Sit upside down to dry. How to make a snowman lantern. #Holiday #SnowmanLantern #Christmas Powered By the Tweet This Plugin Tweet This No need to paint the top part of the rim because you will be putting the lid back on. Adding the Snow…
How to Make Paper Beads
…r out of the paper mush as you can. Homemade beads Pour some white glue or mod podge over the squeezed out paper mush and mix. Making paper beads Now start forming paper beads. I made all sizes, big and small. (Next time I will try making some paper heart beads). Homemade paper beads Place beads on wax paper lined tray to dry. Turn beads at least once a day until dried. It took three days for mine to dry. How to make paper beads Once paper beads a…
Mini Book Charm Tutorial
…your mini book pages a little bit smaller than the actual book size. Apply Mod Podge to the first page and stack another on top. Repeat this step until you get your mini book to the thickness that you desire. Punch the hole for your jump ring. Add Mod Podge to both sides of your page stack and to the edge that will be your binding. Center page stack on your leather, and close the leather book. Sit something on top of it to hold it close while it d…
Diy Copper Tube Beads
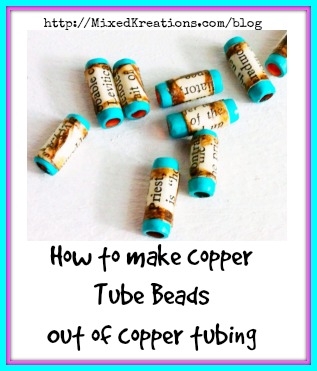
…round the middle of your copper beads, and burn those edges as well. Apply Mod Podge to the back of your paper, then wrap around the center of your tube bead. Apply another 1-2 coats of Mod Podge over the paper. Let dry throughly. You can use these unique diy copper tube beads to make an easy bracelet by just stringing them on black cord with a sliding knot clasp. If you would like to receive new blog post please follow me on Facebook, Twitter, or…
Decorative Coffee Station Tray
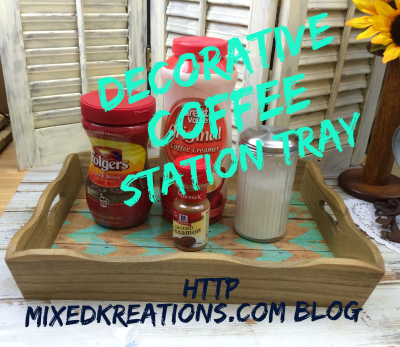
…y wrinkles as you go until it’s all glued down. Let dry then add a coat of Mod Podge over the whole tray to help seal and protect it. There you have it a pretty Diy decorative coffee station tray to keep all your coffee fixin’s neat an organized. How to make a decorative coffee station tray. #diy #coffee #MixedKreations Powered By the Tweet This Plugin Tweet This To clean gently wipe with a slightly damp rag. *This post contains affiliate links,…
- « Previous Page
- 1
- 2
- 3
- 4
- 5
- 6
- …
- 13
- Next Page »