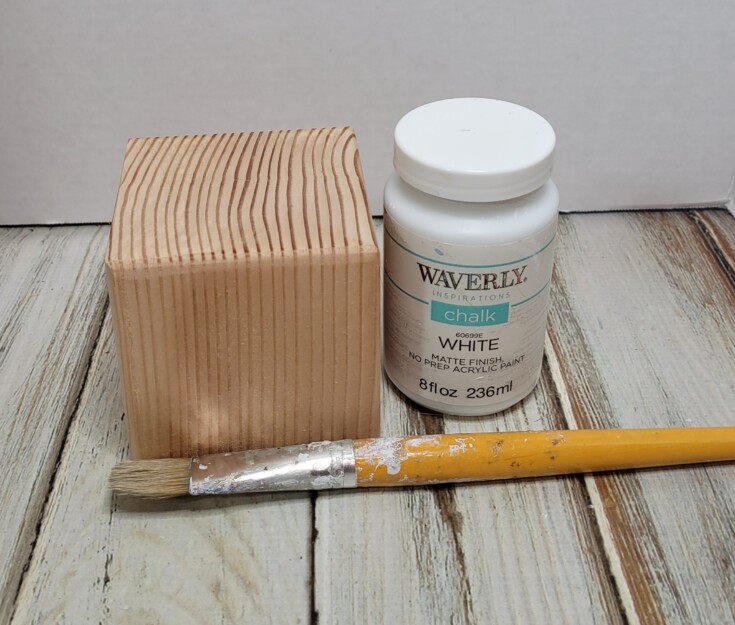
…ry I distressed the edges with sandpaper. Then added a coat of Mod Podge for protection. That’s it for this easy diy six-sided décor block. Supplies for Six-Sided Decor Block Wooden blocks Stencils with words Mod Podge Paint brushes White paint Cottage green paint Sandpaper More Fun Wood Projects to Enjoy! Diy screwball flowers Diy zebra print block Diy recipe card holder Mini photo display magnets…
Search Results for: Mod podge
DIY Spooky Halloween Blocks
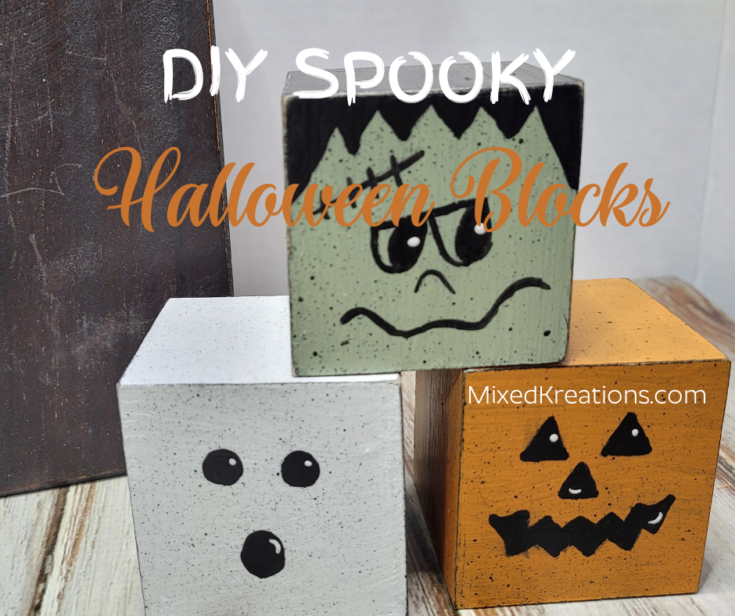
…Halloween Blocks. Perfect Halloween décor for the office, shelf, or on a mantle. Supplies for Halloween Decor Blocks 3 wood cubes Black, orange, white, and green chalk paint Paintbrushes Sandpaper Mod Podge stylus tool More Fun Halloween Projects! Halloween Garland from repurposed bulbs Metal vintage strainer Jack-O-lantern Repurposed items into Jack-O-lantern lamp…
Decoupaged Pumpkin
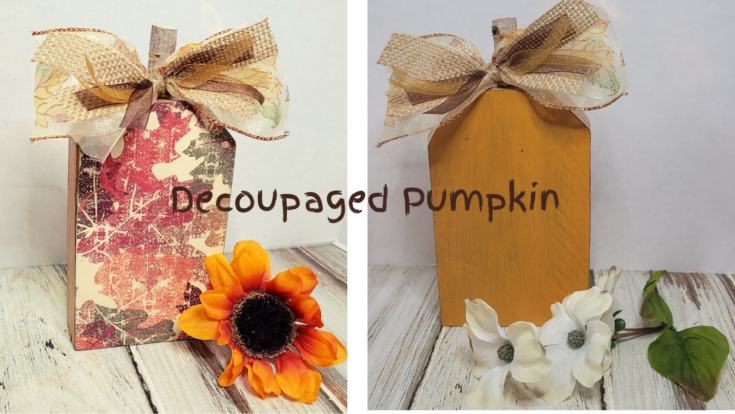
…urn the bow around on the stem for the side you want to show. Which side would you display? Supplies for Decoupaged Pumpkin Fall scrapbook paper Wood pumpkin Black and orange chalk paint Wood stem Wood glue Mod Podge Paint brush Drill X-Acto knife Assortment of ribbon Jute Finger sander More Fun Fall Projects! Scarecrow tissue dispenser Diy wood block pumpkins Tin can pumpkins Happy Fall Yall…
Top 10 Viewed Post of 2022
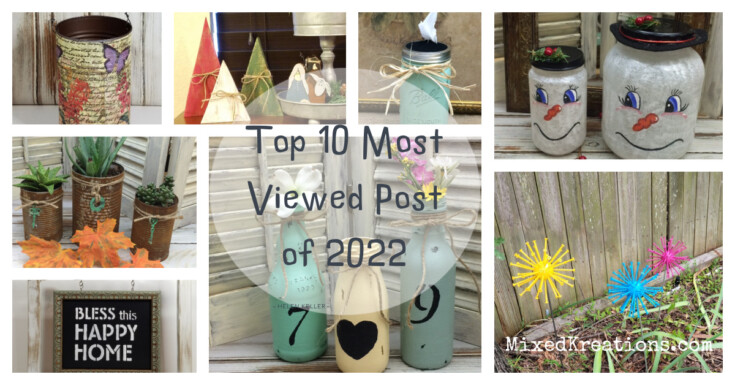
…o make Faux Sea glass, second straight year. All that’s needed is the jar, Mod Podge, and food coloring. #2 Diy snowman lantern is very popular and was in last year’s number one spot. The perfect idea for using up empty glass jars and making super cute Christmas and winter decor. Kids will love them. Drum roll please!!! The #1 in the top 10 viewed post of 2022 is #1 My diy screwball flowers That’s it for the top 10 viewed post of 2022. Which is yo…
Diy Dallas Cowboys Texas Rangers Tissue Box Cover
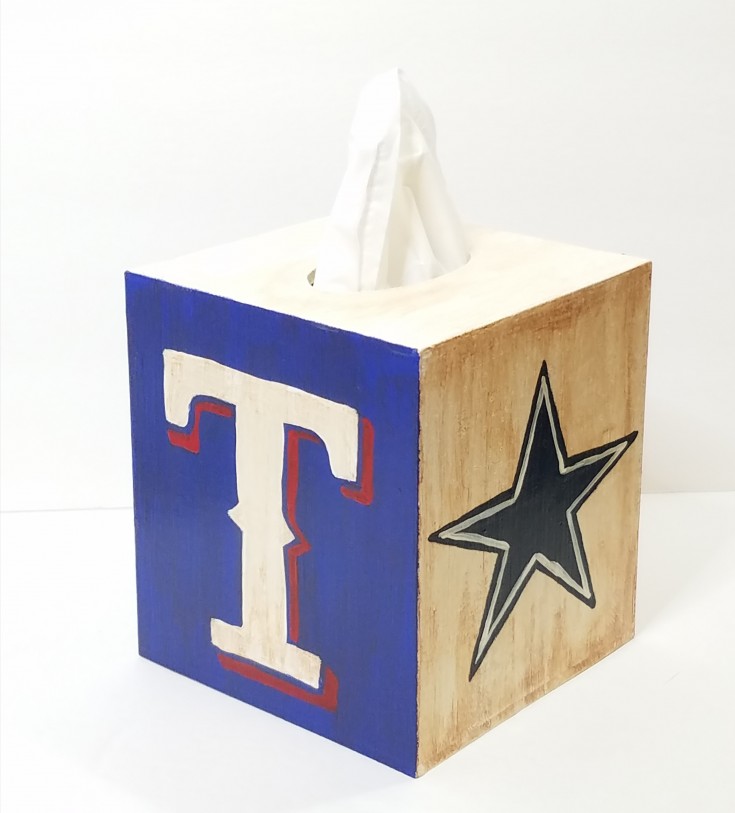
…s Texas Rangers Tissue Box Cover Tissue box cover White chalk paint Red, navy, and bright blue acrylic paint Paint brushes T Stencil or can make your own Star stencil or make your own Antique medium Mod Podge More Fun Diy Projects for Sports Enthusiast! Diy Dallas Cowboys tile coasters University of Oklahoma home decor Dallas Cowboys tin can pencil holder OU home sign…
Cardboard Carrot Hang Tag
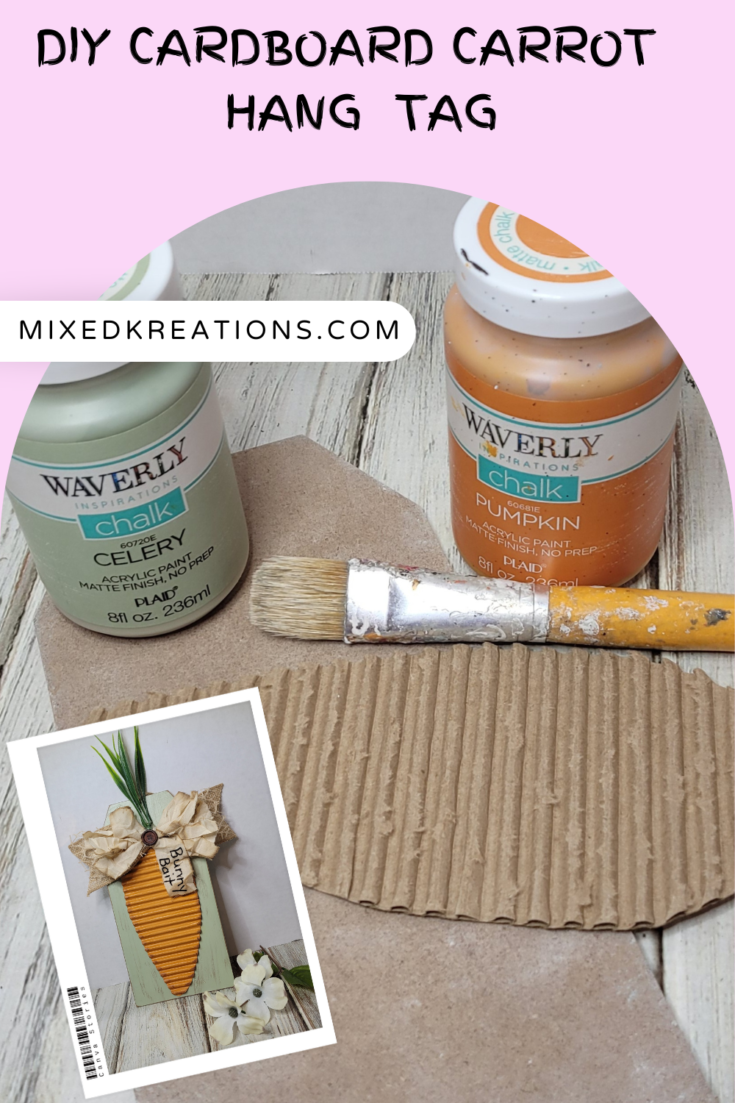
…o back and distress the hang tag edges with a craft sander. Put a layer of Mod Podge on the hang tag and the carrot. Once dry glue the carrot down onto the hang tag. Some brown paint was lightly dry brushed on the hang tag to add to the distressed look. and burnt umber was added to the edges of the carrot. For the cardboard carrot hang tag bow I used 2 ½ inch wide burlap ribbon cut approximately 7 ½ inch long. Coffee-stained muslin strips about 6…
Repurposed Tea Tins
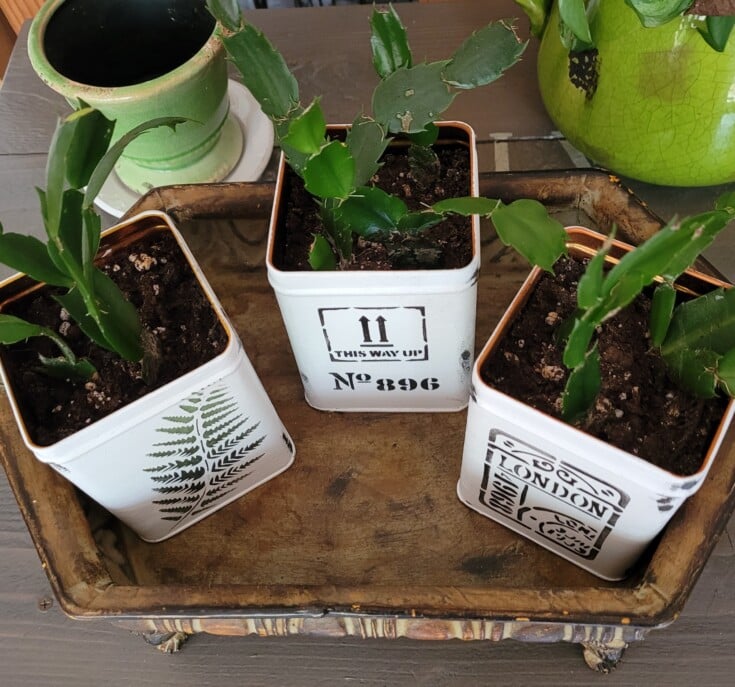
…g. NO Runs, YAY! Once dry I took some black acrylic paint and brushed a little bit on here and there then dabbed it off with a paper towel. Giving the repurpose tea tins a worn distressed look. Give the repurposed tea tins a coat of Mod Podge to seal and protect. Now all I need is the cactus planted in each tin, and that’s it for this easy repurposed tea tins. More Fun Repurposed Tins Quick Diy Housewarming gift Diy Grungy Can Tin can pumpkins Eas…
Easy Peasy Farmhouse Décor Tile
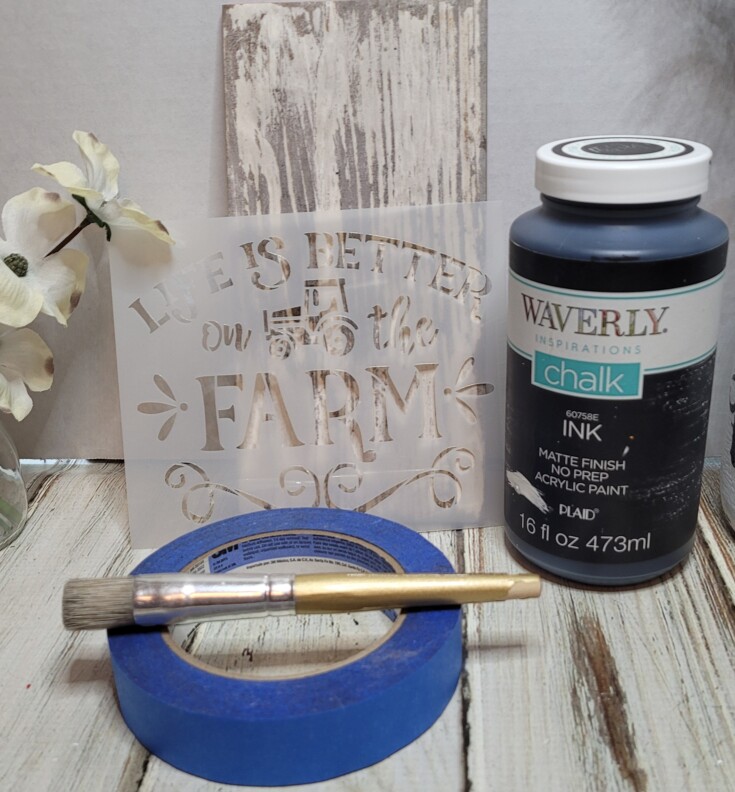
…orial that I have shared so far. Supplies for Farmhouse Décor 4” x 8” tile Farmhouse stencil to fit the tile Black and green chalk paint Stencil brush Painter’s tape Mod Podge More Fun Tile Projects Texas tile coasters Christmas coasters- Red farm truck Glass tile pendant…
Cut Log Pumpkins
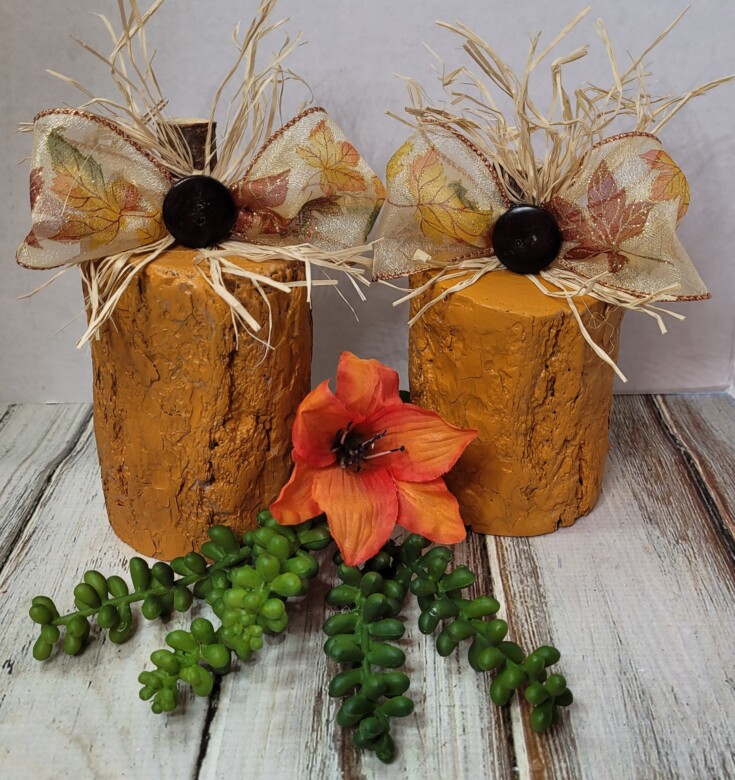
…’s it for these two cut log pumpkins. Perfect for sitting on a mantle or even adding to a Thanksgiving table centerpiece. Cut Log Pumpkin Supplies Wood log Pumpkin chalk paint Sandpaper Paintbrush Mod Podge Wood stems Raffia Fall ribbon Scissors Wire Wire cutters More Fun Pumpkins! Fall is in the air pumpkin Decoupaged Pumpkin Pastel Pumpkins Wood block pumpkins…
Diy Patriotic Succulent Tin Can Planters
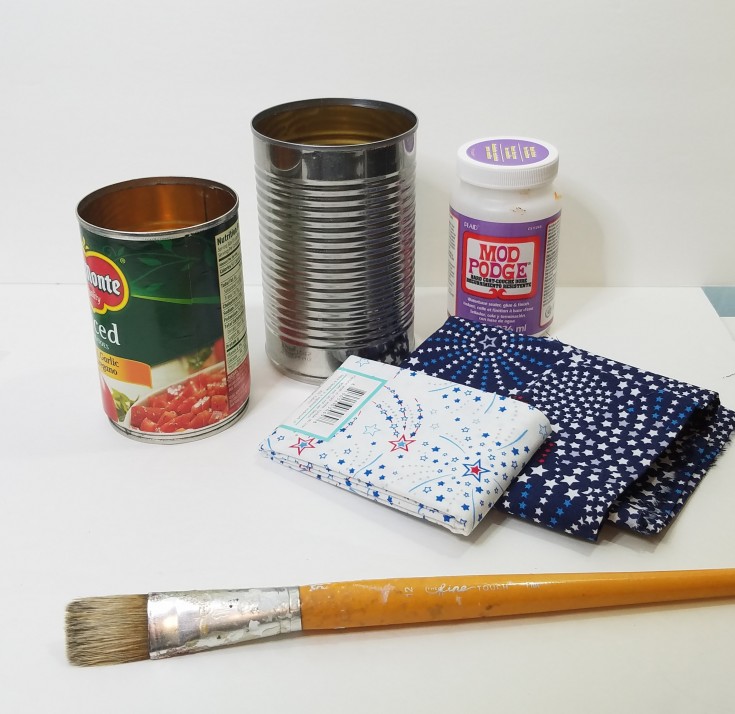
…e to cut your fabric to fit cans. Cut with a little bit of an overlap. Use Mod Podge to start gluing the fabric around the cans working small sections at a time lining the fabric edges with the top and bottom edges of the cans. Finish by gluing down the overlapping of fabric. Next start gluing the twine around the top of the can starting at the rim and working your way down. I made three twine wrap rolls. Now go to the bottom and start at the rim…
- « Previous Page
- 1
- …
- 5
- 6
- 7
- 8
- 9
- …
- 13
- Next Page »