Mixed Kreations

The Creative Life & Journey Of A DIY'ER

  • Home
  • Diy Projects
    • Handmade Cross Projects
    • Holiday & Seasonal Projects
    • Mason Jars
    • Fun Upcyled Shutters & Spindles
    • Texas Projects
    • Upcycled Cans
    • Wood Projects
    • Jewelry Tutorials
  • Quick and Easy Recipes
  • Shop Mixed Kreations
    • Etsy Shop
    • Mixed Kreations Amazon Influencer
  • DISCLOSURES STATEMENT & PRIVACY POLICY
  • About Me
  • Recommendations
You are here: Home / DIY/Craft Projects / How to Add Color to a Wooden Crate the Hubby Way

How to Add Color to a Wooden Crate the Hubby Way

July 25, 2018 By: Linda @ Mixed Kreations4 Comments

If you enjoyed this post, don't forget to pin it for later!

0 shares
  • Share
  • Tweet

Hi All! I hope you are all staying cool. It has been miserably hot here in Texas. It’s been in the triple digits this week, making it really hard to get motivated to do anything except site in the house where it’s cool. Today I want to share How to Add Color to a Wooden Crate Hubby style.

How to Add Color to a Wooden Crate the Hubby Way #upcycled #PlantStand #Garden #WoodCrate MixedKreations.com

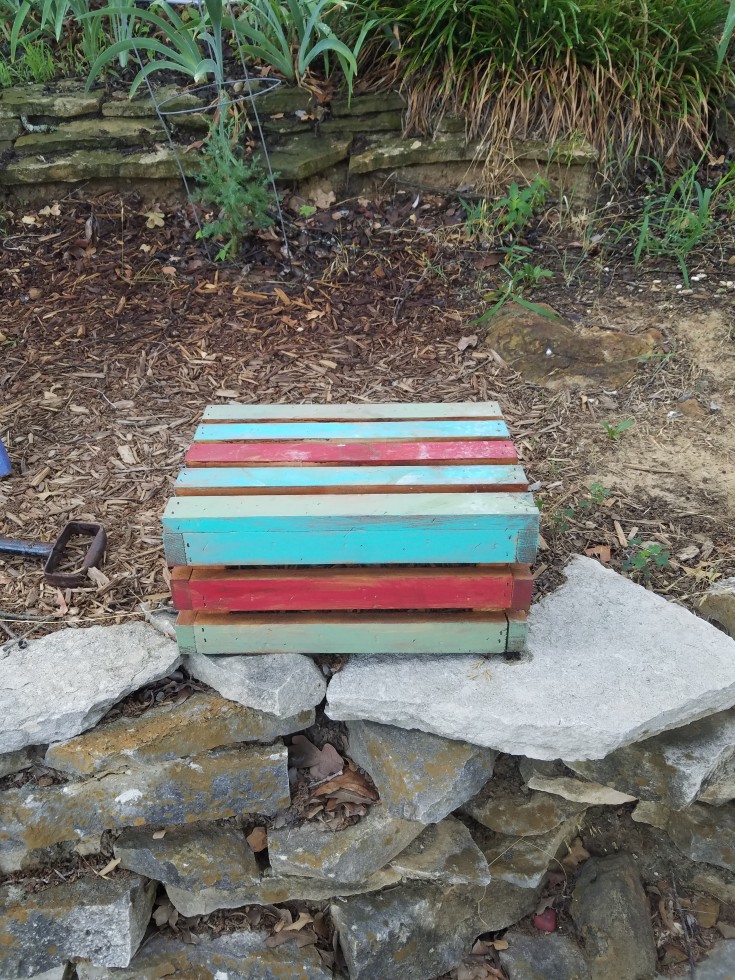
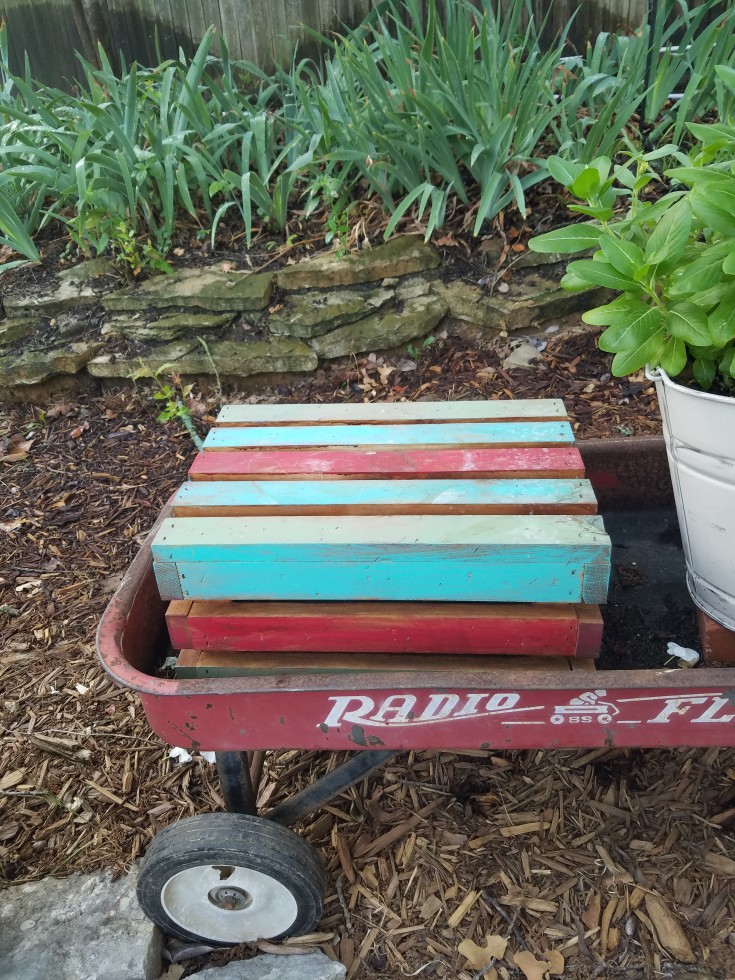
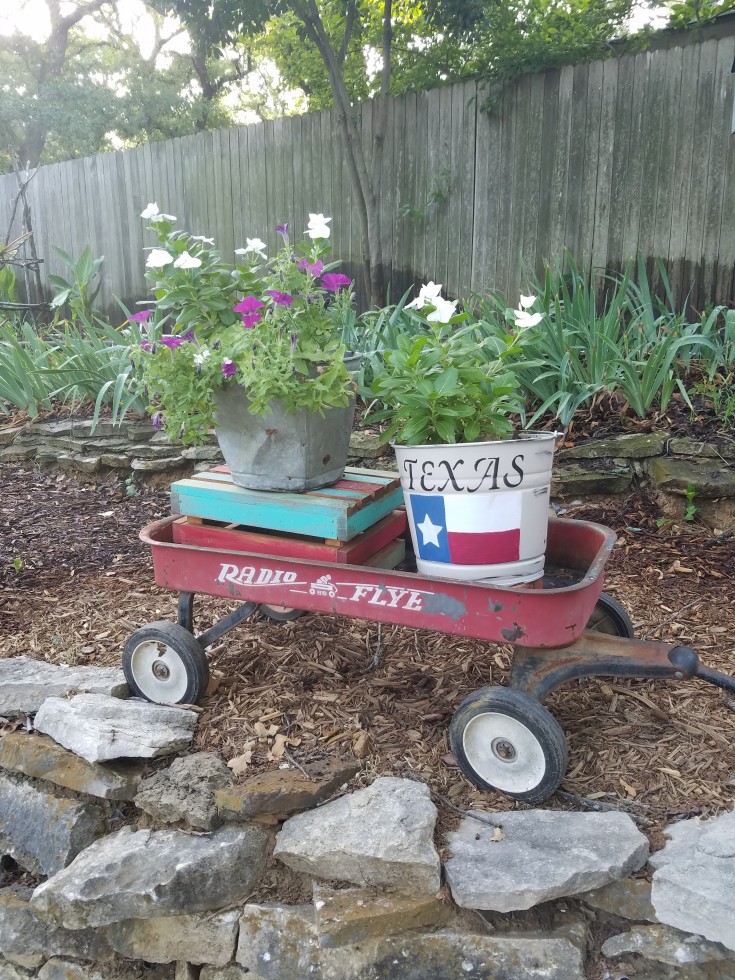
If you remember my post Junkin at Antique Alley, this is the crate the hubby bought to use in raising the vintage bucket up some in the red wagon. Hubby didn’t like it plain so he added some color.

***This post contains affiliate links, if you click on an affiliate link & buy something I may receive a small commission at no extra charge to you. The affiliate money I earn helps pay the expenses to keep this site running. Please read my full advertising disclosure for more info. Thanks so much for your support!***
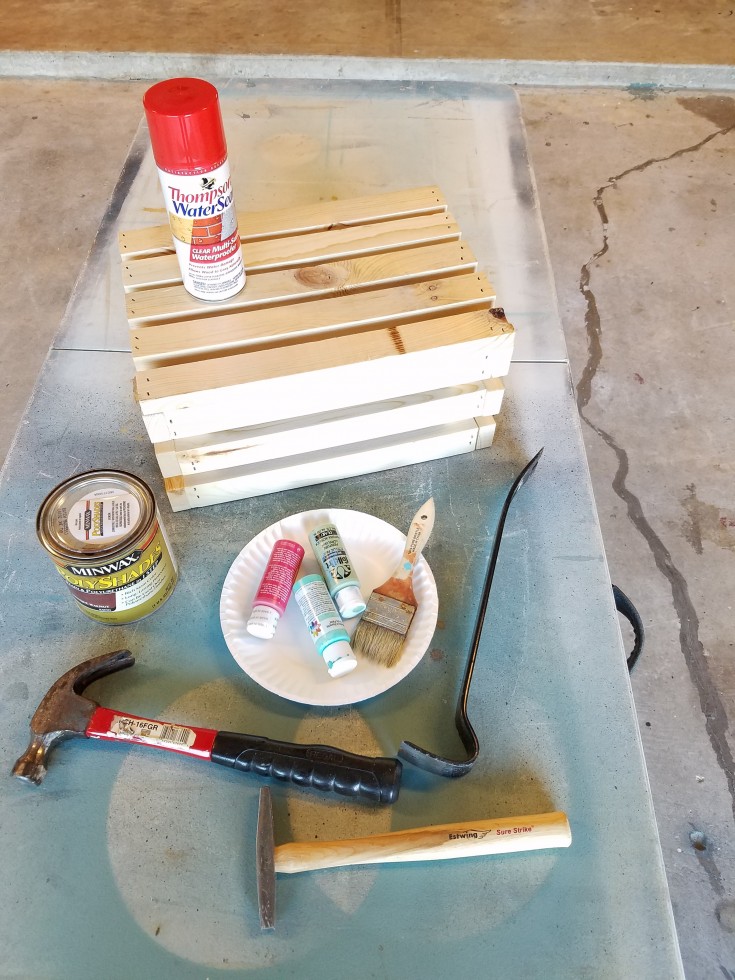
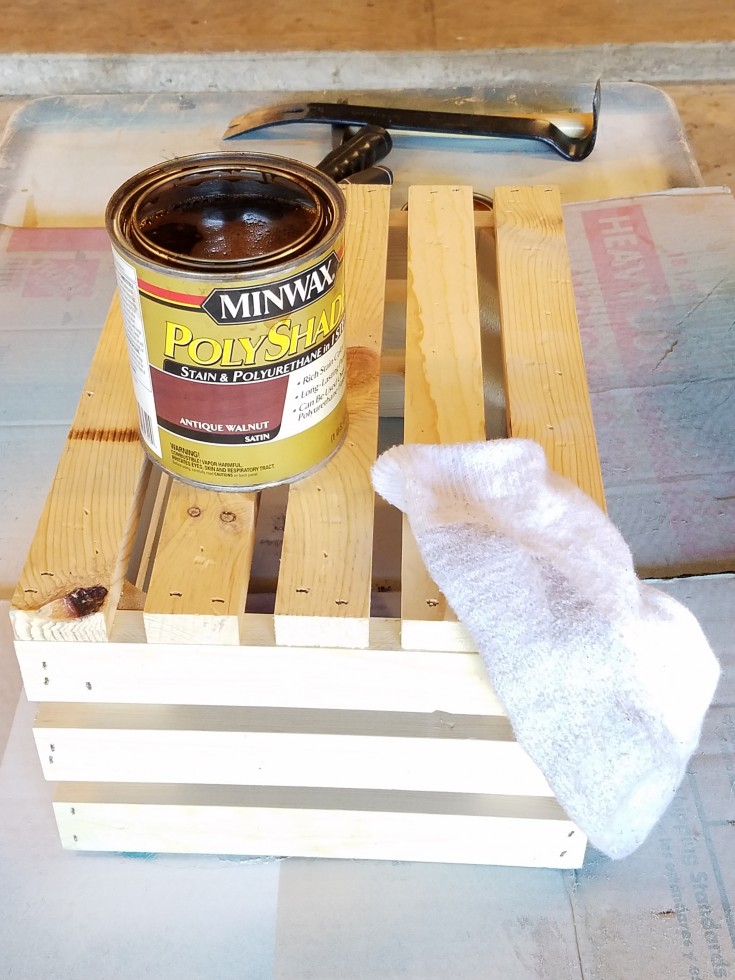
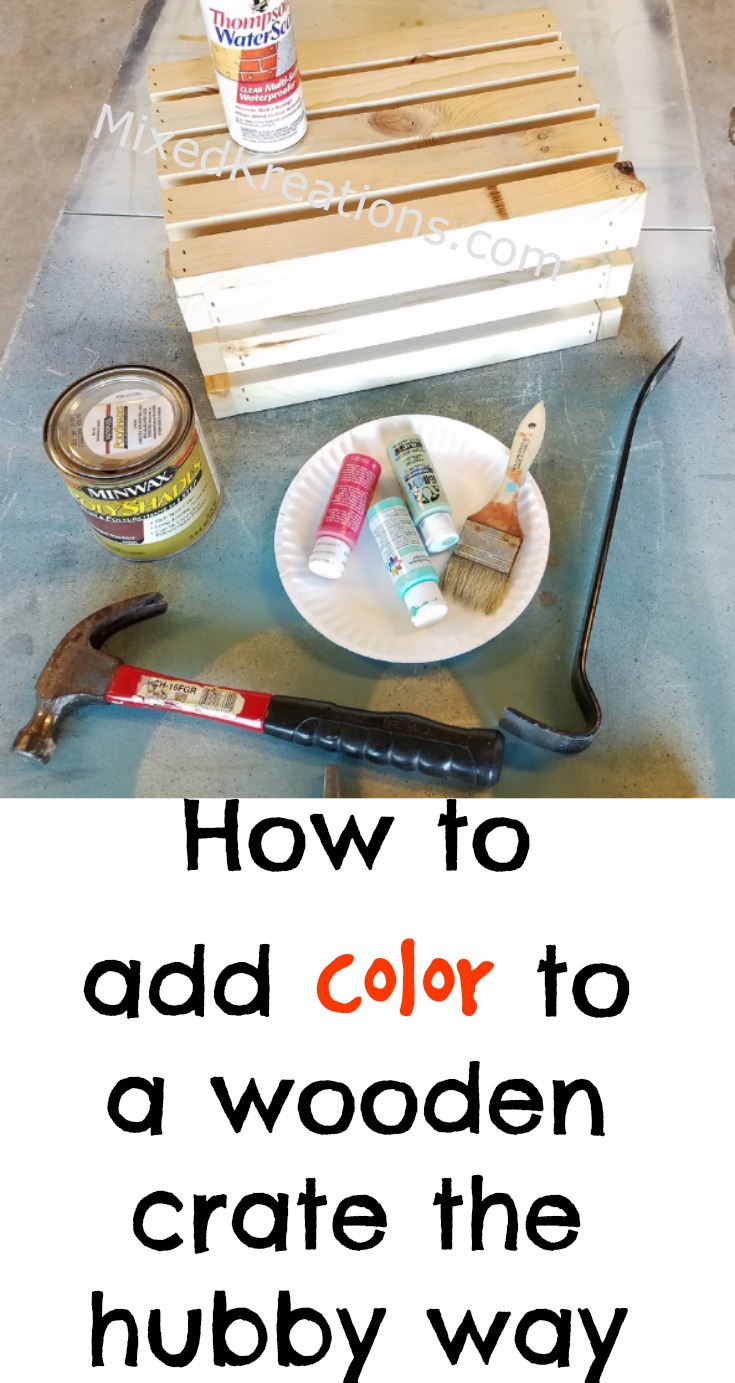
How to Add Color to a Wooden Crate the Hubby Way #upcycled #PlantStand #Garden #WoodCrate MixedKreations.com

Supplies Needed

wood crate
wood stain
3 different colors of paint (your choice)
hammer
crowbar
paint brush
Thompson water sealer

How to Add Color to a Wooden Crate

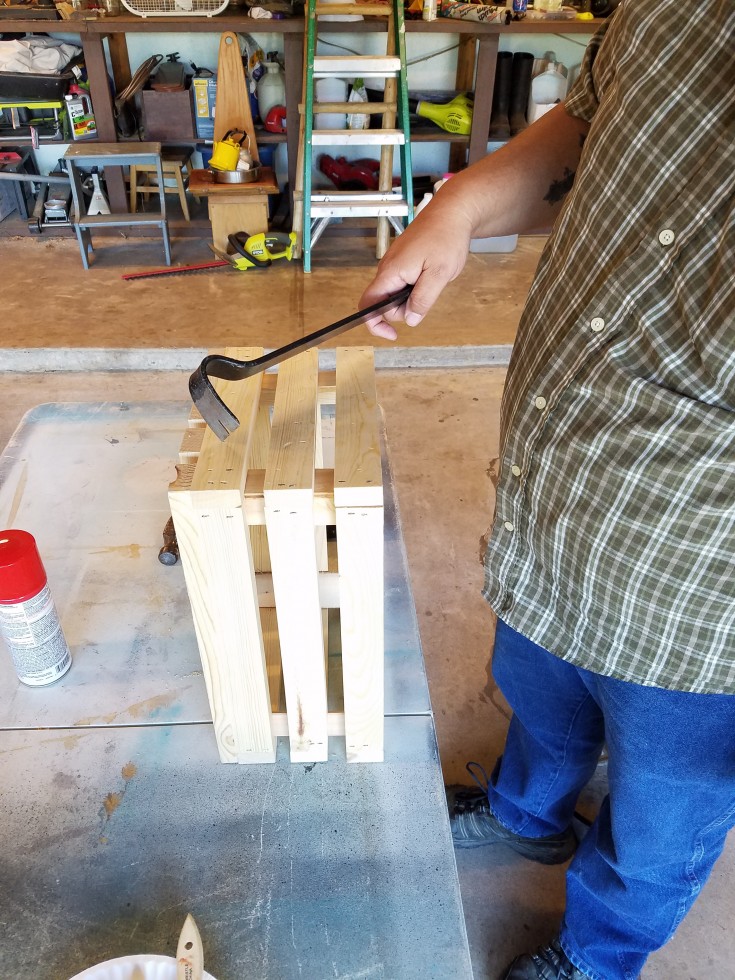
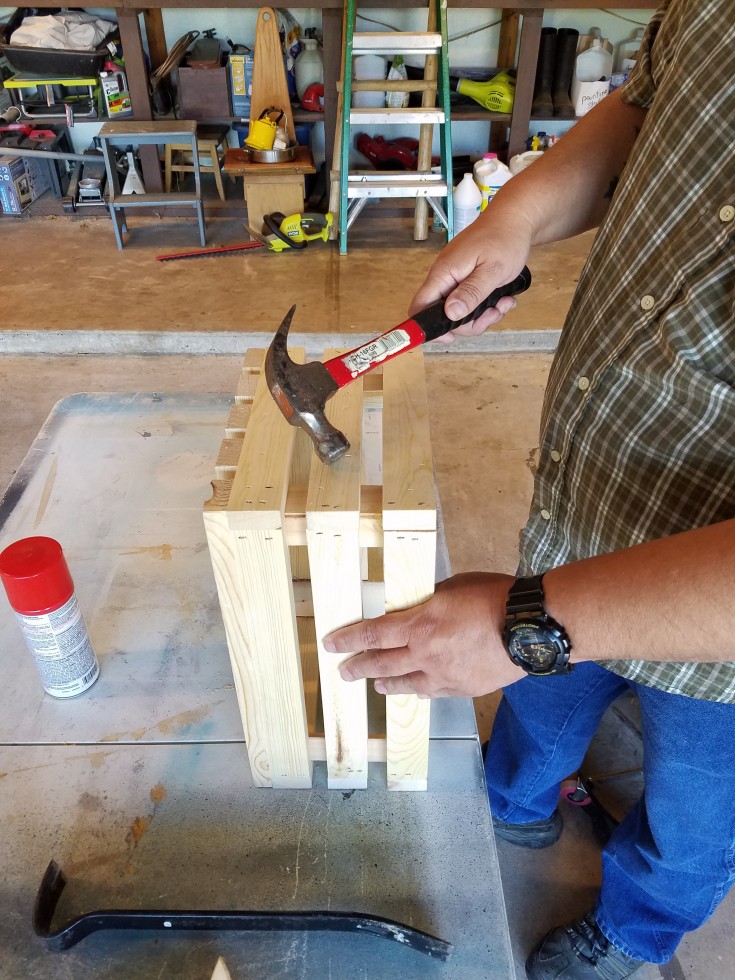
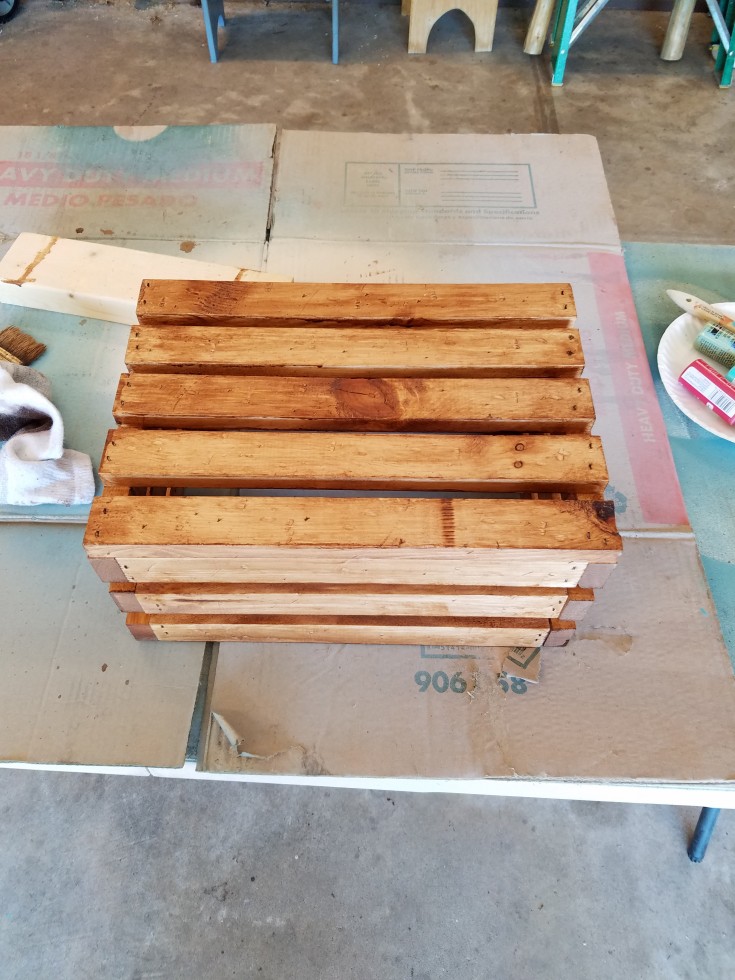
First using a crow bar and hammer he distressed the wood crate.

How to Add Color to a Wooden Crate the Hubby Way #upcycled #PlantStand #Garden #WoodCrate MixedKreations.com

Then he used some Polyshade stain to help age the crate. I myself would have added the stain or homemade aging solution after adding the paint colors. But this is his project so he can do as he pleases.

How to Add Color to a Wooden Crate the Hubby Way #upcycled #PlantStand #Garden #WoodCrate MixedKreations.com

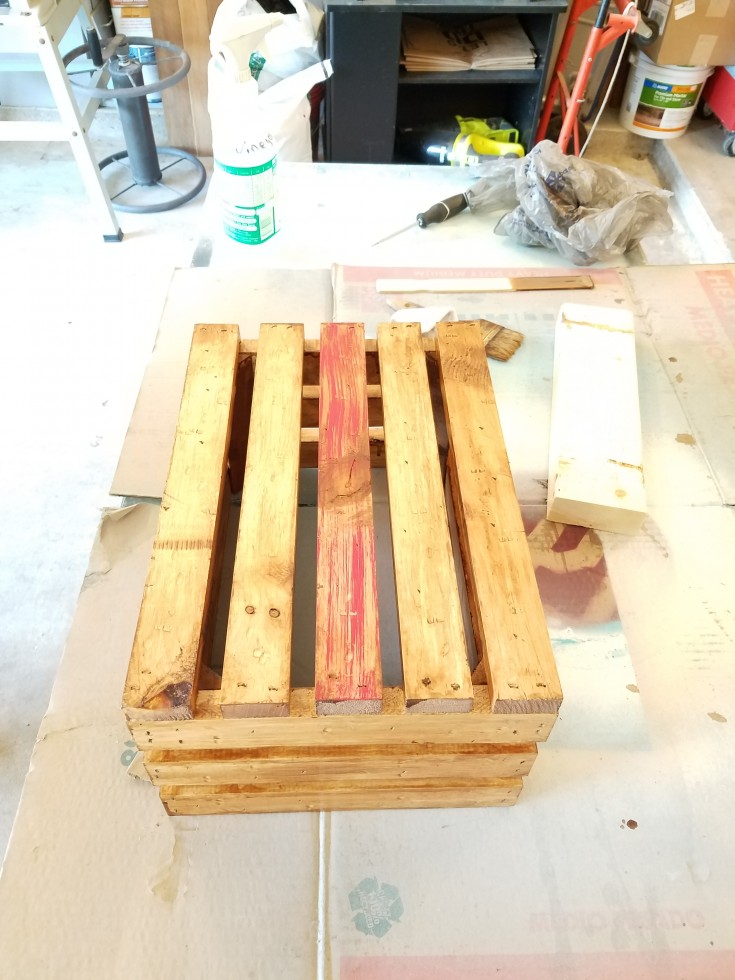
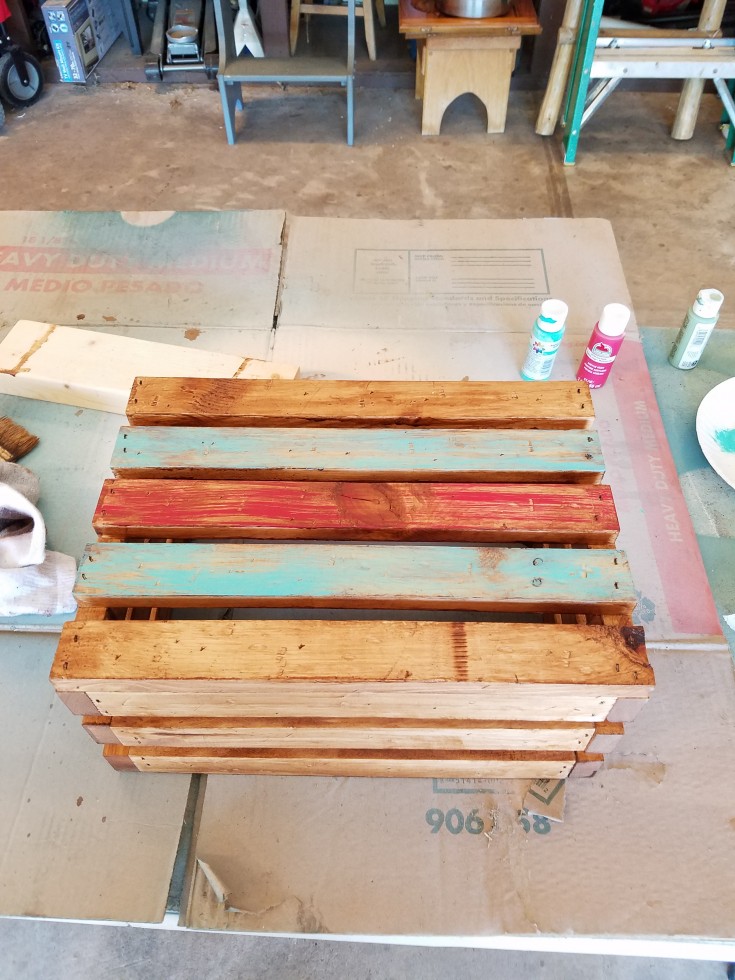
Once he has the crate completely covered with the stain and is dry. He starts adding the color to the sides and bottom of the crate by dry brushing it on not covering it completely. Letting some of the stain show through.

Adding color to a wood crate to be used as a plant stand.
Powered By the Tweet This Plugin
Tweet This

How to Add Color to a Wooden Crate the Hubby Way #upcycled #PlantStand #Garden #WoodCrate MixedKreations.com

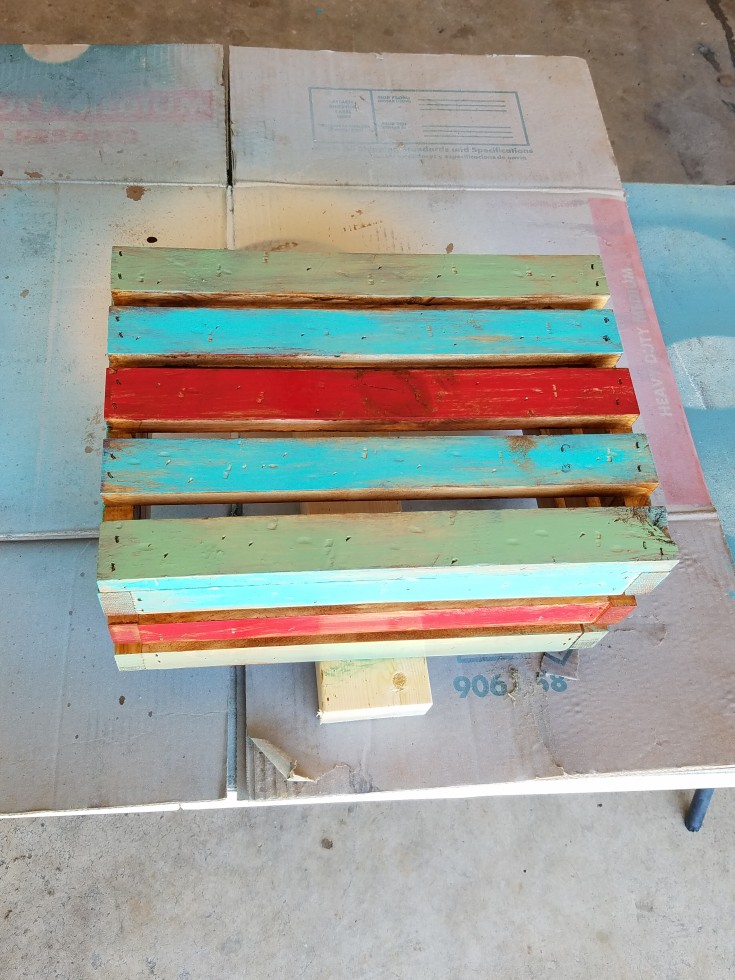
After the wooden crate is dry he sealed it with Thompson Water Sealer.

Left to dry for a few hours before putting it in the little wagon.

How to Add Color to a Wooden Crate the Hubby Way #upcycled #PlantStand #Garden #WoodCrate MixedKreations.com

That is how to add color to a wooden crate the hubby way. How did he do?

How to Add Color to a Wooden Crate the Hubby Way #upcycled #PlantStand #Garden #WoodCrate MixedKreations.com

More of the Hubby’s Projects You May Enjoy!

How to make a diy solar light chandelier
Texas sign made from old license plates

How to distress and Add Color to a Wooden Crate the Hubby Way #upcycled #PlantStand #Garden #WoodCrate MixedKreations.com

If you enjoyed this post, don't forget to pin it for later!

0 shares
  • Share
  • Tweet

If you enjoyed this post, would you mind taking the time to:
  • Share, or Pin for later reference.
  • Follow me on Facebook, Twitter, Pinterest
  • Leave a comment
Thank you so much for taking the time to comment. I love hearing from my readers, and appreciate the kind words.

Comments

  1. Mary says

    July 26, 2018 at 8:02 pm

    Linda I really like how your husband let the stain show through on the wood. It makes for a very interesting effect and all those pretty colors still show.

    Reply
    • Linda @ Mixed Kreations says

      July 31, 2018 at 4:49 pm

      Thanks Mary! I agree 🙂 Even though his technique is backwards from mine, it works. LOL

      Reply
  2. Michelle Leslie says

    July 31, 2018 at 9:49 am

    Your hubby is doing some really cool things Linda. I probably would have added the stain afterwards too, but looking at how the paint didn’t grip on some spots it actually looks really, really good. Very vintage

    Reply
    • Linda @ Mixed Kreations says

      July 31, 2018 at 4:37 pm

      Thank Michelle! It’s pretty cool that he gets out there I has his own projects, the ex never would of done that. I think he did a great job on it!

      Reply

Leave a Reply Cancel reply

Your email address will not be published. Required fields are marked *

CommentLuv badgeShow more posts

This site uses Akismet to reduce spam. Learn how your comment data is processed.

Thanks for sharing your thoughts and comments! I read and appreciate every single one!

Follow Mixed Kreations

Facebooktwitterpinterestyoutubeinstagram

My Favorites on Amazon

My Amazon Influencer Shop

Homemade Chalk Paint

diy chalk paint

How to Make Rusty Cans

how to make rusty cans

How to Make a Flag From a Wood Shutter

how to make a 2 sided american flag

Easter Egg Jar

How to make a Easter egg jar

Diy Texas Tile Coasters

Texas Tile Coasters

Update a Thrift Store Find

How to Update a Hanging Box in 4 easy steps

Categories

By Kelli & Crystal From Learn To Blog Hangouts

#LearntoBlog Hangouts

Dominate Course

LearntoBlog
Featured on Hometalk.com
Rakuten Affiliate Network Welcome Program
Grow and Make

Dollar Tree

Creative Fabrica Font Bundles

Font Banner - Free Fonts

Featured At

Featured At

Mixed Kreations featured in Country sampler

Featured at

mixed kreations is featured in Bella Crafts online magazine
The Pin Junkie

Canva Photo Editing

Amazon Affiliates

I am a participant in the Amazon Services LLC Associates Program, an affiliate advertising program designed to provide a means for sites to earn advertising fees by advertising and linking to Amazon.com.

Disclosures Statement

This policy is valid from 19 July 2013 This blog is a personal blog written and edited by me. For questions about this blog, please contact Linda @ ldkeesee@mixedkreations.com. This blog accepts forms of cash advertising, sponsorship, paid insertions or other forms of compensation. The compensation received will never influence the content, topics or posts made in this blog. All advertising is in the form of advertisements generated by a third party ad network. Those advertisements will be identified as paid advertisements. The owner(s) of this blog is compensated to provide opinion on products, services, websites and various other topics. Even though the owner(s) of this blog receives compensation for our posts or advertisements, we always give our honest opinions, findings, beliefs, or experiences on those topics or products. The views and opinions expressed on this blog are purely the bloggers' own. Any product claim, statistic, quote or other representation about a product or service should be verified with the manufacturer, provider or party in question. This blog does not contain any content which might present a conflict of interest. To get your own policy, go to http://www.disclosurepolicy.org

Copyright © 2023 · Modern Blogger Pro Theme By, Pretty Darn Cute Design