Mixed Kreations

The Creative Life & Journey Of A DIY'ER

  • Home
  • Diy Projects
    • Handmade Cross Projects
    • Holiday & Seasonal Projects
    • Mason Jars
    • Fun Upcyled Shutters & Spindles
    • Texas Projects
    • Upcycled Cans
    • Wood Projects
    • Jewelry Tutorials
  • Quick and Easy Recipes
  • Shop Mixed Kreations
    • Etsy Shop
    • Mixed Kreations Amazon Influencer
  • DISCLOSURES STATEMENT & PRIVACY POLICY
  • About Me
  • Recommendations
You are here: Home / Jewelry / Jewelry Tutorials / Copper Wire Wrapped Paper Bead Tutorial

Copper Wire Wrapped Paper Bead Tutorial

January 27, 2012 By: Linda @ Mixed Kreations14 Comments

If you enjoyed this post, don't forget to pin it for later!

1510 shares
  • Share
  • Tweet

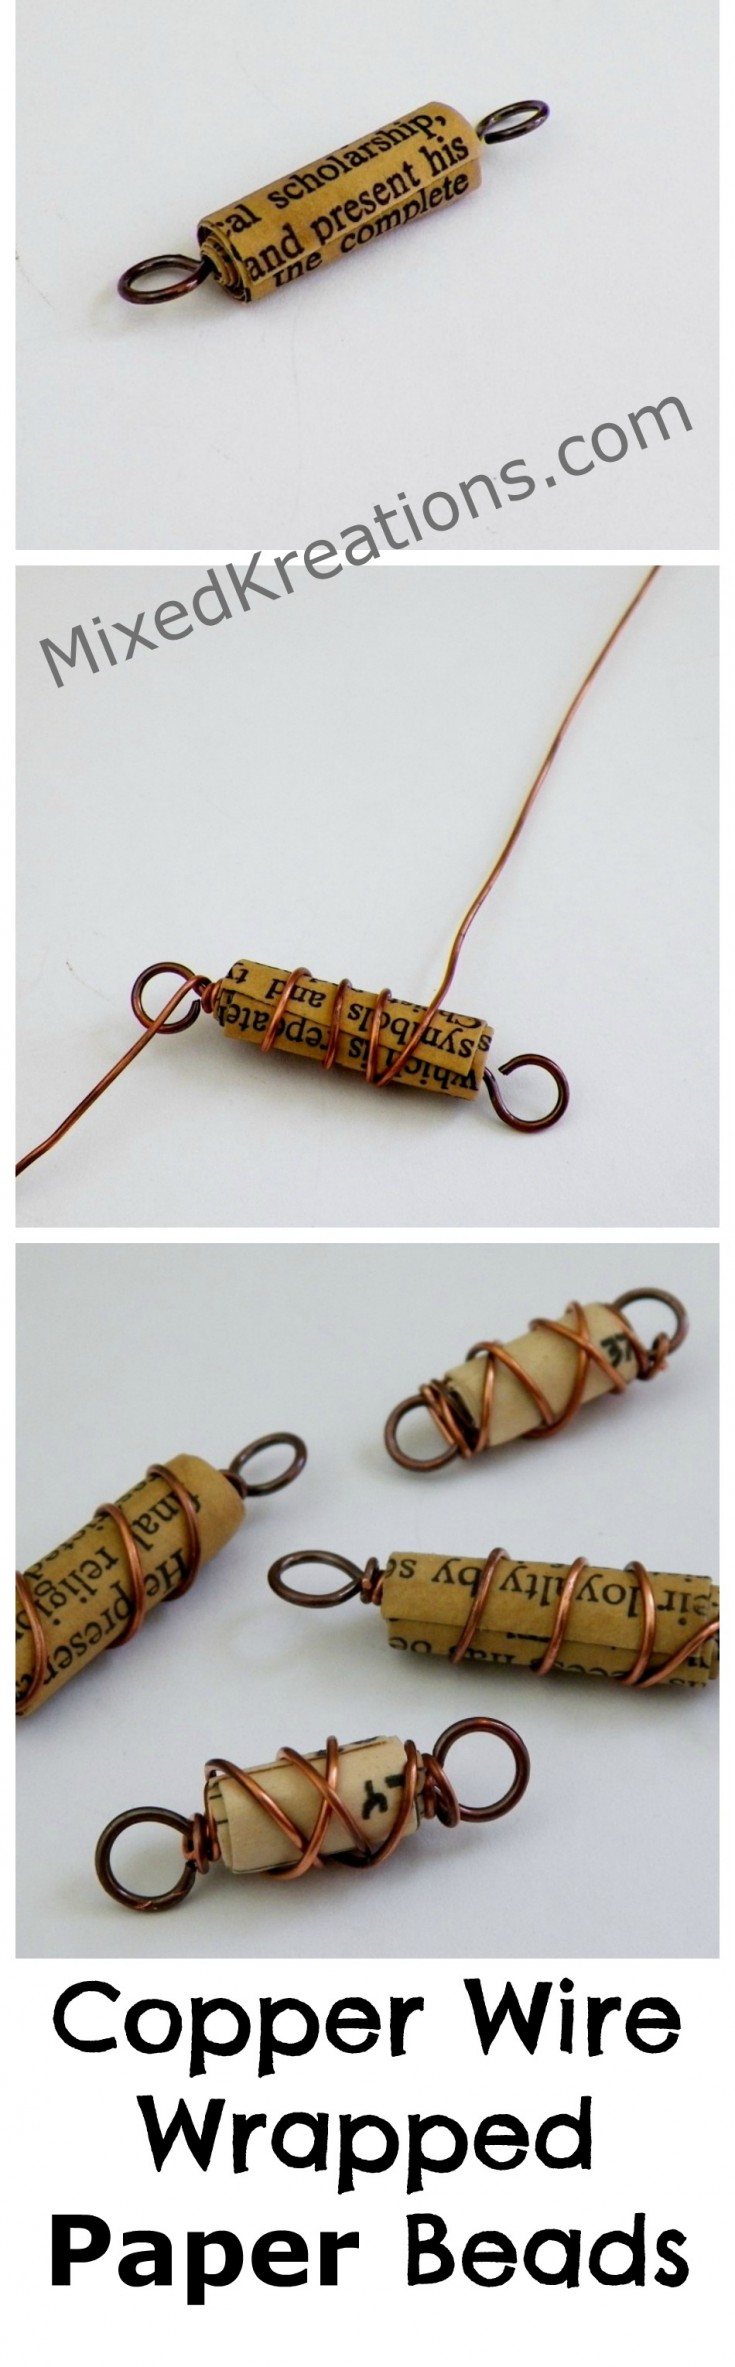
This copper wire wrapped paper bead is not only unique, but is fun to make as well. It was made by using copper wire and paper. These beads would be great for making unique pieces of jewelry whether your making a bracelet or necklace.

Copper Wire Wrapped Paper Beads

How To Make Copper Wire Wrapped Paper Bead

The first thing you need to start making your copper wire wrapped paper bead is to find an old book with aged pages than tear out a few of the aged pages. If you don’t have an old book than you can check out my post (To age your own pages.) Than take your paint brush and adhesive/sealant of your choice. Coat both sides of you pages, twice, let dry between coats.

How to make copper wire wrapped paper beads for making unique jewelry pieces.
Powered By the Tweet This Plugin
Tweet This

Copper Wire Wrapped Paper Bead Tutorial

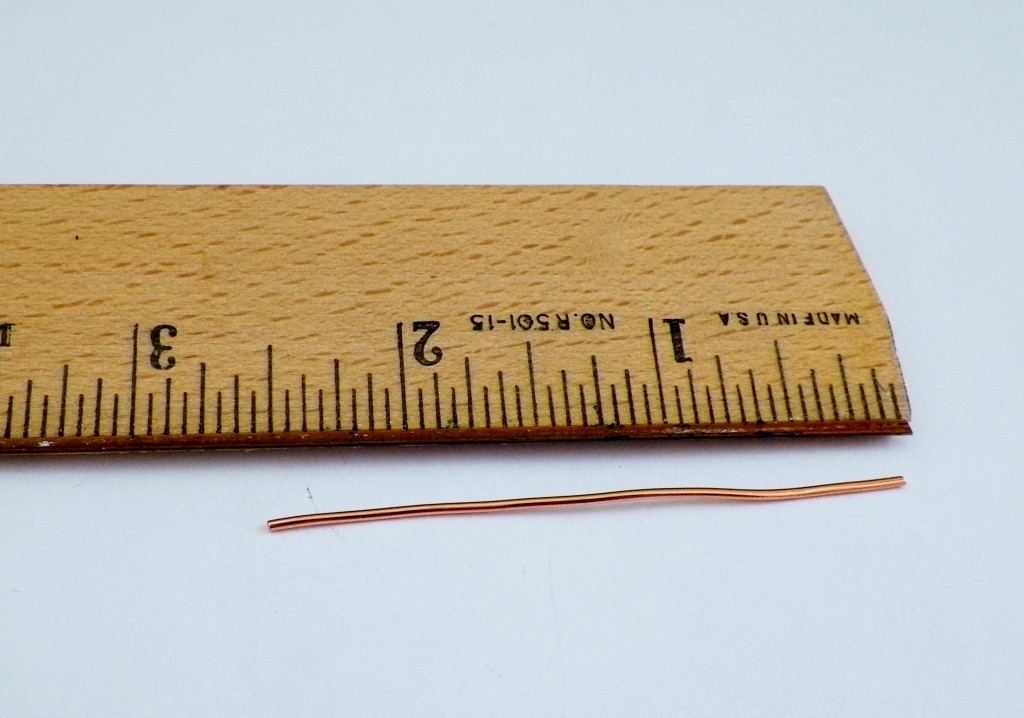
Cut 2 ½ inch pieces from your 18 gauge copper wire for however many beads that you want to make.

Copper Wire Wrapped Paper Bead Tutorial

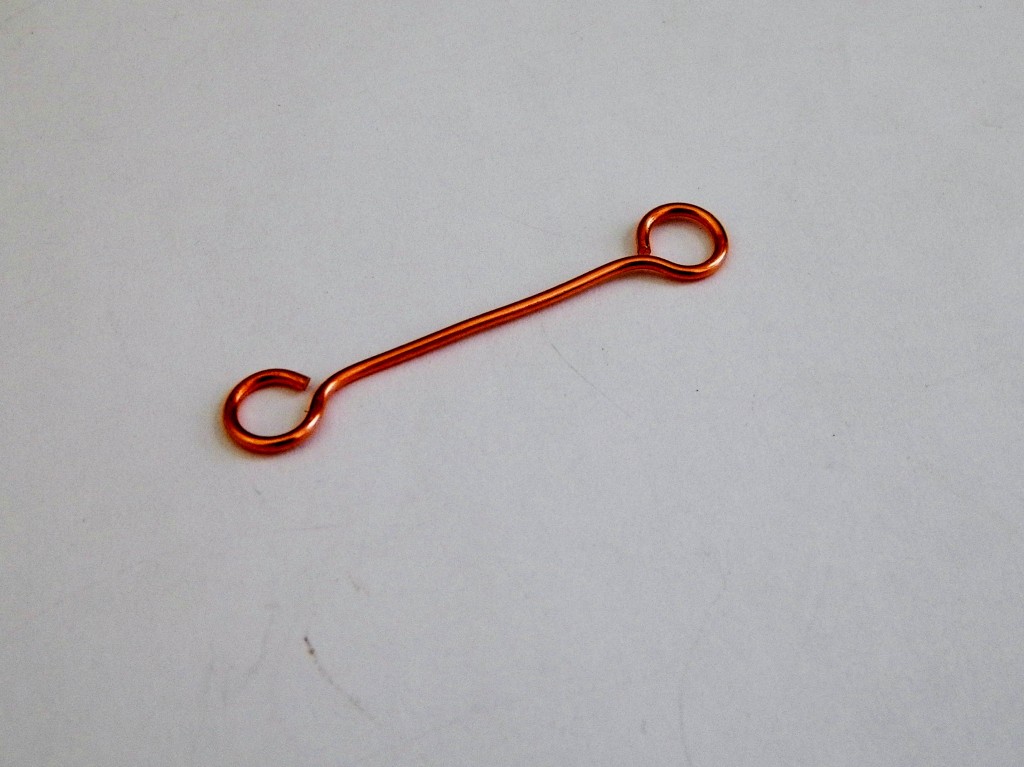
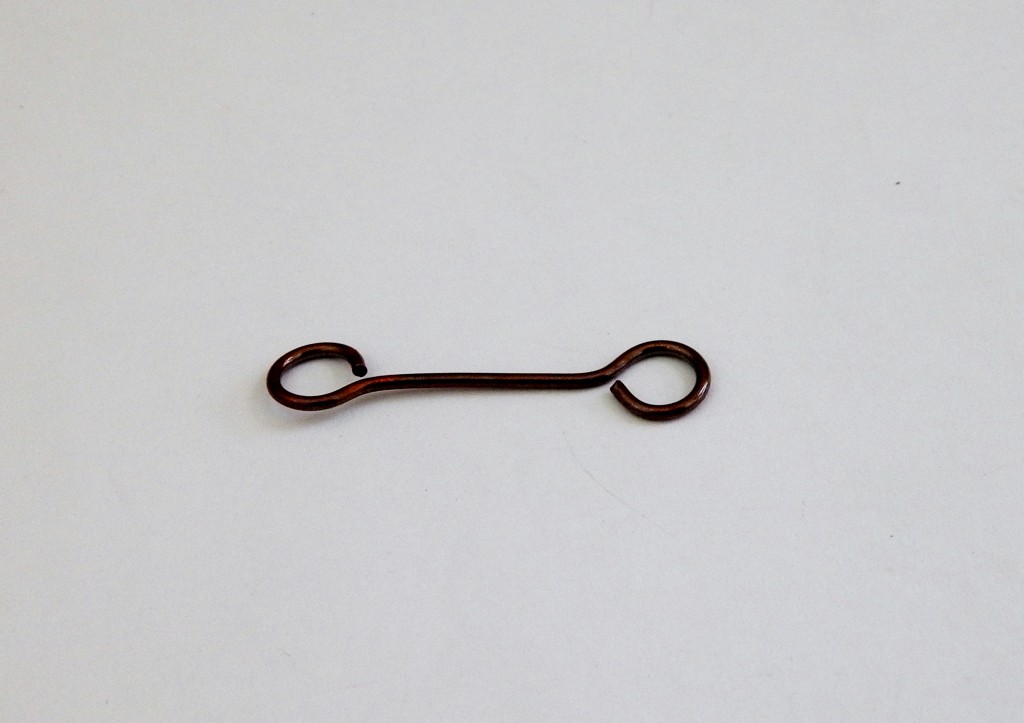
With the 2 ½” wires you just cut make simple straight loop links. When you get all your links made, and you would like them to be oxidized. Then now is the time to apply your liver of sulfur. Go ahead and cut 3 – 4 pieces of your 20 gauge copper wire approximately 1 ½ to 2 feet long (you can wrap 3 or 4 beads with 2 ft. pieces. Apply the liver of sulfur to these pieces as well. Use steel wool to clean and polish. Your links can go in a tumbler if you have one.

Copper Wire Wrapped Paper Bead Tutorial

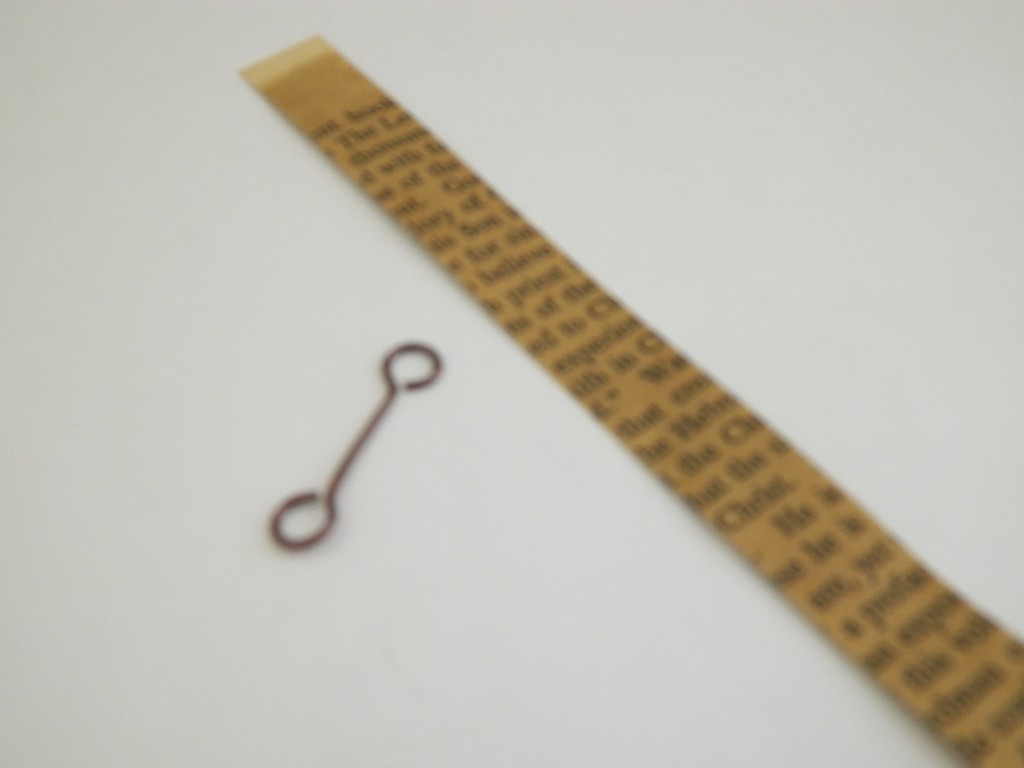
Cut your aged paper into strips, long ways. Cut them just a little smaller than the area between the loops on your links, approximately ¾”. So that you will have plenty of room to make a wrap on each side of the loop, between the link loop and the paper.

Copper Wire Wrapped Paper Bead Tutorial

Start rolling one end of the aged paper strip (just enough to get a little curl in the end to make it easier to get started rolling). Unroll, and now place the link at the end of the paper in the little curl and start rolling. Roll as much as you want, depending on the size of bead that you want.

Copper Wire Wrapped Paper Bead Tutorial

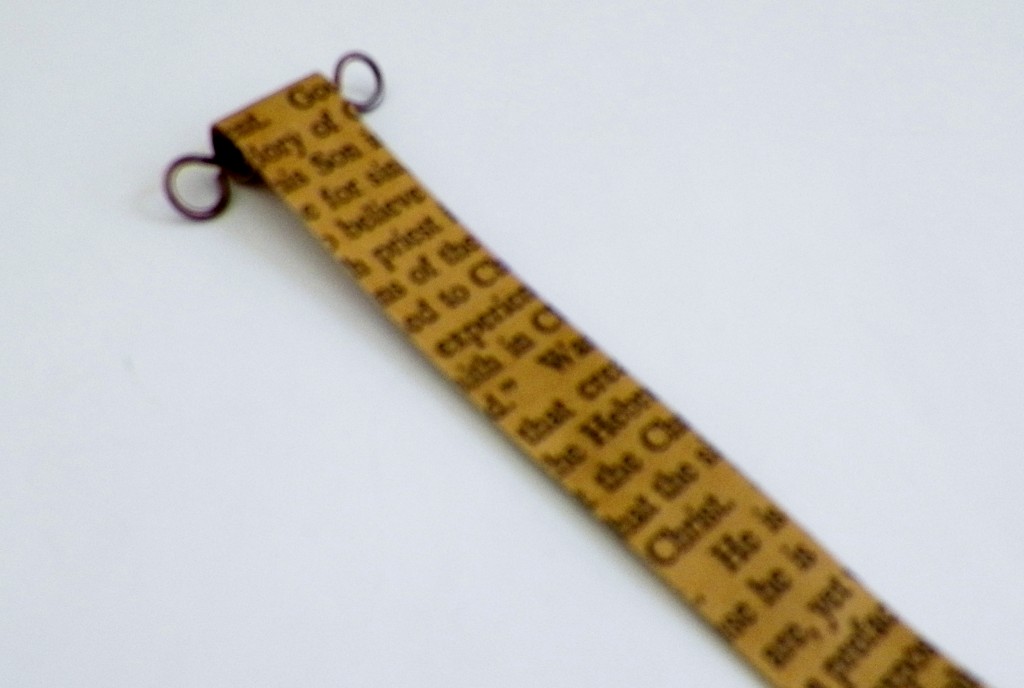
Be sure to keep the paper straight as you roll.

Copper Wire Wrapped Paper Bead Tutorial

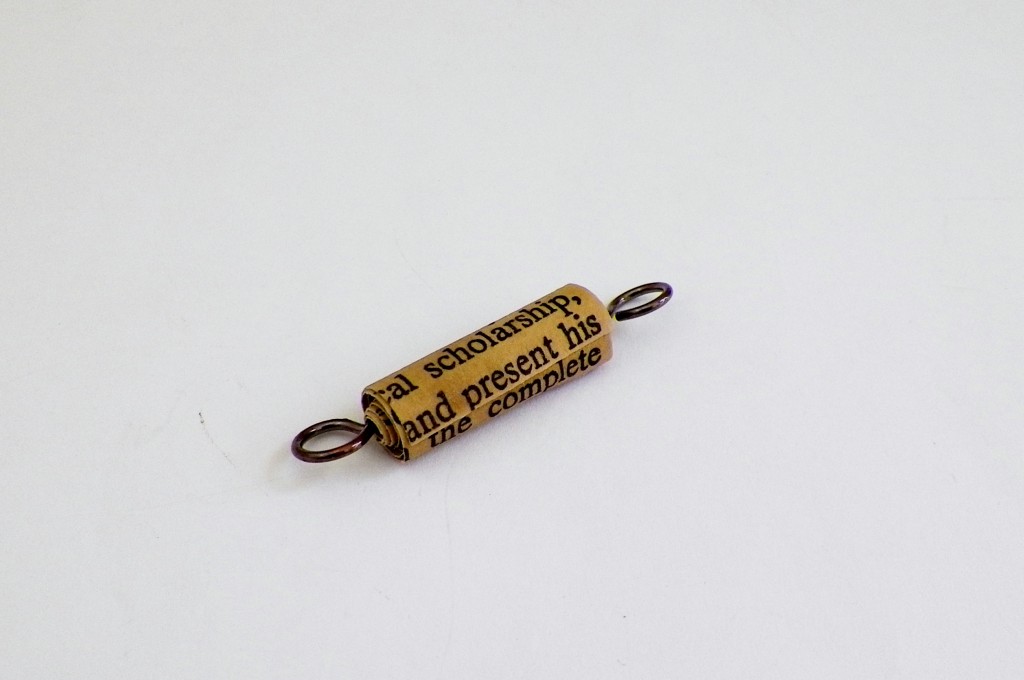
When you get to where you have about an inch left to roll, apply some of your adhesive/protector to the underside and finish rolling. Wipe off any excess, hold for a little bit till it starts to stick, then set your first wire wrapped paper bead to the side to dry, and repeat step #5 till you finish rolling the rest. Let dry overnight.

Copper Wire Wrapped Paper Bead Tutorial

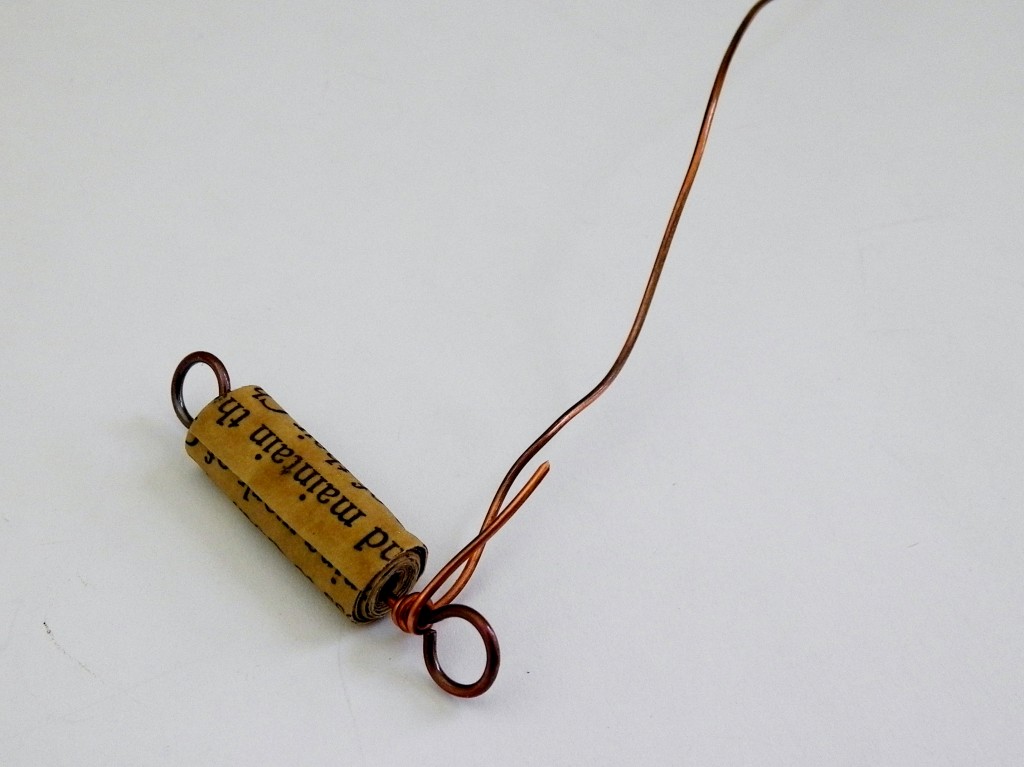
Now take your long pieces of wire and make two wraps in between the link loop and edge of the paper

Copper Wire Wrapped Paper Bead Tutorial

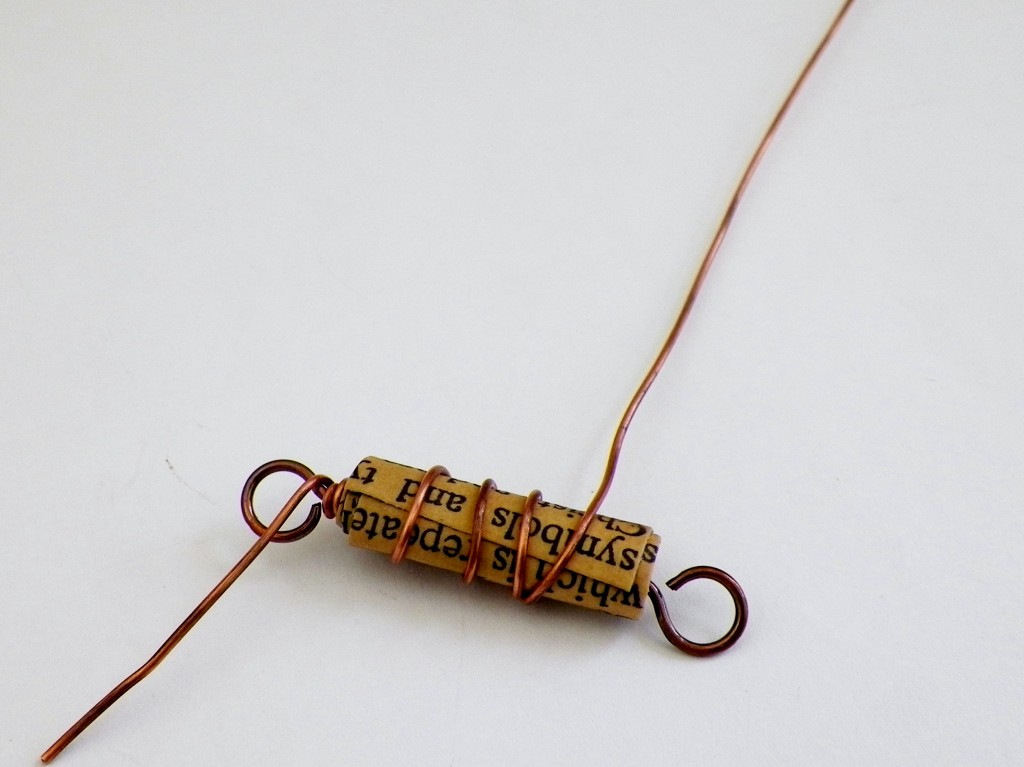
Continue wrapping up onto the paper for 4 or 5 wraps than back down to the wire link, the area between the paper and loop.

Copper Wire Wrapped Paper Bead Tutorial

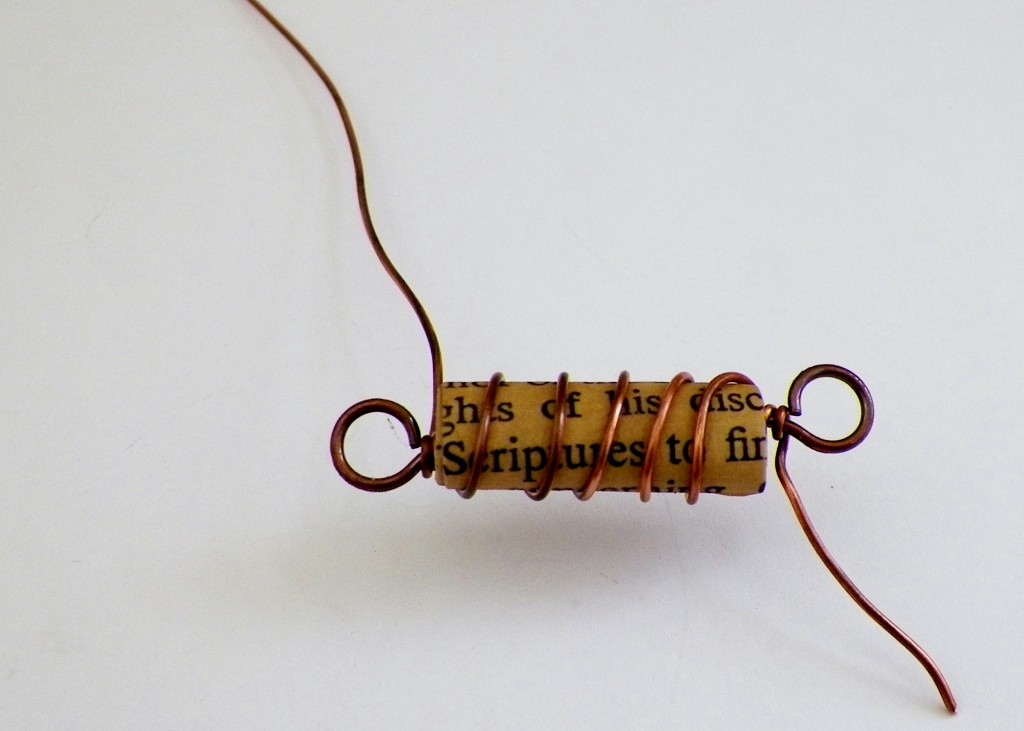
Make a couple of wraps with the wire to secure the wire and paper in place.

Copper Wire Wrapped Paper Bead Tutorial

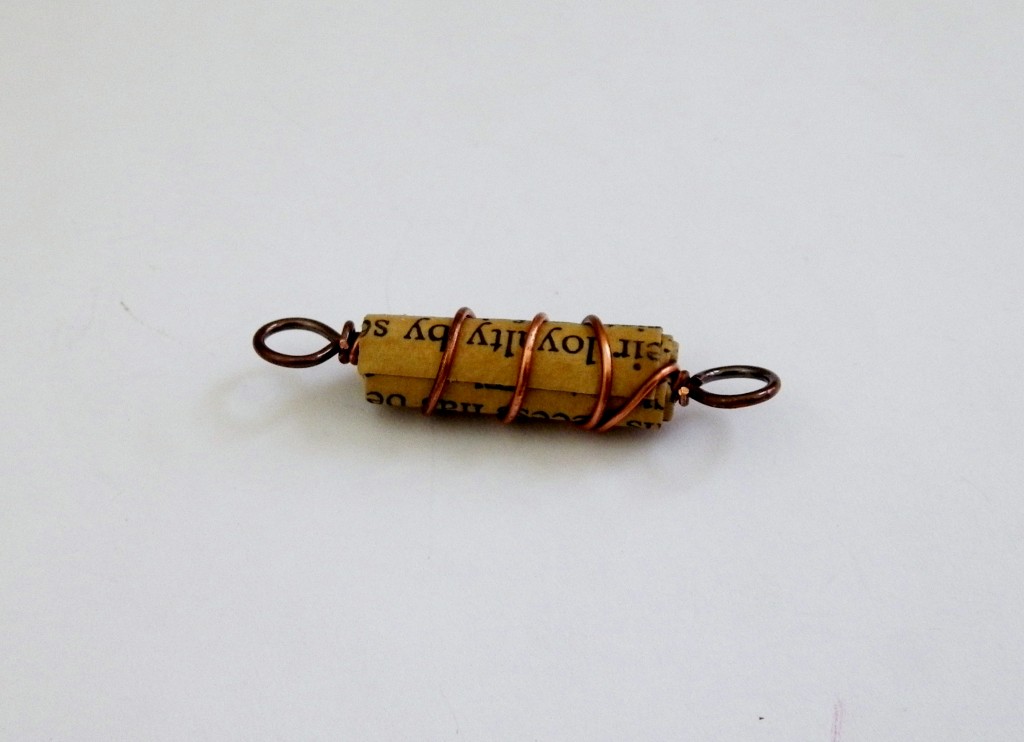
Cut the ends of the wire, than press down the ends tightly so that you will have a neat wrap. Continue each step until you have all the copper wire wrapped paper beads done.

copper and wire wrapped paper bead

***This post contains affiliate links for your convenience. Please read my disclosure for more info. Thanks so much for your support!***
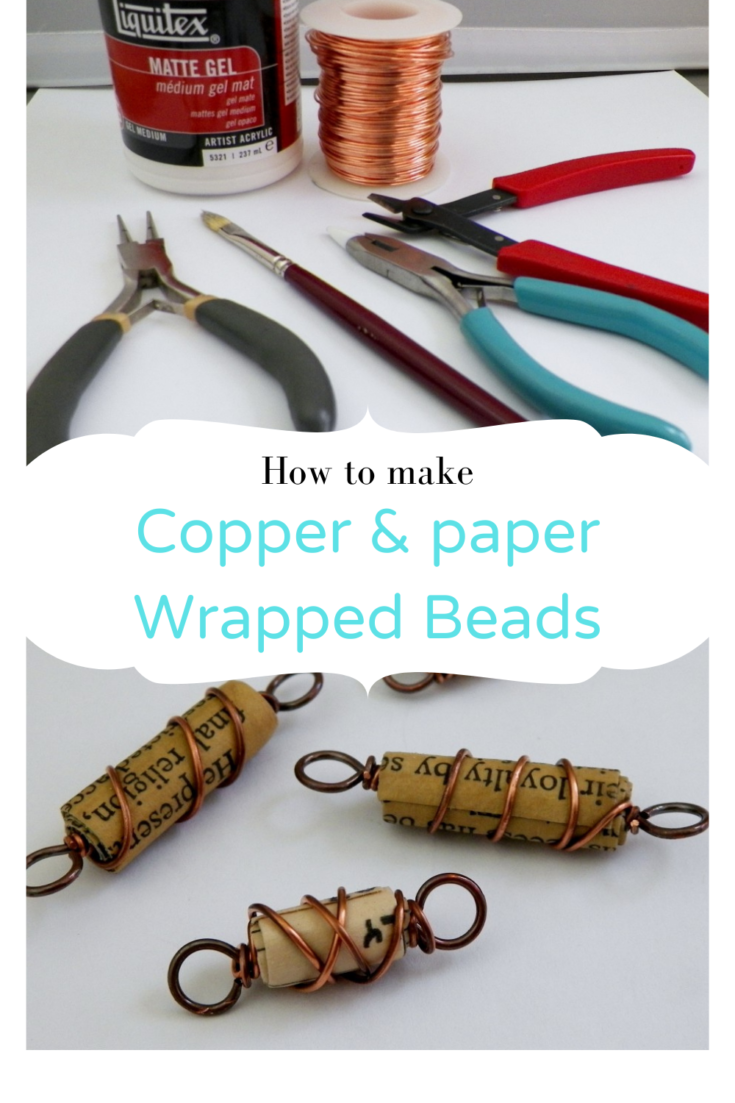
Tools & Supplies

* Round nose pliers
* Flush cutters
* Chain nose pliers
* Ruler
* Copper wire 18 gauge and 20 gauge
* paint brush
* Adhesive sealant and protector for decoupage (such as Mod Podge or Liquitex)
* Aged Book Page
* Steel Wool
* Optional: Liver of sulfur

Do you make jewelry? If so what media do you use most? Wire, stringing, etc.

If you found this post helpful, Please share, or Pin for later. Thanks!

Other Post You May Like

Handmade copper and turquoise bracelet
Wire Wrapped copper beads
Copper tube beads

How to make a copper wire wrapped paper beads | handmade copper and paper beads #HandmadeBeads #diy #JewelryMaking #Beads MixedKreations.com

If you enjoyed this post, don't forget to pin it for later!

1510 shares
  • Share
  • Tweet

If you enjoyed this post, would you mind taking the time to:
  • Share, or Pin for later reference.
  • Follow me on Facebook, Twitter, Pinterest
  • Leave a comment
Thank you so much for taking the time to comment. I love hearing from my readers, and appreciate the kind words.

Comments

  1. Kathy says

    February 24, 2015 at 2:43 pm

    I love this tutorial! I have everything I need to make these, too. Thanks for sharing!

    Reply
    • Linda @ Mixed Kreations says

      February 24, 2015 at 7:59 pm

      Thanks Kathy! These beads were fun to make. I would love to see your beads once your finished.

      Reply
  2. Wanda says

    April 3, 2015 at 10:11 am

    Very nice! And so helpful for those who are learning how to make paper beads. I have an Etsy shop that offers precut paper strips for making paper beads, paper bead rollers, and paper bead kits. One of my customers purchased the kits for their church so the kids could make paper beads. I thought that was such a wonderful idea! But if any of your readers would like to make the process easier, I invite them to visit my shop http://www.etsy.com/shop/GroundZeroCreations
    Wanda recently posted…Wine Glass Charms – Ideal Wine Accessories, Perfect Wedding Favor and Bar Accessories for Glass Charm by GroundZeroCreationsMy Profile

    Reply
    • Linda @ Mixed Kreations says

      April 3, 2015 at 10:33 am

      Thank you Wanda! I bet the children enjoyed making the beads. Thanks for stopping by!

      Reply
  3. Renee Fuller says

    January 22, 2016 at 11:21 am

    What a cute bead idea!
    Renee Fuller recently posted…Carolina ChickadeeMy Profile

    Reply
    • Linda @ Mixed Kreations says

      January 22, 2016 at 2:44 pm

      Thank you Renee!

      Reply
  4. Cam says

    April 22, 2016 at 9:52 am

    I love this,and will try it soon. I only have to get the modge podge and I will be set.thanks for sharing this.

    Reply
    • Linda @ Mixed Kreations says

      April 25, 2016 at 3:06 pm

      Thank you Cam! Would love to see your when you are done.

      Reply
  5. Anna says

    October 16, 2017 at 1:50 pm

    Great tutorial, nice to see new ideas!

    ~Anna
    Anna recently posted….My Profile

    Reply
    • Linda @ Mixed Kreations says

      October 20, 2017 at 6:06 am

      Thank you Anna!

      Reply
  6. Polycab Support says

    January 4, 2021 at 5:56 am

    Great to know this I was not aware that with copper wire we can do this much things what a great way to make jewelry bracelet or necklace

    Reply
    • Linda @ Mixed Kreations says

      January 16, 2021 at 9:47 am

      Thank you for stopping by!

      Reply

Trackbacks

  1. Handcrafted Paper and Wire Wrapped Bead Bracelet says:
    May 18, 2015 at 6:31 am

    […] My wire wrapped paper bead tutorial. […]

    Reply
  2. Easy DIY Sari Wrap Bracelet - Mixed Kreations says:
    January 30, 2017 at 7:06 am

    […] Copper wire wrapped paper beads Copper and turquoise bracelet Vintaj Key hole charm bracelet […]

    Reply

Leave a Reply Cancel reply

Your email address will not be published. Required fields are marked *

CommentLuv badgeShow more posts

This site uses Akismet to reduce spam. Learn how your comment data is processed.

Thanks for sharing your thoughts and comments! I read and appreciate every single one!

Follow Mixed Kreations

Facebooktwitterpinterestyoutubeinstagram

My Favorites on Amazon

My Amazon Influencer Shop

Homemade Chalk Paint

diy chalk paint

How to Make Rusty Cans

how to make rusty cans

How to Make a Flag From a Wood Shutter

how to make a 2 sided american flag

Easter Egg Jar

How to make a Easter egg jar

Diy Texas Tile Coasters

Texas Tile Coasters

Update a Thrift Store Find

How to Update a Hanging Box in 4 easy steps

Categories

By Kelli & Crystal From Learn To Blog Hangouts

#LearntoBlog Hangouts

Dominate Course

LearntoBlog
Featured on Hometalk.com
Rakuten Affiliate Network Welcome Program
Grow and Make

Dollar Tree

Creative Fabrica Font Bundles

Font Banner - Free Fonts

Featured At

Featured At

Mixed Kreations featured in Country sampler

Featured at

mixed kreations is featured in Bella Crafts online magazine
The Pin Junkie

Canva Photo Editing

Amazon Affiliates

I am a participant in the Amazon Services LLC Associates Program, an affiliate advertising program designed to provide a means for sites to earn advertising fees by advertising and linking to Amazon.com.

Disclosures Statement

This policy is valid from 19 July 2013 This blog is a personal blog written and edited by me. For questions about this blog, please contact Linda @ ldkeesee@mixedkreations.com. This blog accepts forms of cash advertising, sponsorship, paid insertions or other forms of compensation. The compensation received will never influence the content, topics or posts made in this blog. All advertising is in the form of advertisements generated by a third party ad network. Those advertisements will be identified as paid advertisements. The owner(s) of this blog is compensated to provide opinion on products, services, websites and various other topics. Even though the owner(s) of this blog receives compensation for our posts or advertisements, we always give our honest opinions, findings, beliefs, or experiences on those topics or products. The views and opinions expressed on this blog are purely the bloggers' own. Any product claim, statistic, quote or other representation about a product or service should be verified with the manufacturer, provider or party in question. This blog does not contain any content which might present a conflict of interest. To get your own policy, go to http://www.disclosurepolicy.org

Copyright © 2023 · Modern Blogger Pro Theme By, Pretty Darn Cute Design