Mixed Kreations

The Creative Life & Journey Of A DIY'ER

  • Home
  • Diy Projects
    • Handmade Cross Projects
    • Holiday & Seasonal Projects
    • Mason Jars
    • Fun Upcyled Shutters & Spindles
    • Texas Projects
    • Upcycled Cans
    • Wood Projects
    • Jewelry Tutorials
  • Quick and Easy Recipes
  • Shop Mixed Kreations
    • Etsy Shop
    • Mixed Kreations Amazon Influencer
  • DISCLOSURES STATEMENT & PRIVACY POLICY
  • About Me
  • Recommendations
You are here: Home / DIY/Craft Projects / How To Make A Alcohol Ink Stamp

How To Make A Alcohol Ink Stamp

July 29, 2015 By: Linda @ Mixed Kreations7 Comments

If you enjoyed this post, don't forget to pin it for later!

5 shares
  • Share
  • Tweet

A while back while looking through Pinterests I ran across some glass bottles colored using alcohol inks. Adding this to my long list of things to try I looked it over to see what was needed for the project. I seen that a felt applicator was needed for adding the alcohol ink to the bottles.

*This post contains affiliate links, if you click on an affiliate link & buy something I may receive a small commission at no extra charge to you. The affiliate money I earn helps pay the expenses to keep this site running. Please read my full advertising disclosure for more info. Thanks so much for your support!*

Me the Diy’er that I am, and not wanting to spend money (hubby calls it cheap) when I can make something myself. I am sure with all the little wood parts that I have stashed away I could come up with something that would work for an (affiliate) Alcohol ink stamp. So instead of purchasing a alcohol ink stamp I made my own from my stash.

Easy Diy Alcohol Ink Stamp
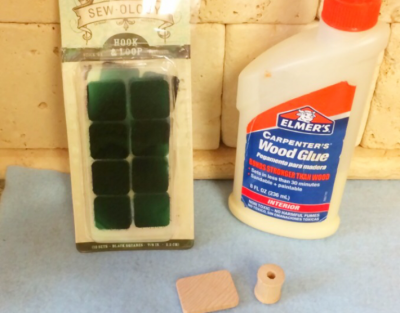
alcohol ink stamp 1

Materials Needed :

  • Wood glue 
  • Velcro 
  • Small wooden spool 
  • Small rectangle wood cutout

alcohol ink stamp

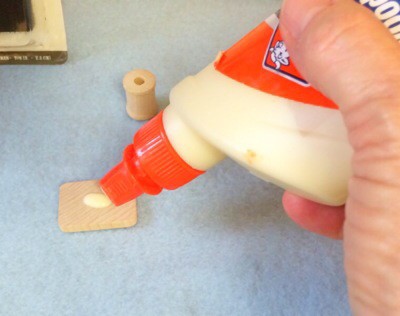
First take your small rectangle wood cutout and add a drop of wood glue

alcohol ink stamp

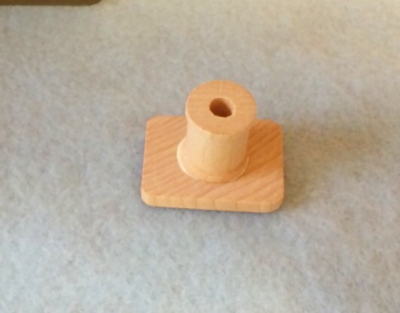
Take your mini wood spool and sit it on top of the glue and let dry throughly.

alcohol ink stamp

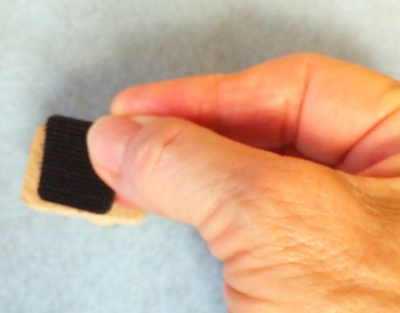
Take your Velcro and stick to the bottom side of your alcohol ink stamp.

alcohol ink stamp 9

alcohol ink stamp 10

alcohol ink stamp 11

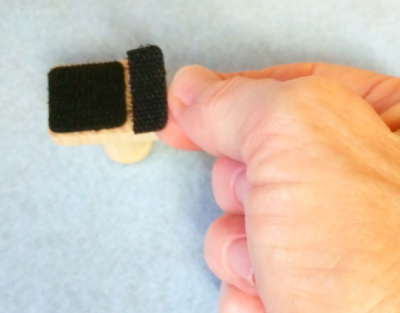
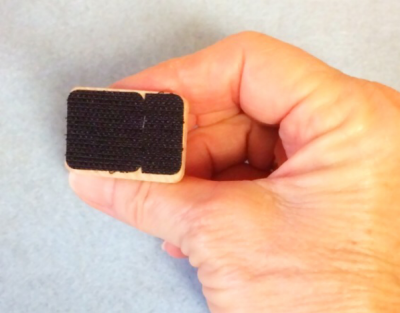
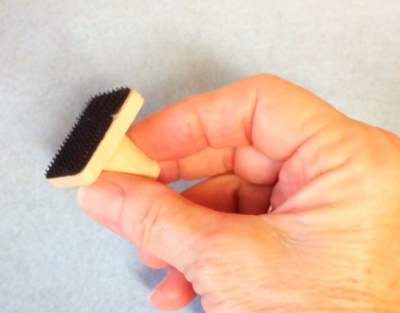
I had to use two separate pieces of velcro to cover the bottom of the stamp.

alcohol ink stamp 12

alcohol ink stamp 13

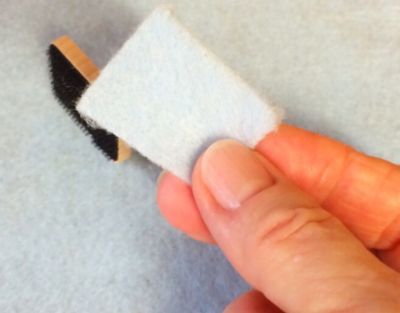
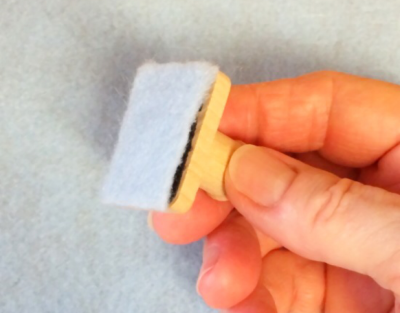
Cut small pieces of felt to stick to the bottom of your alcohol ink stamp for applying the (affiliate) ink to your bottle.

Just remove felt and add another small piece when switching colors of alcohol ink.

Can’t get any easier then that, and best of all it was all things that I had on hand.

Thanks for stopping by! For more Diy projects .

If you enjoyed this post, don't forget to pin it for later!

5 shares
  • Share
  • Tweet

If you enjoyed this post, would you mind taking the time to:
  • Share, or Pin for later reference.
  • Follow me on Facebook, Twitter, Pinterest
  • Leave a comment
Thank you so much for taking the time to comment. I love hearing from my readers, and appreciate the kind words.

Comments

  1. Erin says

    July 30, 2015 at 7:35 am

    I am really impressed with your innovative way! These images are great for my visual learning style! Thanks for posting this.
    Erin recently posted…Why We Should Take Children to the LibraryMy Profile

    Reply
    • Linda @ Mixed Kreations says

      July 30, 2015 at 4:28 pm

      Thanks Erin!

      Reply
  2. Lindsay says

    July 30, 2015 at 8:55 am

    I love the little spool handle- adorable! What do you use this for?
    Lindsay recently posted…Important Everyday Safety TipsMy Profile

    Reply
    • Linda @ Mixed Kreations says

      July 30, 2015 at 4:28 pm

      Thank you Lindsay! I made it to apply alcohol inks to glass bottles.

      Reply
  3. Ashley Servis says

    July 31, 2015 at 5:28 pm

    Interesting craft! I like how you used your resources.
    Ashley Servis recently posted…July IN & OUTMy Profile

    Reply
    • Linda @ Mixed Kreations says

      August 1, 2015 at 7:55 am

      Thanks Ashley! If I can make something in stead of buying I always opt for that.

      Reply

Trackbacks

  1. Diy Tile Coasters - Mixed Kreations Blog says:
    August 17, 2015 at 6:31 am

    […] coasters for quite a while now, I just haven’t decided, do I want to use scrapbook paper, a stamp, or paint something on the […]

    Reply

Leave a Reply Cancel reply

Your email address will not be published. Required fields are marked *

CommentLuv badgeShow more posts

This site uses Akismet to reduce spam. Learn how your comment data is processed.

Thanks for sharing your thoughts and comments! I read and appreciate every single one!

Follow Mixed Kreations

Facebooktwitterpinterestyoutubeinstagram

My Favorites on Amazon

My Amazon Influencer Shop

Homemade Chalk Paint

diy chalk paint

How to Make Rusty Cans

how to make rusty cans

How to Make a Flag From a Wood Shutter

how to make a 2 sided american flag

Easter Egg Jar

How to make a Easter egg jar

Diy Texas Tile Coasters

Texas Tile Coasters

Update a Thrift Store Find

How to Update a Hanging Box in 4 easy steps

Categories

By Kelli & Crystal From Learn To Blog Hangouts

#LearntoBlog Hangouts

Dominate Course

LearntoBlog
Featured on Hometalk.com
Rakuten Affiliate Network Welcome Program
Grow and Make

Dollar Tree

Creative Fabrica Font Bundles

Font Banner - Free Fonts

Featured At

Featured At

Mixed Kreations featured in Country sampler

Featured at

mixed kreations is featured in Bella Crafts online magazine
The Pin Junkie

Canva Photo Editing

Amazon Affiliates

I am a participant in the Amazon Services LLC Associates Program, an affiliate advertising program designed to provide a means for sites to earn advertising fees by advertising and linking to Amazon.com.

Disclosures Statement

This policy is valid from 19 July 2013 This blog is a personal blog written and edited by me. For questions about this blog, please contact Linda @ ldkeesee@mixedkreations.com. This blog accepts forms of cash advertising, sponsorship, paid insertions or other forms of compensation. The compensation received will never influence the content, topics or posts made in this blog. All advertising is in the form of advertisements generated by a third party ad network. Those advertisements will be identified as paid advertisements. The owner(s) of this blog is compensated to provide opinion on products, services, websites and various other topics. Even though the owner(s) of this blog receives compensation for our posts or advertisements, we always give our honest opinions, findings, beliefs, or experiences on those topics or products. The views and opinions expressed on this blog are purely the bloggers' own. Any product claim, statistic, quote or other representation about a product or service should be verified with the manufacturer, provider or party in question. This blog does not contain any content which might present a conflict of interest. To get your own policy, go to http://www.disclosurepolicy.org

Copyright © 2023 · Modern Blogger Pro Theme By, Pretty Darn Cute Design