Mixed Kreations

The Creative Life & Journey Of A DIY'ER

  • Home
  • Diy Projects
    • Handmade Cross Projects
    • Holiday & Seasonal Projects
    • Mason Jars
    • Fun Upcyled Shutters & Spindles
    • Texas Projects
    • Upcycled Cans
    • Wood Projects
    • Jewelry Tutorials
  • Quick and Easy Recipes
  • Shop Mixed Kreations
    • Etsy Shop
    • Mixed Kreations Amazon Influencer
  • DISCLOSURES STATEMENT & PRIVACY POLICY
  • About Me
  • Recommendations
You are here: Home / DIY/Craft Projects / repurposed/upcycled / Diy Grungy Can – Repurposed Tin Can

Diy Grungy Can – Repurposed Tin Can

September 28, 2015 By: Linda @ Mixed Kreations15 Comments

If you enjoyed this post, don't forget to pin it for later!

2116 shares
  • Share
  • Tweet

The first time I heard of a grungy can, I had to find out what it was, and once I seen one I knew I had to make my own. It started out twirling around in my head, than the idea came for my Diy Grungy Can.

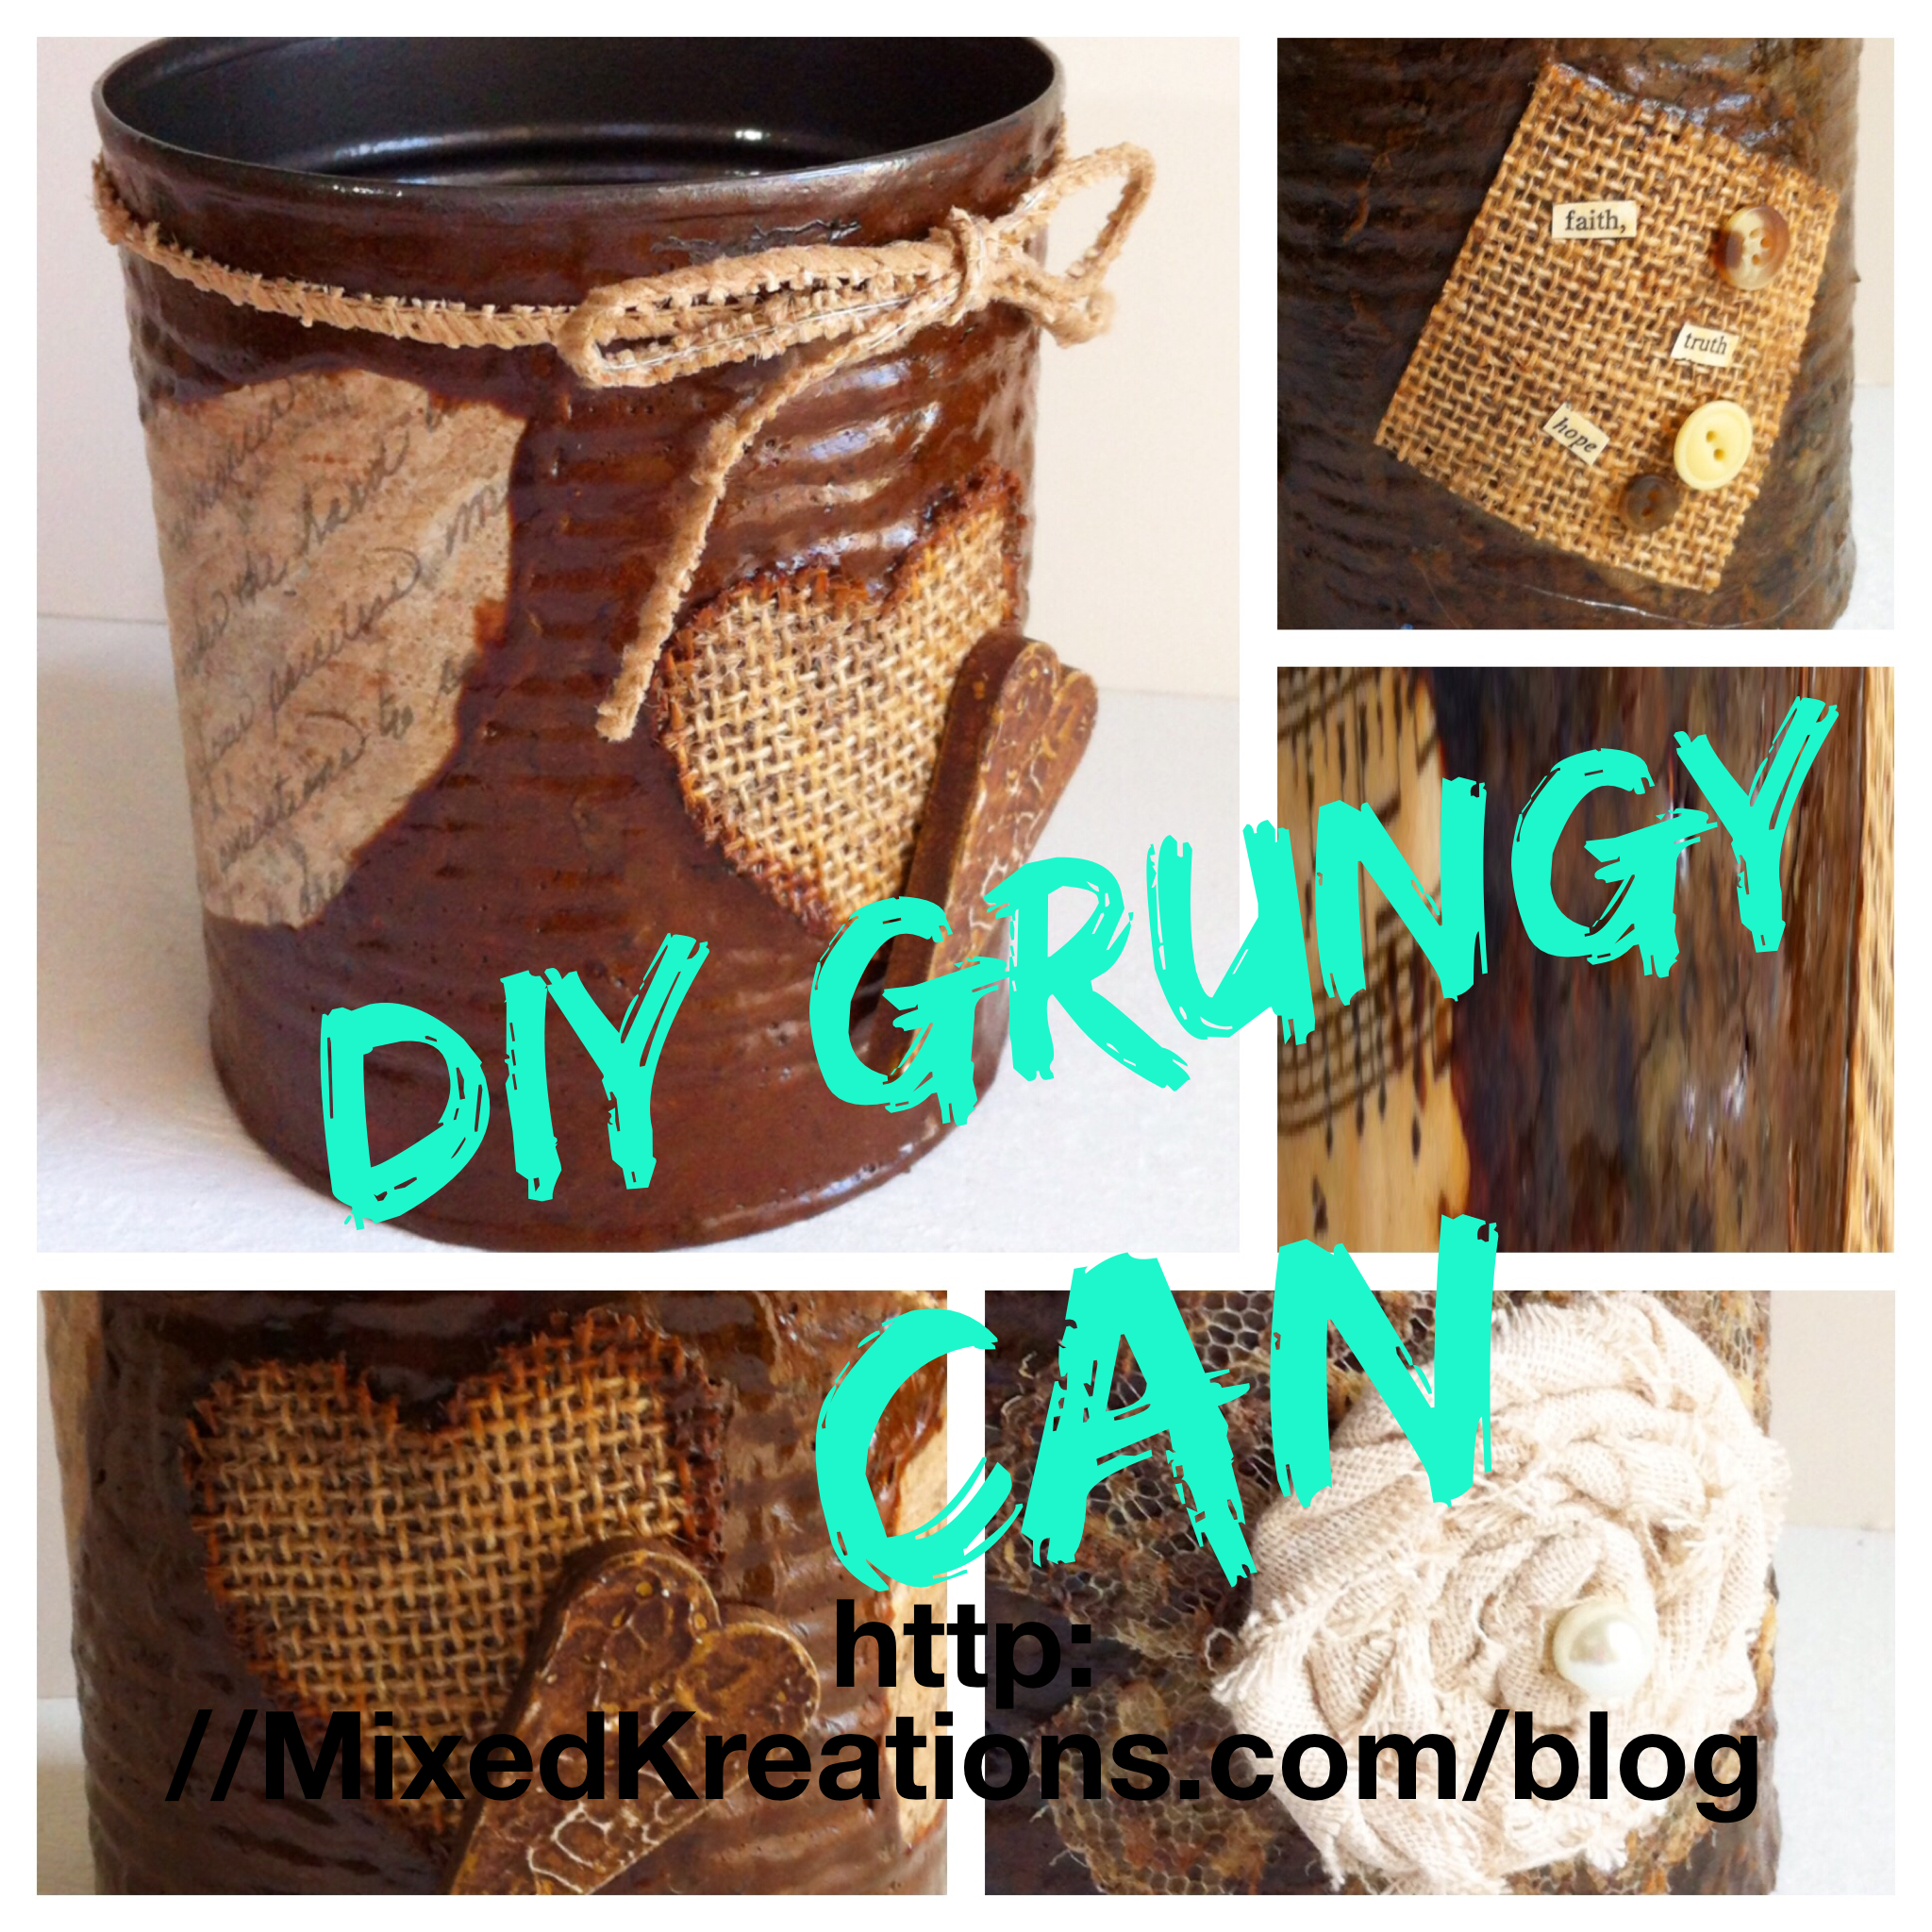
Make A Diy Grungy Can

I made this grungy can quite a while back but never got around to making a tutorial.

Then when I was going through my pictures and clearing some of them out I ran across these pictures for my diy grungy can.

How to make a grungy can using instant coffee. #GrungyCan #TinCanCrafts #diy
Powered By the Tweet This Plugin
Tweet This

How To Make A Grungy Can

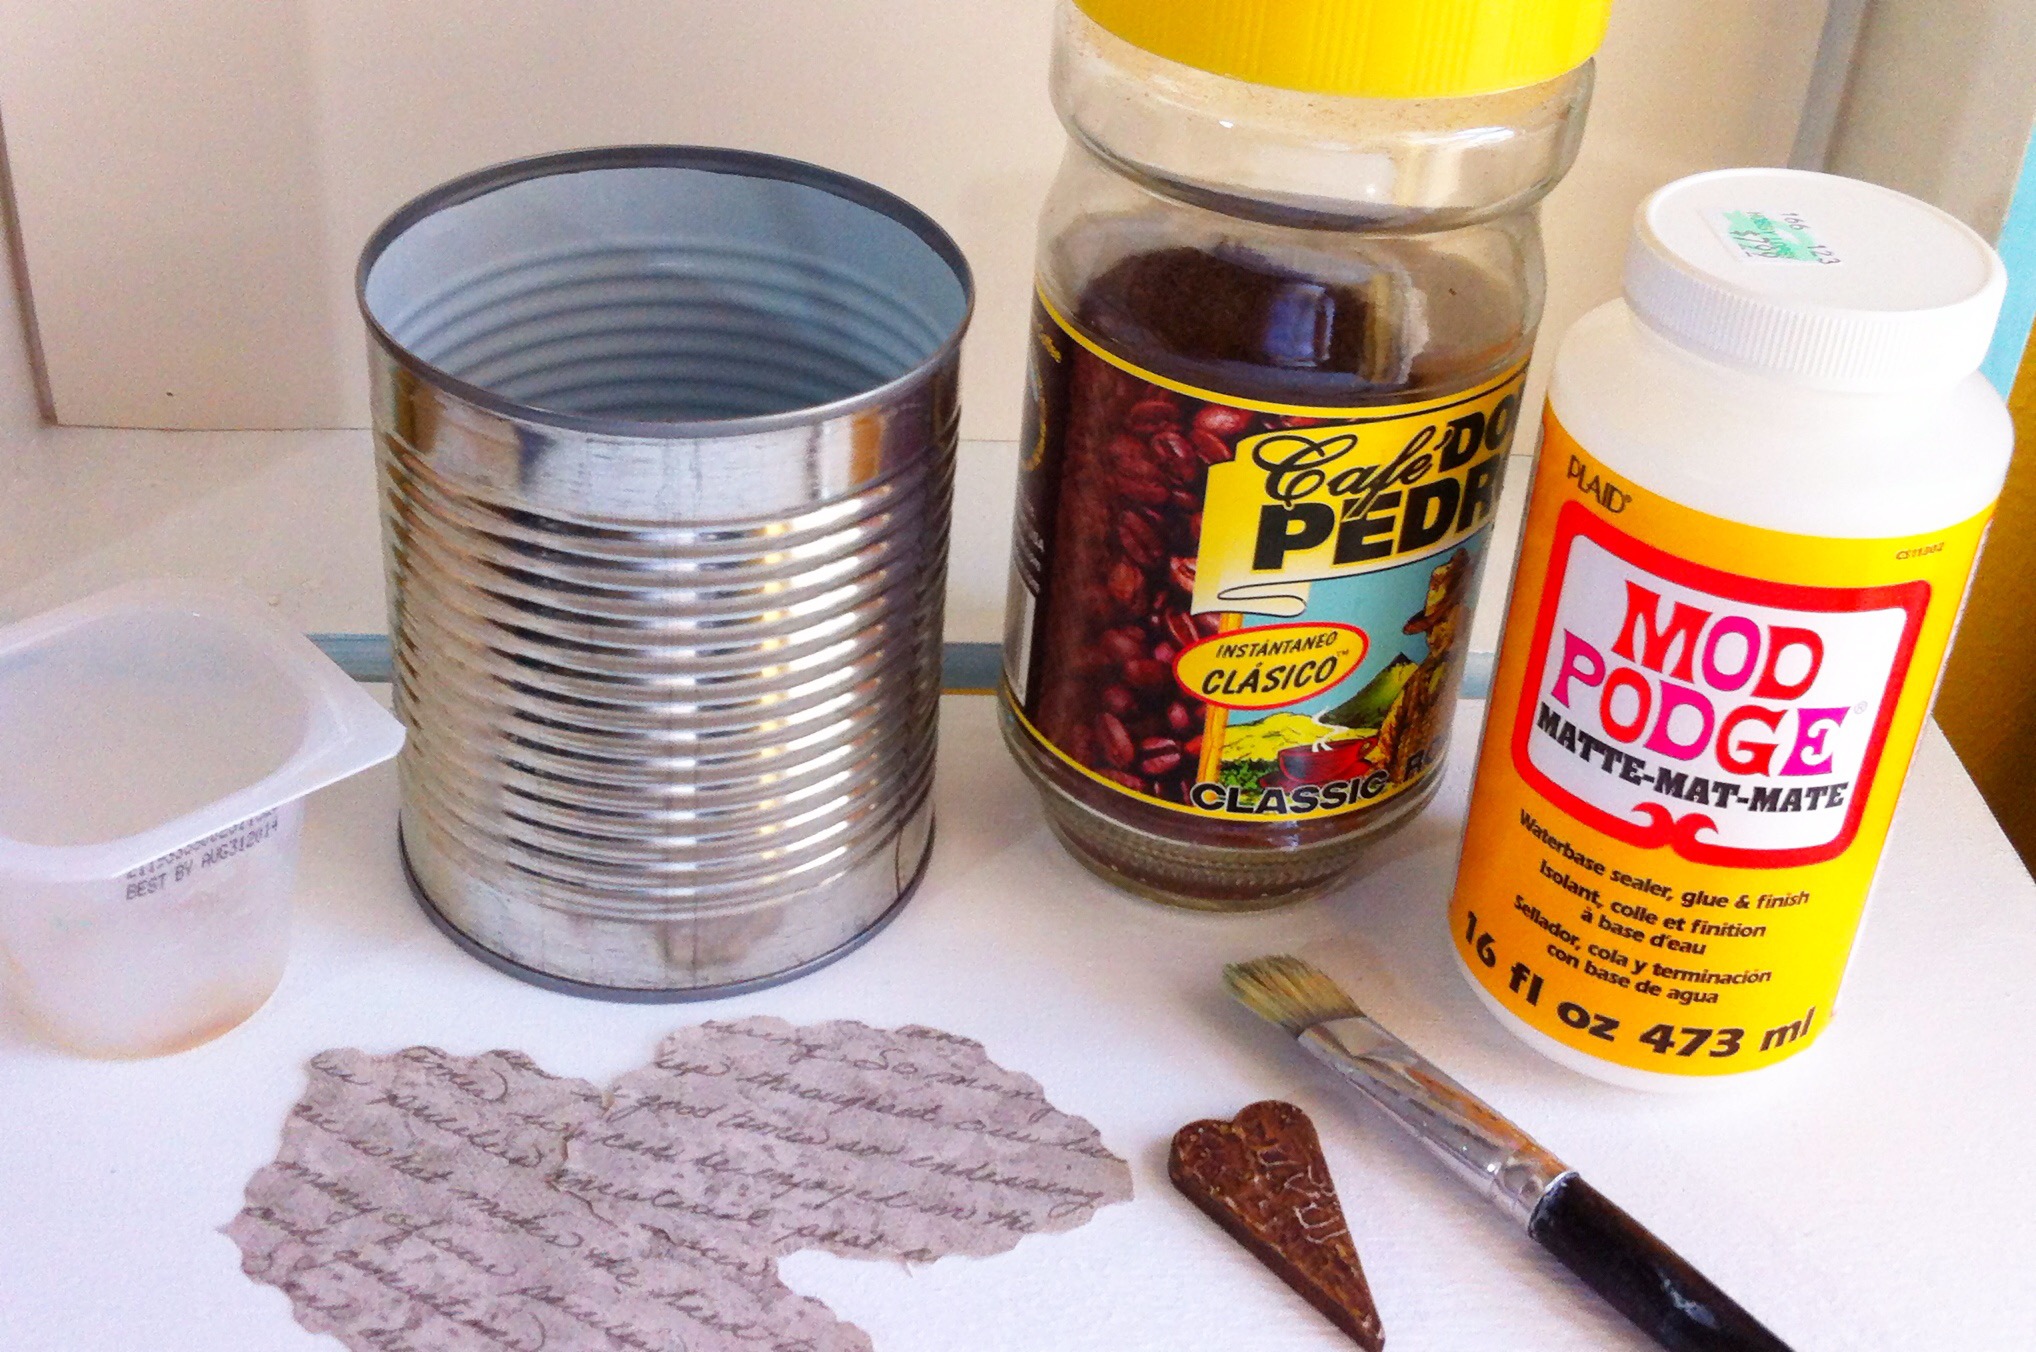
I first cut a piece of scrapbook paper, whatever shape you desire. Then Mod Podge it on your tin can, and Mod Podge over it also.

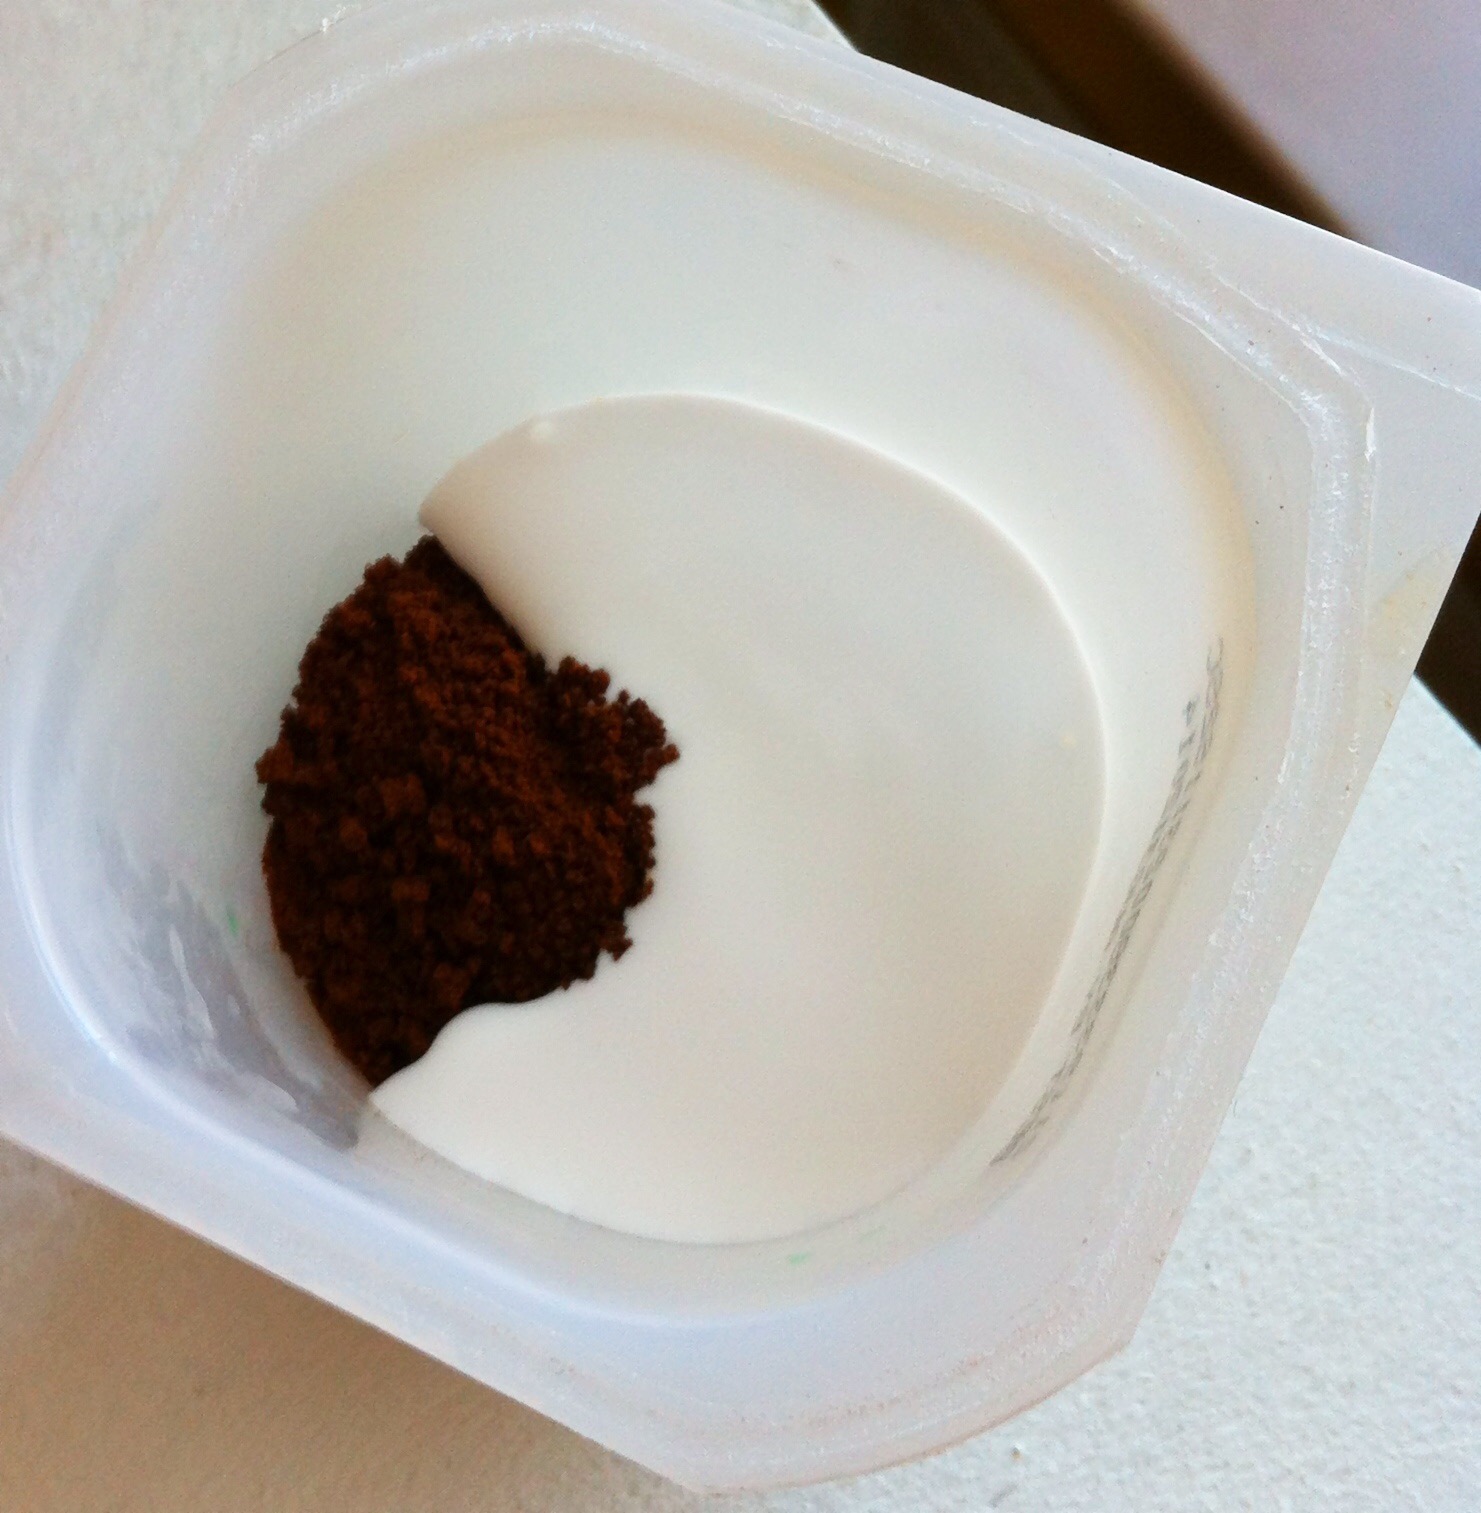
To make your grungy can you will need a mixture of Mod Podge and coffee granules.

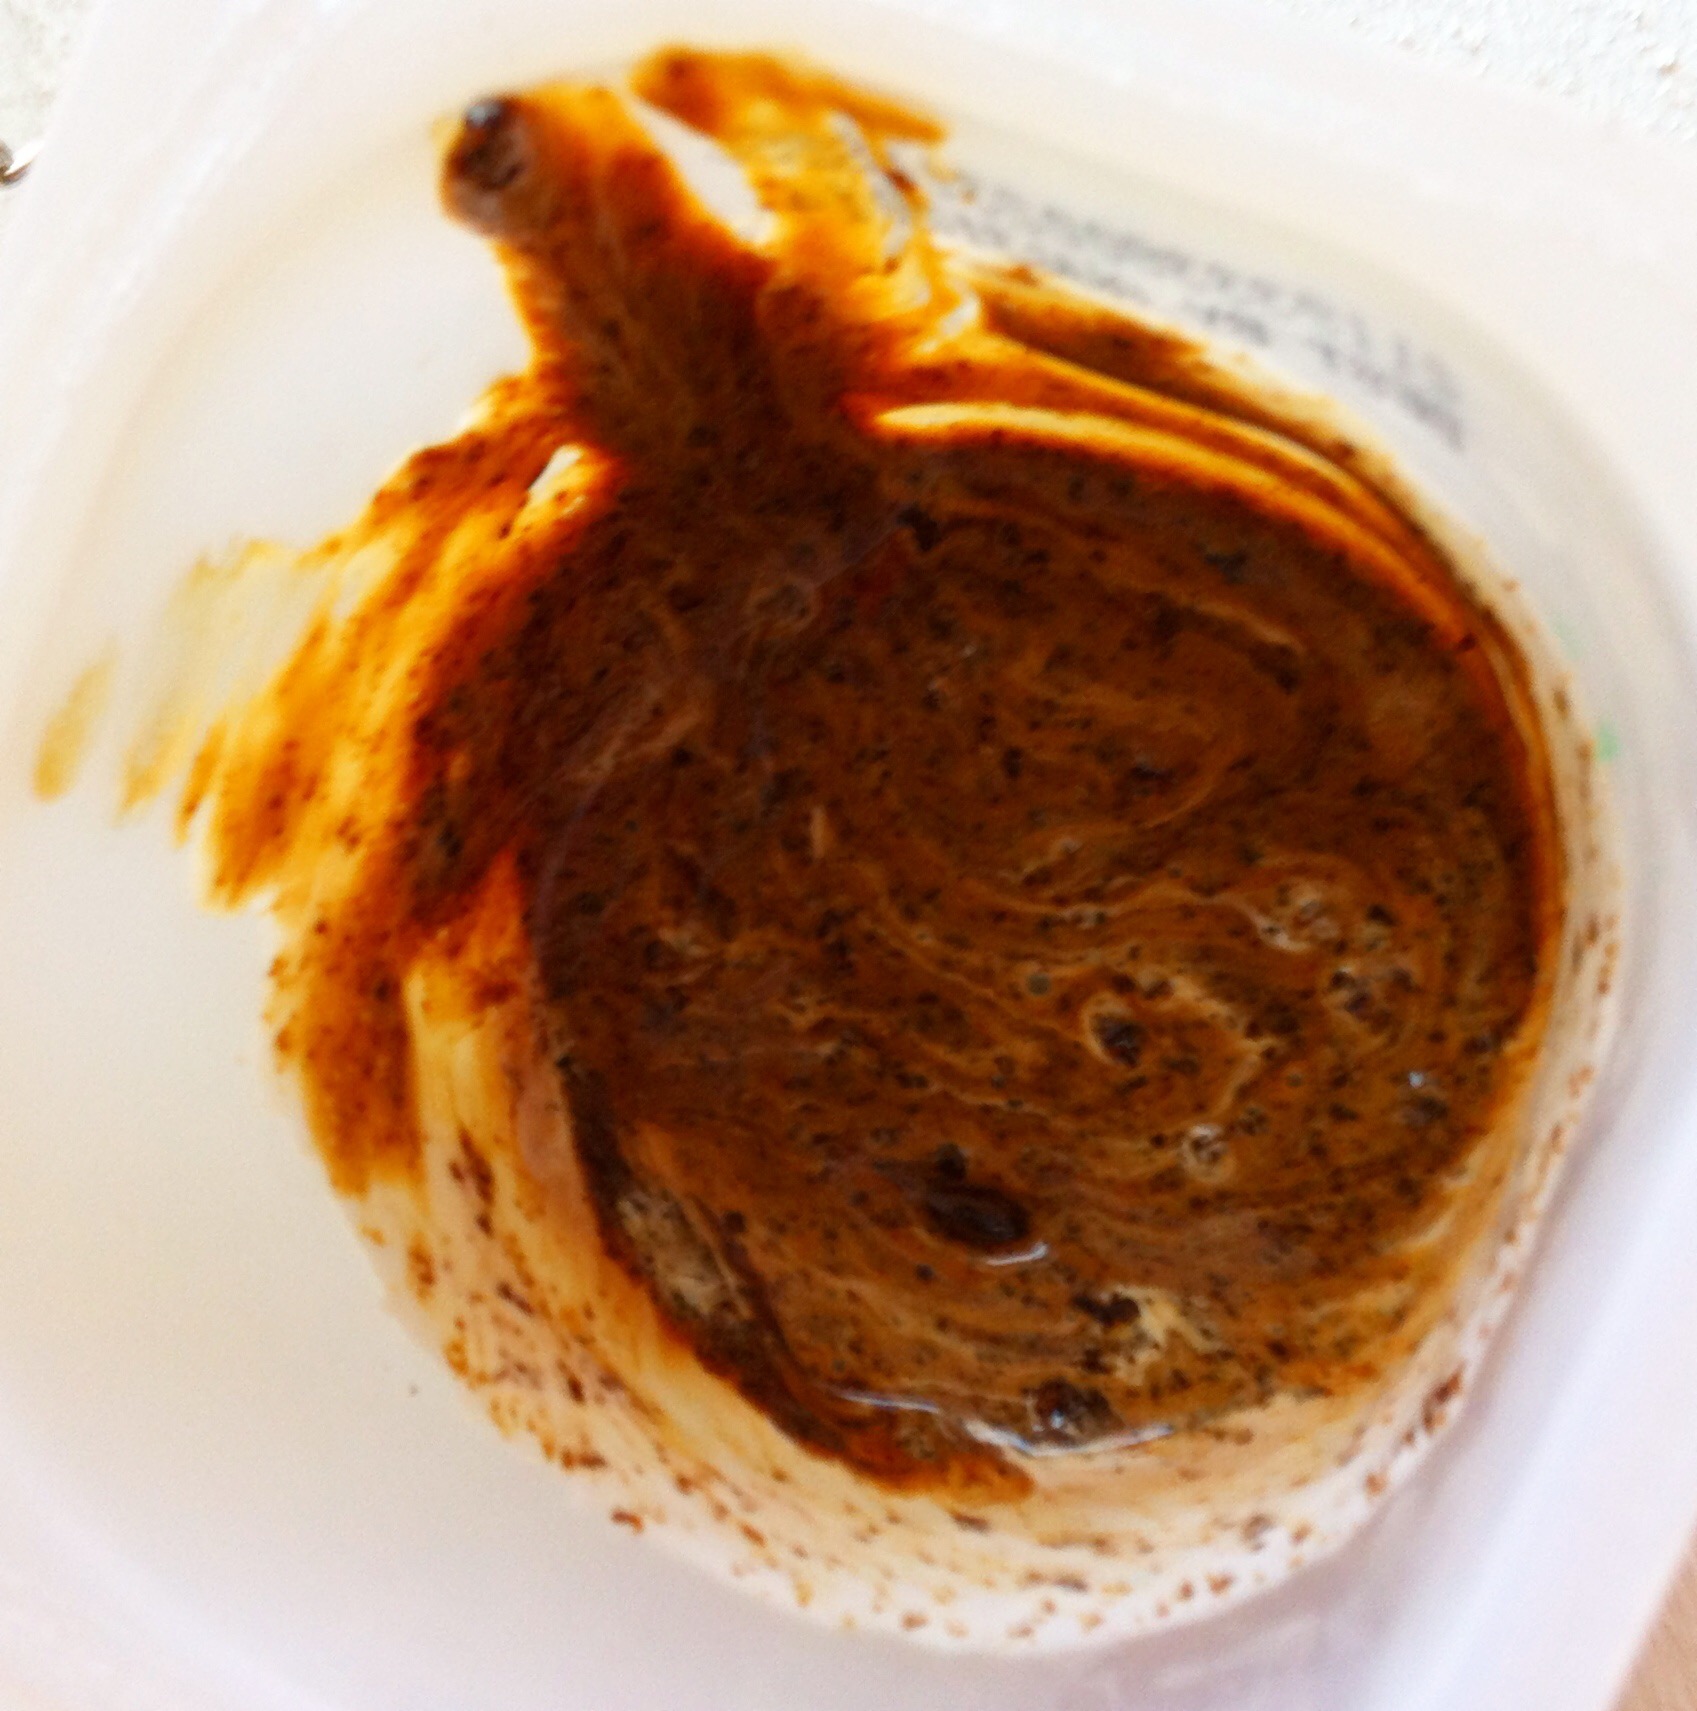
Add to a disposable container and mix well.

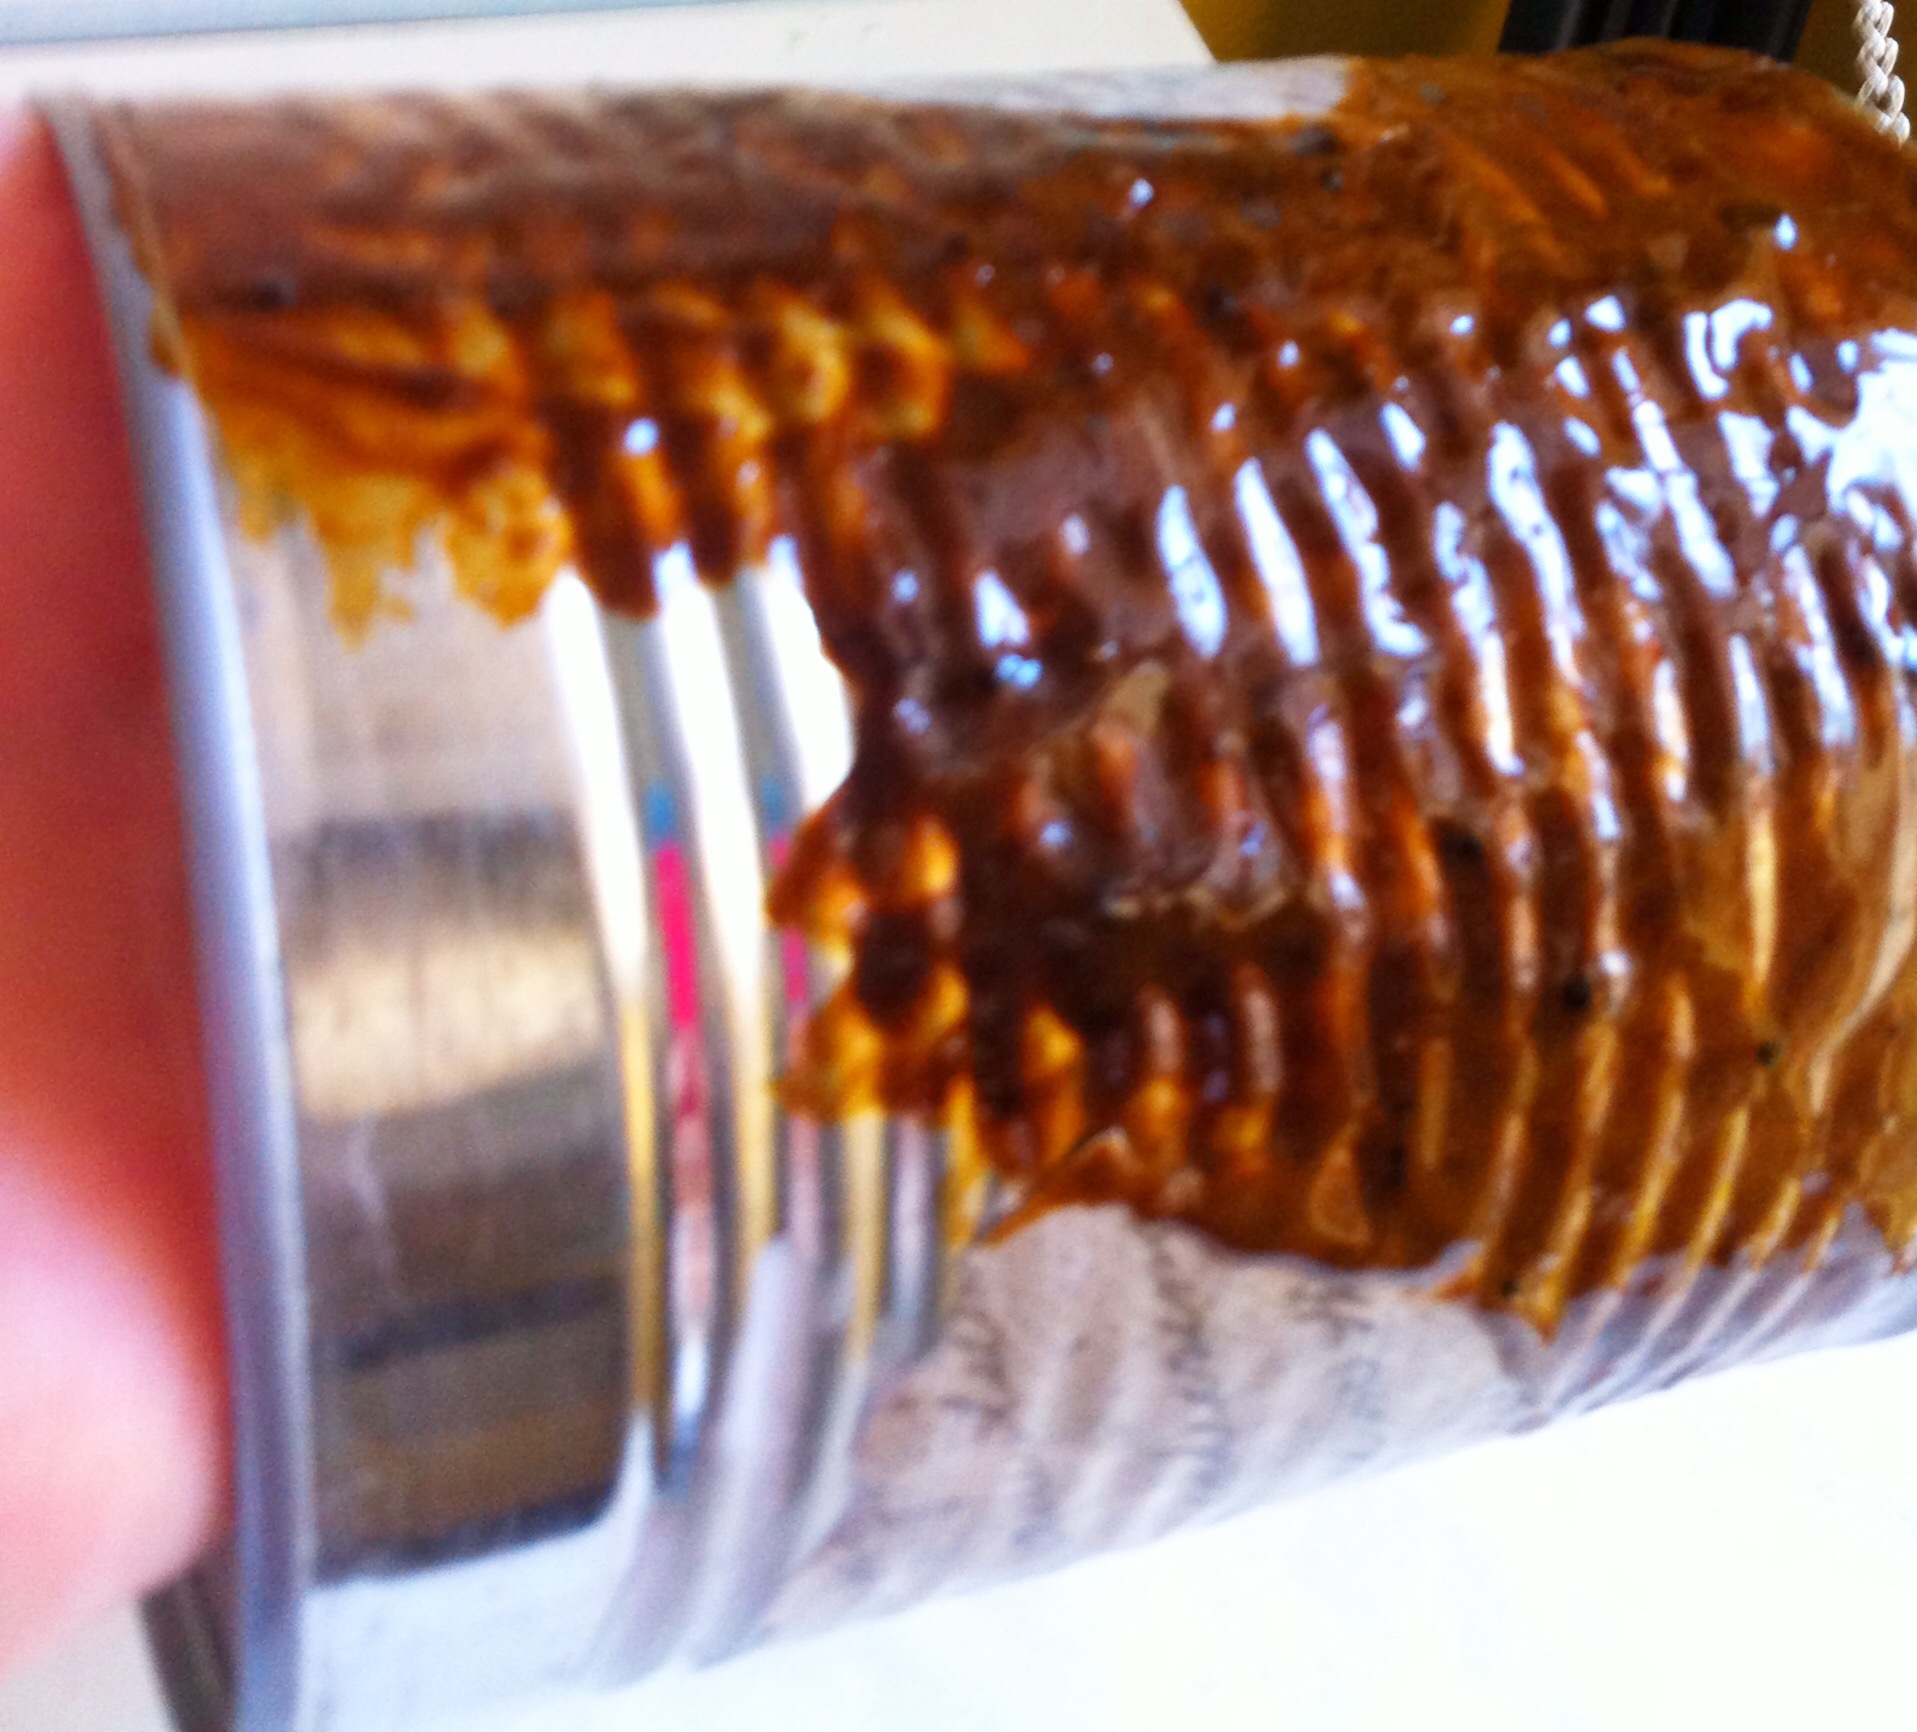
Start by painting the edges and around your scrapbook paper.

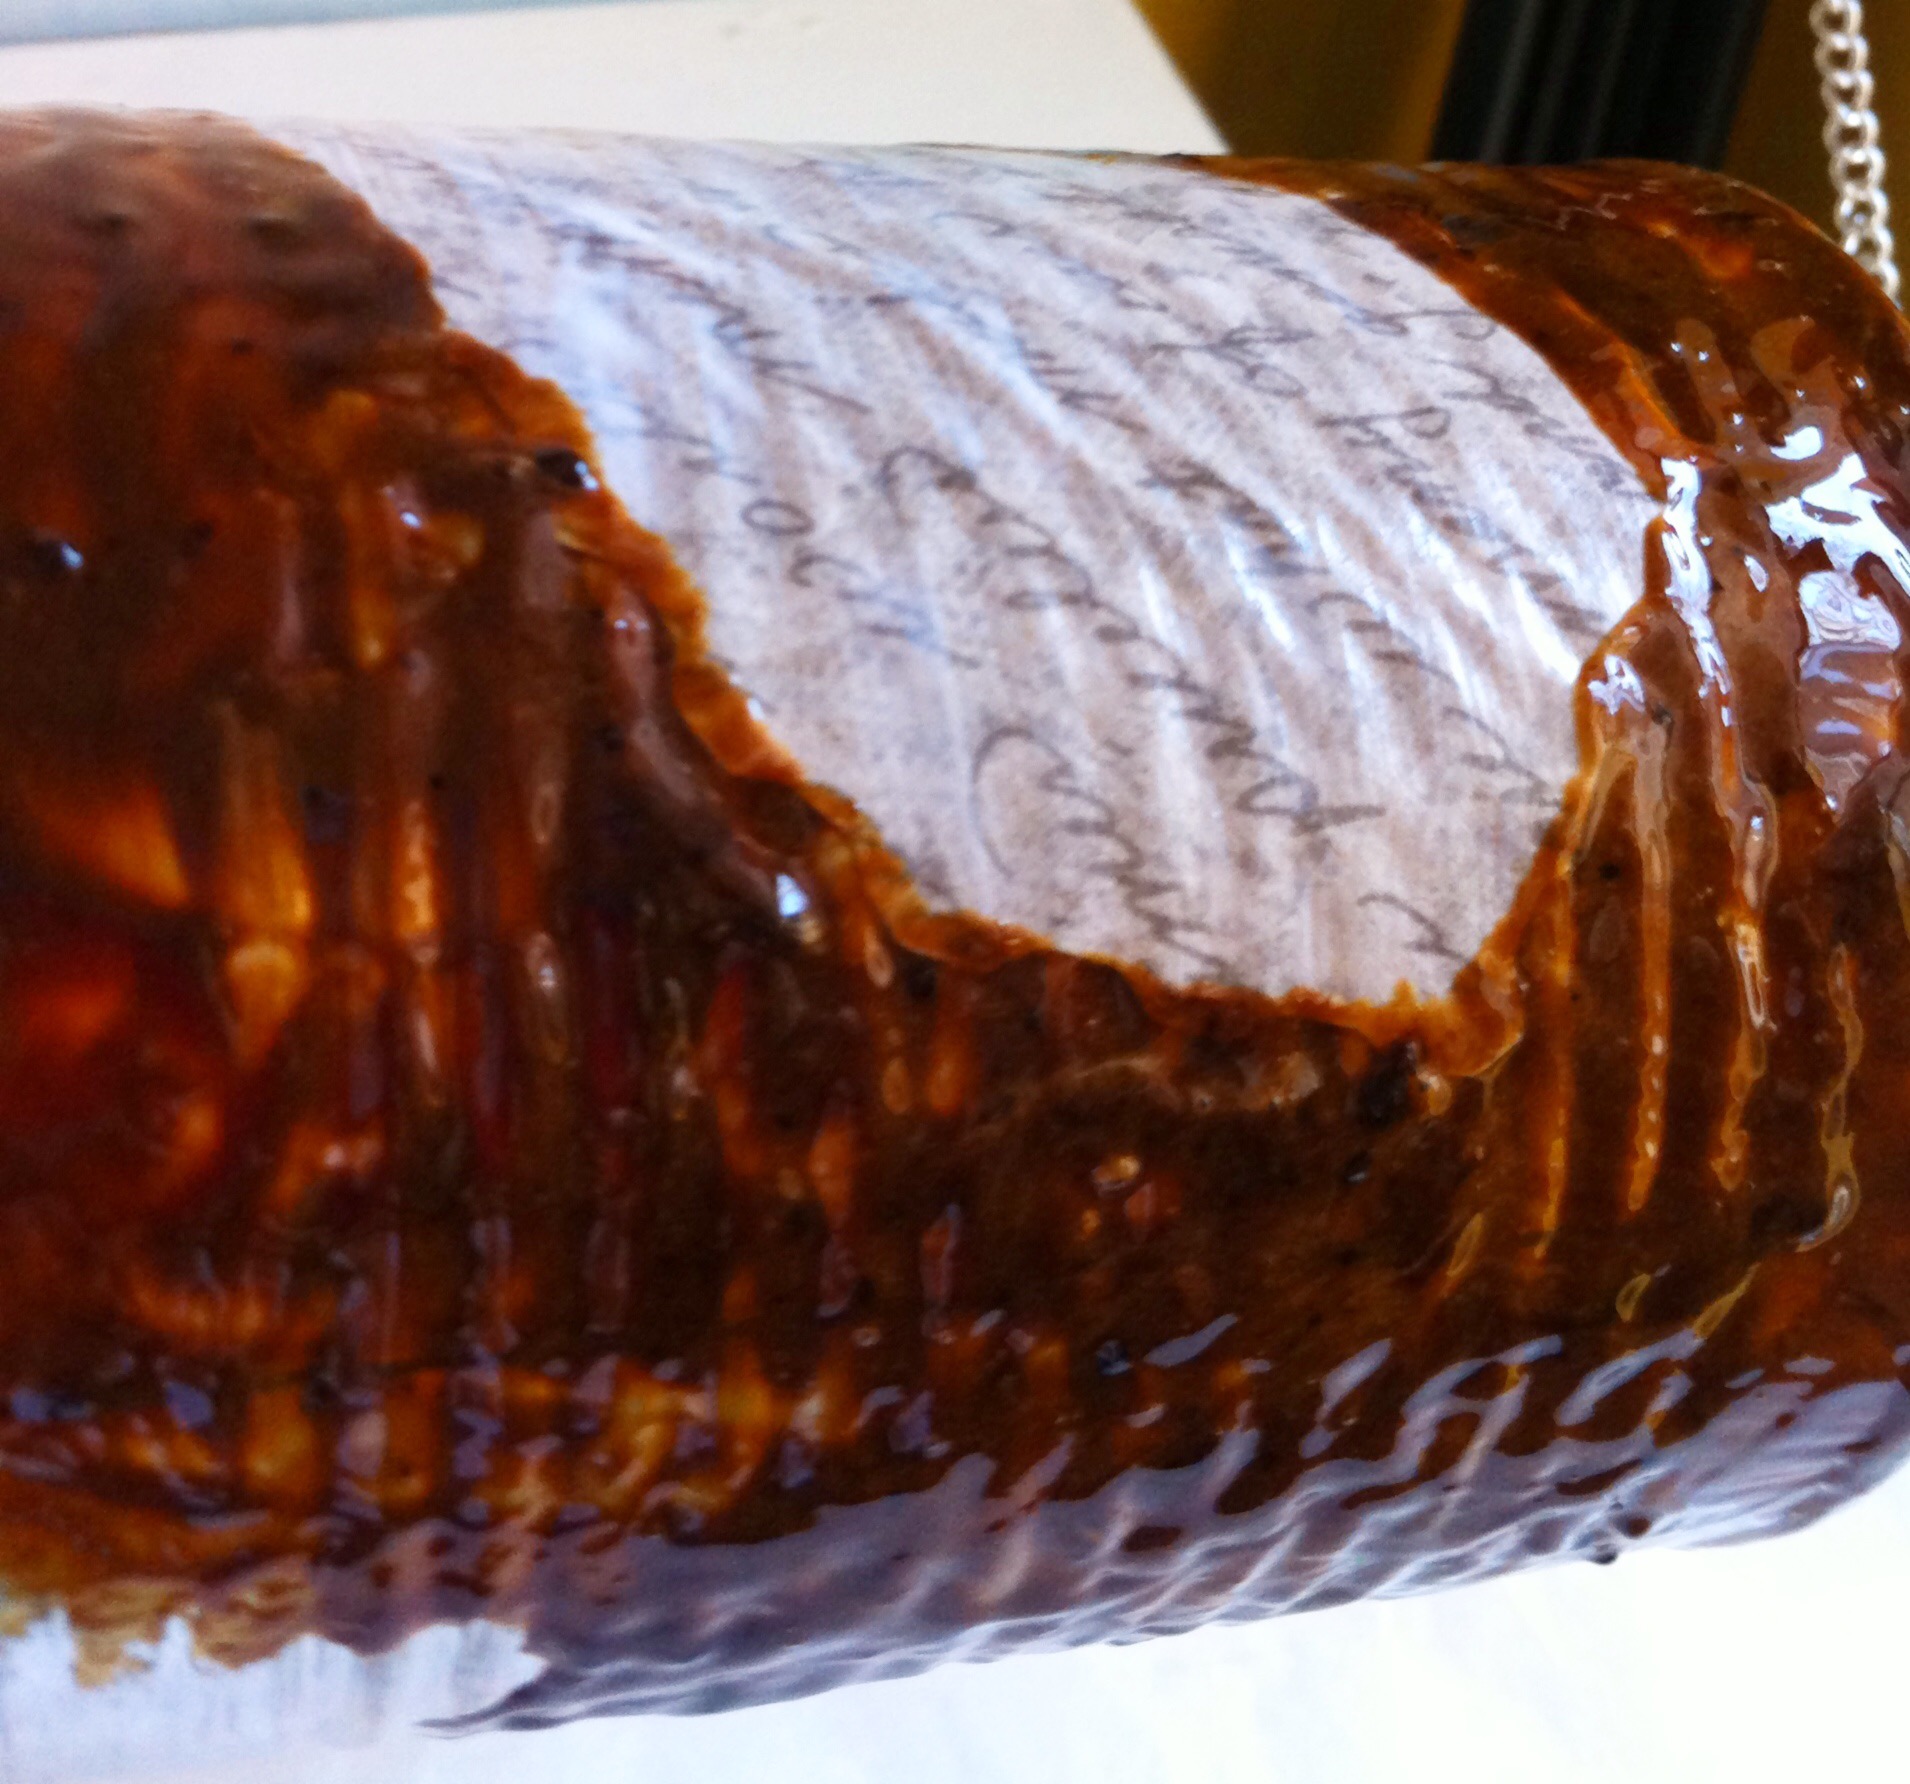
Cover your can completely with the mixture, except over the scrapbook paper.

First time I ever seen a grungy I knew I had to make me one of my own. #GrungyCan #TinCan #diy
Powered By the Tweet This Plugin
Tweet This

I added this burlap heart by sticking it to my grungy can while it was still wet, then dap some of the mixture to the edges. The wood heart was glued on once it all dried.

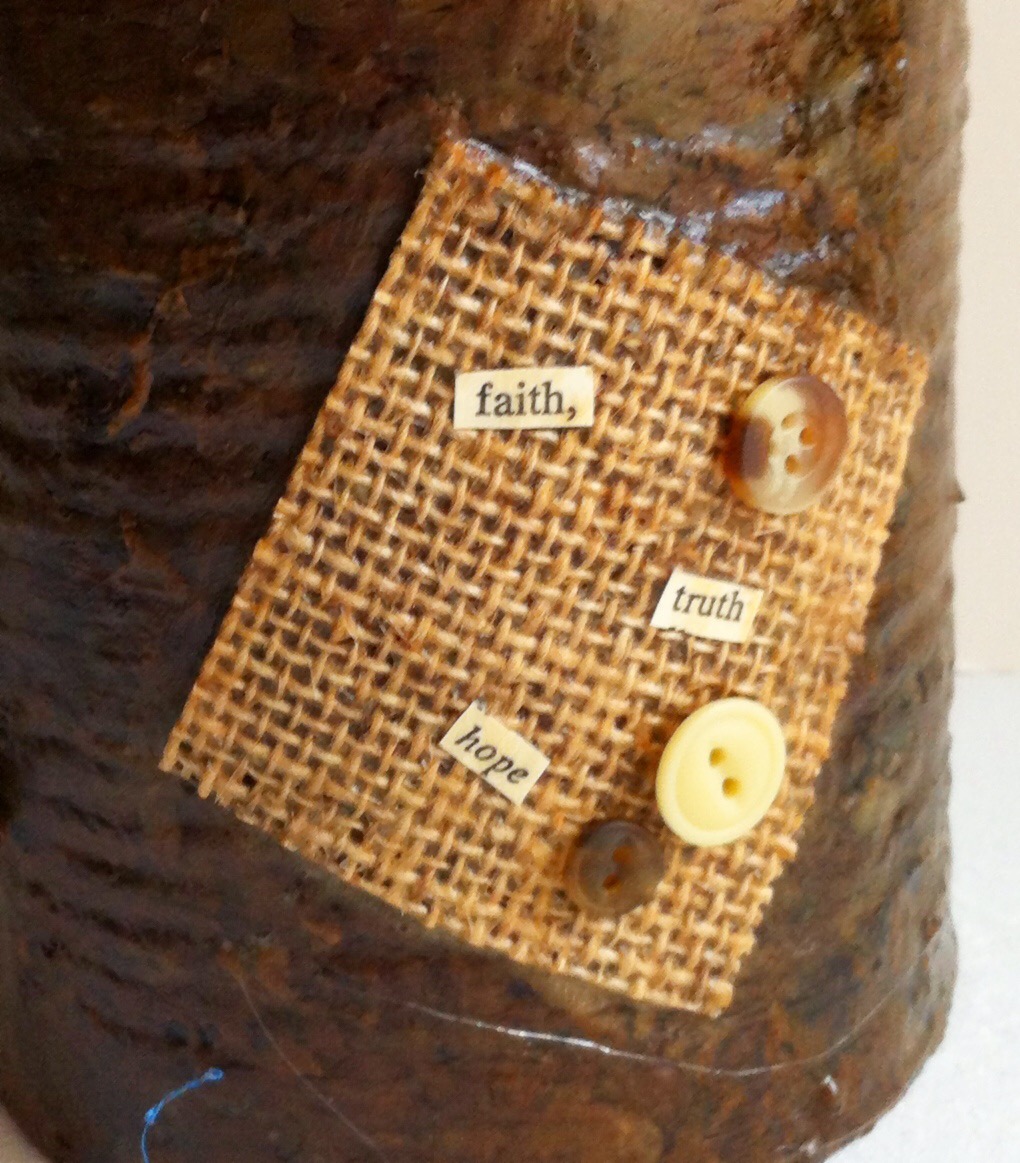
This burlap square was added to the wet side of the grungy can like above. The words were added later with Mod Podge and the buttons were glued on.

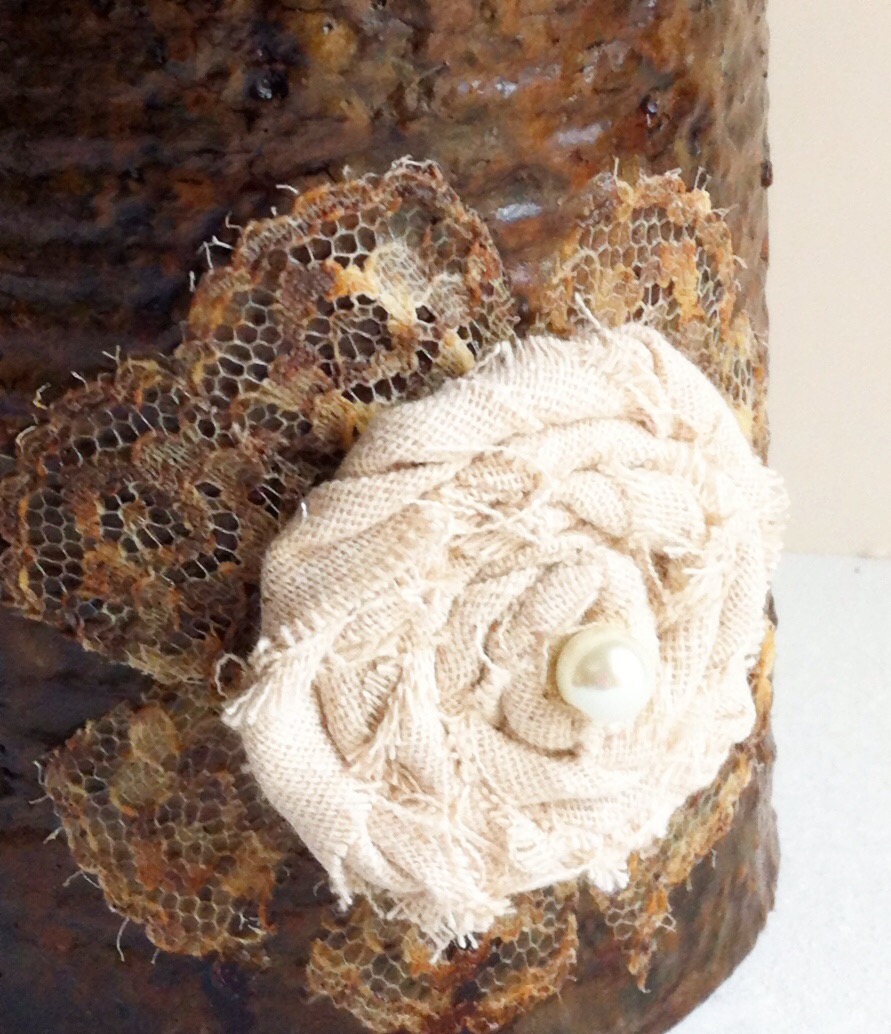
This one was on another can that I had made, by placing pieces of lace in a circle on top of the wet mixture, then sapping a light coat of mixture over top.

The handmade fabric flower with the Pearl center was glued on later.

*This post contains affiliate links, if you click on an affiliate link & buy something I may receive a small commission at no extra charge to you. The affiliate money I earn helps pay the expenses to keep this site running. Please read my full advertising disclosure for more info. Thanks so much for your support!*

Grungy Can Supply List

  • Tin can
  • Mod Podge
  • Instant Coffee Granules 
  • Burlap
  • Scrapbook paper
  • Wood heart
  • Lace
  • Fabric flower 
  • Paint brush 
  • Jute
  • Disposable container
  •  

    Have you made any grungy cans or bottles?

    If you found this post helpful Please share, or pin and save for later. Thanks!

    If you enjoyed this post, don't forget to pin it for later!

    2116 shares
    • Share
    • Tweet

    If you enjoyed this post, would you mind taking the time to:
    • Share, or Pin for later reference.
    • Follow me on Facebook, Twitter, Pinterest
    • Leave a comment
    Thank you so much for taking the time to comment. I love hearing from my readers, and appreciate the kind words.

    Comments

    1. Davina says

      September 28, 2015 at 9:20 am

      Hi Linda,

      It’s amazing what you can do with a handful of supplies. Your grungy can is really great to look at, and I admire your creativity.
      Davina recently posted…How to Beat your Biggest Blogging ChallengesMy Profile

      Reply
      • Linda @ Mixed Kreations says

        September 28, 2015 at 4:47 pm

        Thank you Davina! This grungy can was really easy to make and I don’t think you could really go wrong anyway you embellish it. Makes great storage for the craft room. Thanks for stopping by!

        Reply
    2. Denise/DIY Crush says

      November 4, 2015 at 9:19 am

      I LOVE, LOVE, LOVE this project!! It’s looks vintage! Amazing!! Stopping by from #WAYWOW and I’d love to have you come over and link your post up to my craft party which starts at 7pm EST. and is new every Thursday! I also pin every post!

      http://www.diy-crush.com/blog/category/link-party/
      Denise/DIY Crush recently posted…Bubble Skirt Sewing PatternMy Profile

      Reply
      • Linda @ Mixed Kreations says

        November 4, 2015 at 8:51 pm

        Thanks for the invite Denise!

        Reply
    3. Nikki Frank-Hamilton says

      November 9, 2015 at 7:55 pm

      I had never heard of a “grungy” can! I learn so much each day from bloggers like you who share their creations! It’s pretty amazing what a bit of coffee can create? I knew coffee was the wonder drug, but this is another plus to add to the coffee list!
      Nikki Frank-Hamilton recently posted…Changed, if we are lucky enough, we become better.My Profile

      Reply
      • Linda @ Mixed Kreations says

        November 10, 2015 at 9:17 am

        LOL I think I like the coffee on the can better (-;

        Reply
    4. Tara says

      August 21, 2016 at 9:11 pm

      Your grungy can looks great! I love the fabric flower!

      Reply
      • Linda @ Mixed Kreations says

        August 22, 2016 at 4:46 am

        Thanks Tara! Sometimes great things just pop in your head! LOL and they just happen to do that in the middle of the night so I can’t sleep Grrrr until I draw a picture or make a note. These little flowers are so easy to make and can be used in all kinds of projects.

        Reply
    5. Sarah - Craft Invaders says

      August 22, 2016 at 4:02 am

      I have used coffee to stain paper before Linda, but it never occurred to me to add it to glue – cant wait to try it!

      Reply
      • Linda @ Mixed Kreations says

        August 22, 2016 at 4:43 am

        Sarah, I have used coffee and tea to stain paper, and fabric. Then one day I that just popped in my head so I gave it a try. It works great, and it doesn’t take much at all.

        Reply
    6. alice says

      June 17, 2021 at 8:09 am

      Can this be done over a already painted plastic Jar???

      Reply
      • Linda @ Mixed Kreations says

        June 17, 2021 at 3:07 pm

        I don’t see why you couldn’t.

        Reply

    Trackbacks

    1. How To Make Rusty Cans says:
      November 16, 2015 at 5:37 am

      […] will need a tin can, salt, and Hydrogen Peroxide to make your own rusty […]

      Reply
    2. Faux Sea Glass Mason Jar - Mixed Kreations says:
      July 11, 2018 at 3:15 pm

      […] so easy. The recipe I found said to use Elmer’s glue, but I didn’t have any, so I used Mod Podge instead. (Supply list at bottom of […]

      Reply
    3. Easy Diy Tin Can Pumpkins - Fall Decor - Mixed Kreations says:
      July 25, 2018 at 9:00 am

      […] Quick and Easy Repurposed Tin Cans How to Make Rusty Tin Cans Grungy Can […]

      Reply

    Leave a Reply Cancel reply

    Your email address will not be published. Required fields are marked *

    CommentLuv badgeShow more posts

    This site uses Akismet to reduce spam. Learn how your comment data is processed.

    Thanks for sharing your thoughts and comments! I read and appreciate every single one!

    Follow Mixed Kreations

    Facebooktwitterpinterestyoutubeinstagram

    My Favorites on Amazon

    My Amazon Influencer Shop

    Homemade Chalk Paint

    diy chalk paint

    How to Make Rusty Cans

    how to make rusty cans

    How to Make a Flag From a Wood Shutter

    how to make a 2 sided american flag

    Easter Egg Jar

    How to make a Easter egg jar

    Diy Texas Tile Coasters

    Texas Tile Coasters

    Update a Thrift Store Find

    How to Update a Hanging Box in 4 easy steps

    Categories

    By Kelli & Crystal From Learn To Blog Hangouts

    #LearntoBlog Hangouts

    Dominate Course

    LearntoBlog
    Featured on Hometalk.com
    Rakuten Affiliate Network Welcome Program
    Grow and Make

    Dollar Tree

    Creative Fabrica Font Bundles

    Font Banner - Free Fonts

    Featured At

    Featured At

    Mixed Kreations featured in Country sampler

    Featured at

    mixed kreations is featured in Bella Crafts online magazine
    The Pin Junkie

    Canva Photo Editing

    Amazon Affiliates

    I am a participant in the Amazon Services LLC Associates Program, an affiliate advertising program designed to provide a means for sites to earn advertising fees by advertising and linking to Amazon.com.

    Disclosures Statement

    This policy is valid from 19 July 2013 This blog is a personal blog written and edited by me. For questions about this blog, please contact Linda @ ldkeesee@mixedkreations.com. This blog accepts forms of cash advertising, sponsorship, paid insertions or other forms of compensation. The compensation received will never influence the content, topics or posts made in this blog. All advertising is in the form of advertisements generated by a third party ad network. Those advertisements will be identified as paid advertisements. The owner(s) of this blog is compensated to provide opinion on products, services, websites and various other topics. Even though the owner(s) of this blog receives compensation for our posts or advertisements, we always give our honest opinions, findings, beliefs, or experiences on those topics or products. The views and opinions expressed on this blog are purely the bloggers' own. Any product claim, statistic, quote or other representation about a product or service should be verified with the manufacturer, provider or party in question. This blog does not contain any content which might present a conflict of interest. To get your own policy, go to http://www.disclosurepolicy.org

    Copyright © 2023 · Modern Blogger Pro Theme By, Pretty Darn Cute Design