Mixed Kreations

The Creative Life & Journey Of A DIY'ER

  • Home
  • Diy Projects
    • Handmade Cross Projects
    • Holiday & Seasonal Projects
    • Mason Jars
    • Fun Upcyled Shutters & Spindles
    • Texas Projects
    • Upcycled Cans
    • Wood Projects
    • Jewelry Tutorials
  • Quick and Easy Recipes
  • Shop Mixed Kreations
    • Etsy Shop
    • Mixed Kreations Amazon Influencer
  • DISCLOSURES STATEMENT & PRIVACY POLICY
  • About Me
  • Recommendations
You are here: Home / DIY/Craft Projects / repurposed/upcycled / Diy Jewelry Tray – Repurposed Picture Frame

Diy Jewelry Tray – Repurposed Picture Frame

September 26, 2016 By: Linda @ Mixed Kreations17 Comments

If you enjoyed this post, don't forget to pin it for later!

141 shares
  • Share
  • Tweet

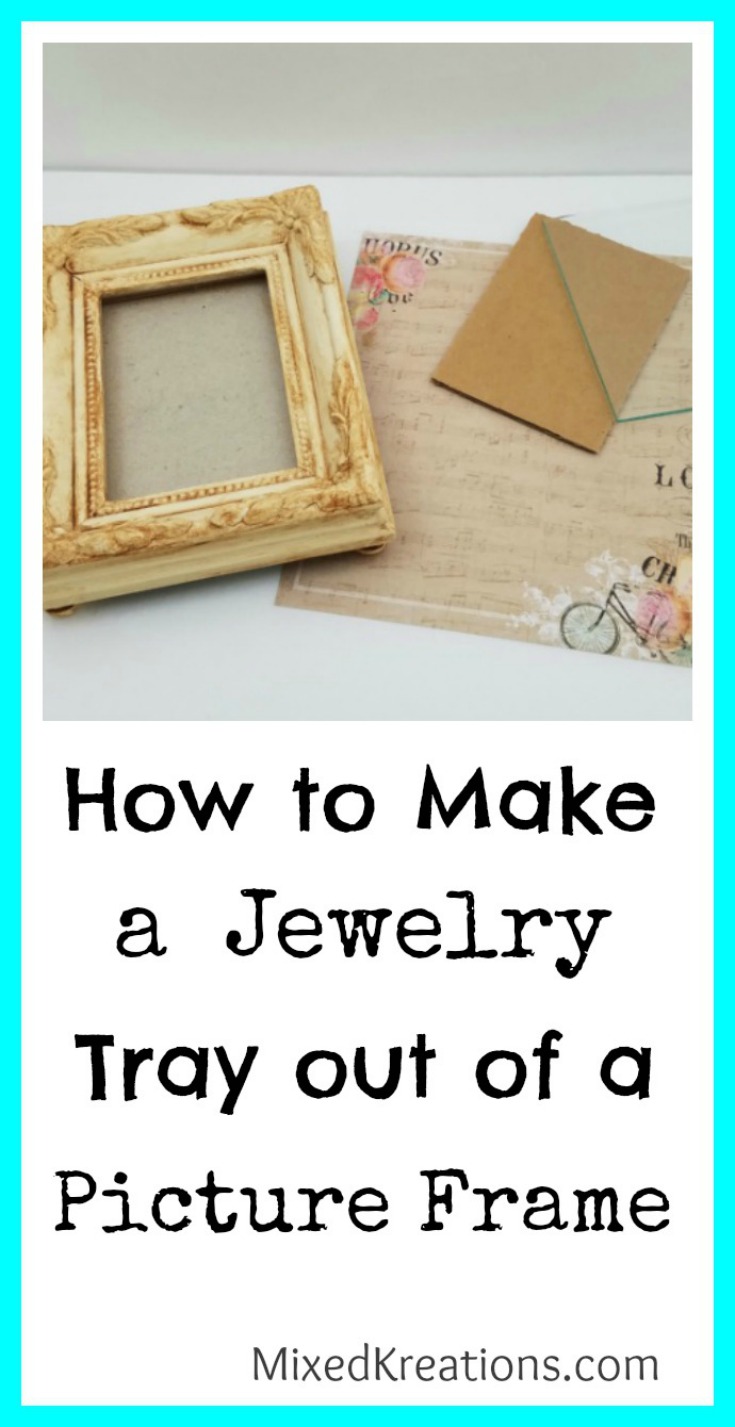
When I ran across this pretty little picture frame I knew if would be the perfect frame for my diy jewelry tray project.

diy jewelry tray

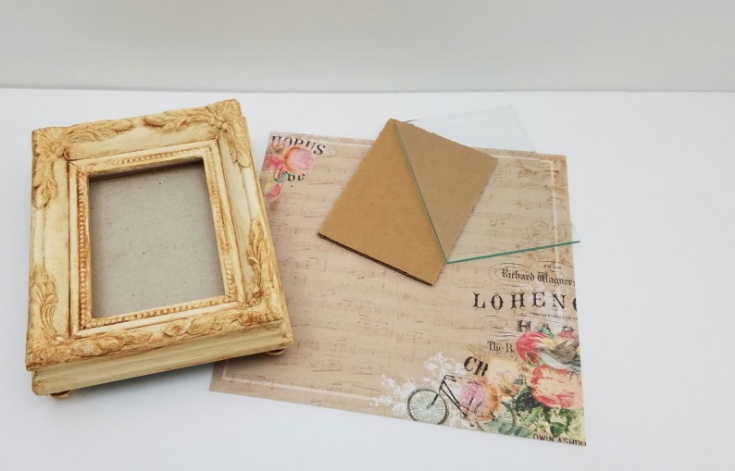
First start by finding a cute little wood frame, then removed the glass and cardboard from the frame by opening the window in the back. Then close the little window back in place.

repurposed frame into jewelry tray

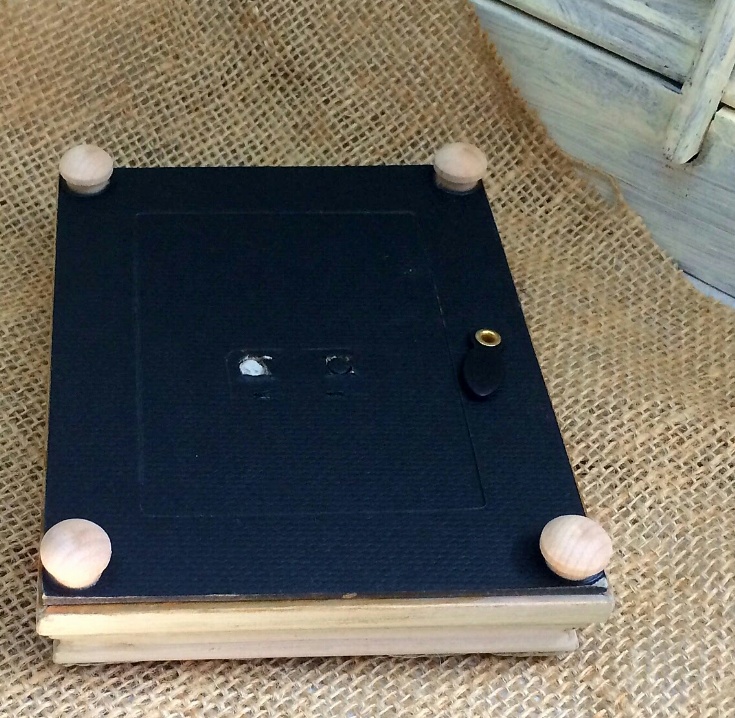
I then flipped the wood frame over and glued the wooden plugs in the four corners on the bottom of the frame.

diy jewelry tray

I repurposed this small frame into a jewelry tray. #repurposed #PictureFrame
Powered By the Tweet This Plugin
Tweet This

repurposed frame into jewelry tray

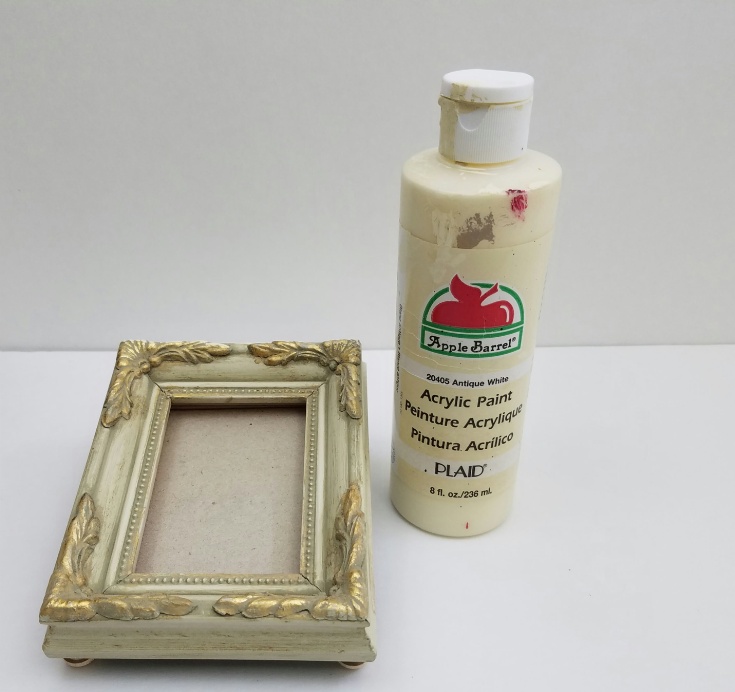
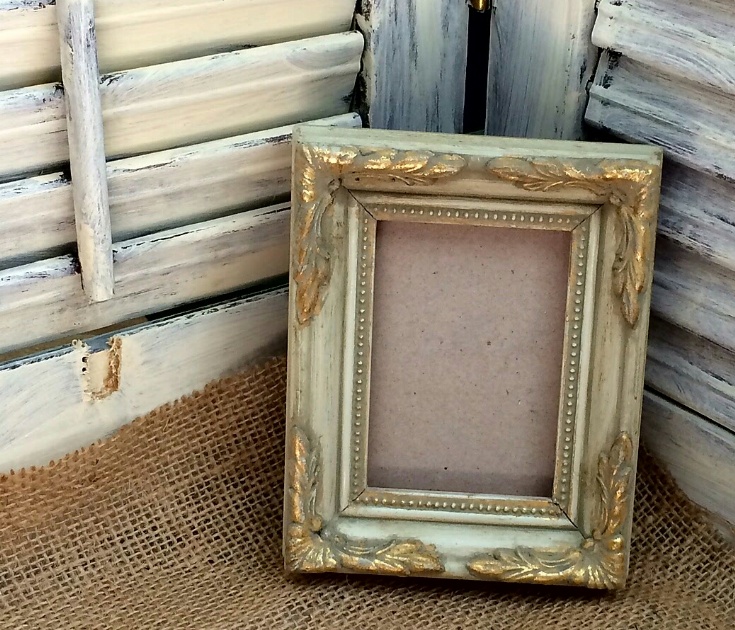
Then I painted the frame, wood plugs and the edges of the back of the frame (cardboard backing) with antique white acrylic paint.

repurposed frame

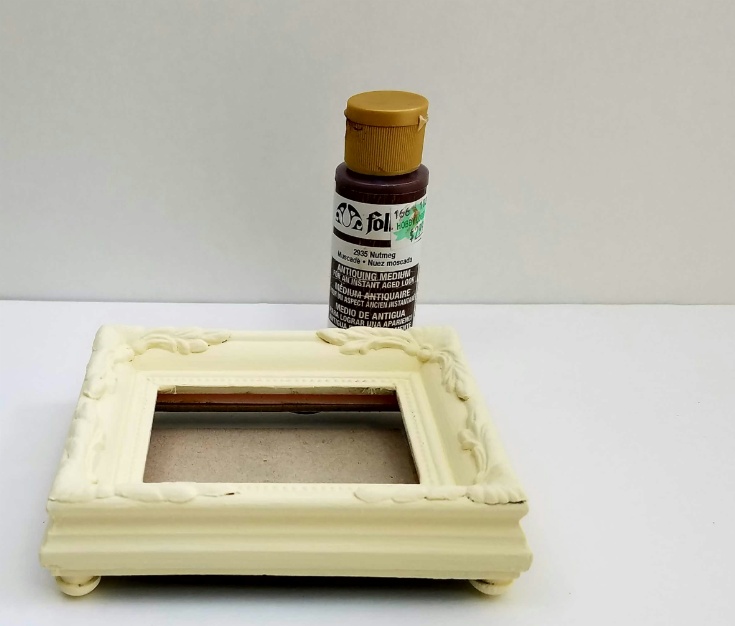
Next I watered down some of my favor antiquing medium and covered the frame by working in sections. Then wiping off any excess till I got the desired look that I wanted.

While that was drying I cut my piece of scrapbook paper the same size as the glass from the frame.

diy jewelry tray

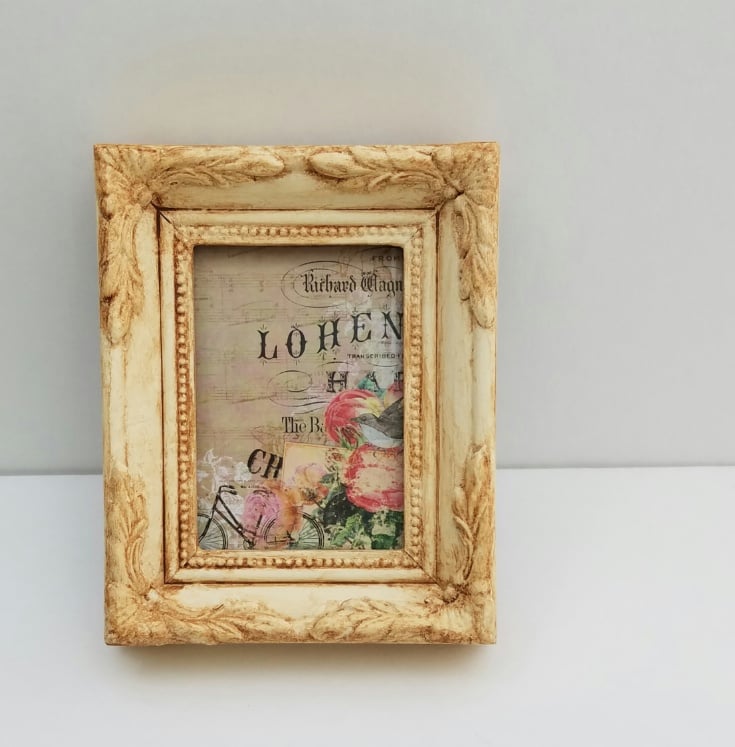
Now it’s time to put the scrapbook paper in the little diy jewelry tray.

How to make a mini jewelry tray from a small picture frame. #repurposed
Powered By the Tweet This Plugin
Tweet This

diy jewelry tray

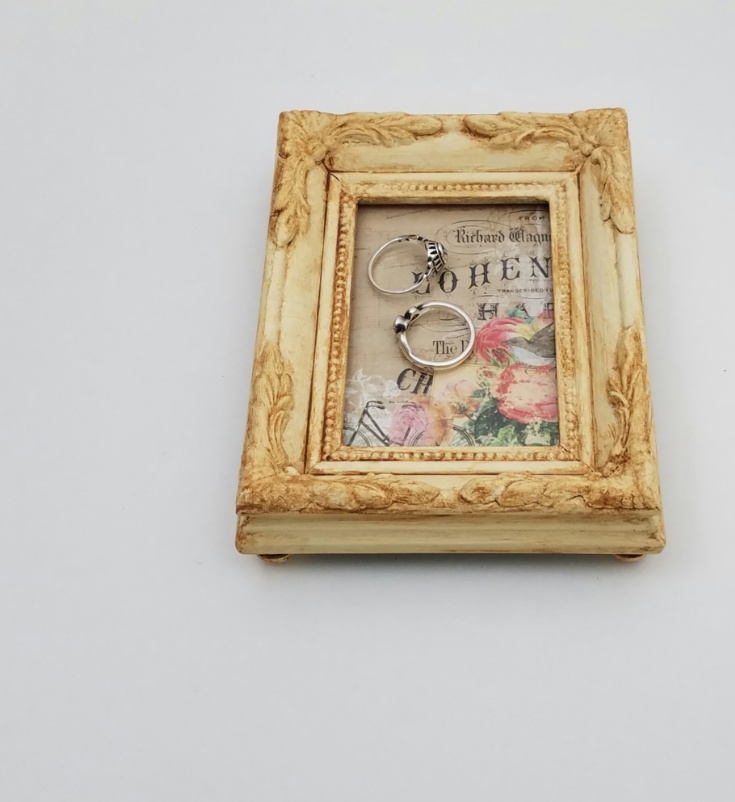
This pretty little diy jewelry tray is great for holding rings and things. I love how it turned out, and I think that the scrapbook paper looks perfect in the little frame. What do you think?

*This post contains affiliate links, if you click on an affiliate link & buy something I may receive a small commission at no extra charge to you. The affiliate money I earn helps pay the expenses to keep this site running. Please read my full advertising disclosure for more info. Thanks so much for your support!*

Diy Jewelry Tray Supplies

Small wood picture frame (I picked up at Goodwill)
Scrapbook paper to fit frame (Hobby Lobby, Michaels, and JoAnn’s have a great section)
4 wooden plugs
Wood glue (I use gorilla wood glue, pretty good stuff)
Antique white acrylic paint
Antiquing medium

diy jewelry tray out of a frame

diy jewelry tray from small frame

If you enjoyed this post, don't forget to pin it for later!

141 shares
  • Share
  • Tweet

If you enjoyed this post, would you mind taking the time to:
  • Share, or Pin for later reference.
  • Follow me on Facebook, Twitter, Pinterest
  • Leave a comment
Thank you so much for taking the time to comment. I love hearing from my readers, and appreciate the kind words.

Comments

  1. Sarah Jean says

    September 26, 2016 at 3:57 pm

    Super cute! I didn’t start using a jewelry case until I got married and needed a place for my rings.

    Reply
    • Linda @ Mixed Kreations says

      October 2, 2016 at 4:31 pm

      Thanks Sarah! This little frame makes a great place to lay your jewelry overnight.

      Reply
  2. Michelle says

    September 26, 2016 at 11:44 pm

    Gorgeous Linda I love the colors you used and that’s such a totally clever and unique way to repurpose a frame.

    Reply
    • Linda @ Mixed Kreations says

      October 2, 2016 at 4:29 pm

      Thank you Michelle! I was debating whether to paint it or leave it like it was and just add the scrapbook paper.

      Reply
  3. Celeste | The Whole Serving says

    September 27, 2016 at 8:58 pm

    I love it and I like the choice of print inside.

    Reply
    • Linda @ Mixed Kreations says

      October 2, 2016 at 4:26 pm

      Thank you Celeste! When I was looking at the scrapbook paper that I had on hand, I knew that was the print for the little frame.

      Reply
  4. Nikki Frank-Hamilton says

    October 3, 2016 at 11:45 am

    Linda, it turned out se perfect! You could use this tutorial and adapt it to any decor, the perfect project. And who doesn’t need a space to corral often used jewelry? I have a jewelry box, but I hate to have to look through it to find the pieces I use most. I want them nearby so I can grab them on the way out the door.

    This would be a perfect Christmas gift for a man or a woman. You could make it specific to their decor and personality. A teen girl would love this, as well as an older Girl like me. And a man would have the perfect place for his watch, keys and wallet!

    What a great idea, and Christmas is coming! I better find some frames!

    Reply
    • Linda @ Mixed Kreations says

      October 6, 2016 at 6:25 am

      Thank you Nikki! Most things that I make go to the craft booth but this was a keeper. I will have to look for more small frames, the Grand daughters may like one. Now for the hubby I would need a large frame he likes watches.
      Once we get our masterbath finished I am thinking of making a larger and narrow version for the vanity to organize things.

      Reply
  5. Wendi @ H2OBungalow says

    March 21, 2017 at 5:57 am

    Your scrapbook paper is the perfect choice for your pretty tray. What a smart upcycle! You won’t loose jewelry pieces when you take them off. Pinned!

    Reply
    • Linda @ Mixed Kreations says

      March 23, 2017 at 4:26 pm

      Thanks Wendi! While looking through my scrapbook paper that piece was the one that jumped out at me as the perfect piece. That’s for pinning!

      Reply
  6. Florence @ VintageSouthernPicks says

    November 11, 2017 at 9:17 am

    That’s gorgeous Linda! That frame! Love the paper too. Pinning & sharing.

    Reply
    • Linda @ Mixed Kreations says

      November 11, 2017 at 4:34 pm

      Thank you Florence! I had been saving the paper for something special, and I thought that the frame would be perfect. Thanks for Sharing!

      Reply
  7. Maria says

    March 7, 2018 at 12:02 pm

    What a beautiful project! I am in love with this idea. i have so many frames too.

    Reply
    • Linda @ Mixed Kreations says

      March 8, 2018 at 4:54 pm

      Thank you Maria! I have a pretty good collection of frames as well, and have a tray made out of a frame on my list to make. Thanks for stopping by!

      Reply
  8. Nina Lewis says

    January 20, 2020 at 5:11 pm

    I just saw this on Twitter. I absolutely LOVE It! It’s so clever.

    I invite you to share this at my Party in Your PJs link party that starts on Tuesday at 7:00 p.m. And, feel free to share a couple of other awesome ideas you have.

    The party is at http://grandmaideas.com

    Reply
    • Linda @ Mixed Kreations says

      January 27, 2020 at 11:43 am

      Thank you Nina! This was a quick and easy project.

      Reply

Trackbacks

  1. 16 Brilliant Ways to Organize Jewelry & Accessories • Organizenvy says:
    August 2, 2022 at 9:57 am

    […] need a simple solution to store a few key pieces of jewelry (like rings) that we wear daily. This DIY jewelry tray from Mixed Kreations is perfect for such a […]

    Reply

Leave a Reply Cancel reply

Your email address will not be published. Required fields are marked *

CommentLuv badgeShow more posts

This site uses Akismet to reduce spam. Learn how your comment data is processed.

Thanks for sharing your thoughts and comments! I read and appreciate every single one!

Follow Mixed Kreations

Facebooktwitterpinterestyoutubeinstagram

My Favorites on Amazon

My Amazon Influencer Shop

Homemade Chalk Paint

diy chalk paint

How to Make Rusty Cans

how to make rusty cans

How to Make a Flag From a Wood Shutter

how to make a 2 sided american flag

Easter Egg Jar

How to make a Easter egg jar

Diy Texas Tile Coasters

Texas Tile Coasters

Update a Thrift Store Find

How to Update a Hanging Box in 4 easy steps

Categories

By Kelli & Crystal From Learn To Blog Hangouts

#LearntoBlog Hangouts

Dominate Course

LearntoBlog
Featured on Hometalk.com
Rakuten Affiliate Network Welcome Program
Grow and Make

Dollar Tree

Creative Fabrica Font Bundles

Font Banner - Free Fonts

Featured At

Featured At

Mixed Kreations featured in Country sampler

Featured at

mixed kreations is featured in Bella Crafts online magazine
The Pin Junkie

Canva Photo Editing

Amazon Affiliates

I am a participant in the Amazon Services LLC Associates Program, an affiliate advertising program designed to provide a means for sites to earn advertising fees by advertising and linking to Amazon.com.

Disclosures Statement

This policy is valid from 19 July 2013 This blog is a personal blog written and edited by me. For questions about this blog, please contact Linda @ ldkeesee@mixedkreations.com. This blog accepts forms of cash advertising, sponsorship, paid insertions or other forms of compensation. The compensation received will never influence the content, topics or posts made in this blog. All advertising is in the form of advertisements generated by a third party ad network. Those advertisements will be identified as paid advertisements. The owner(s) of this blog is compensated to provide opinion on products, services, websites and various other topics. Even though the owner(s) of this blog receives compensation for our posts or advertisements, we always give our honest opinions, findings, beliefs, or experiences on those topics or products. The views and opinions expressed on this blog are purely the bloggers' own. Any product claim, statistic, quote or other representation about a product or service should be verified with the manufacturer, provider or party in question. This blog does not contain any content which might present a conflict of interest. To get your own policy, go to http://www.disclosurepolicy.org

Copyright © 2023 · Modern Blogger Pro Theme By, Pretty Darn Cute Design