Mixed Kreations

The Creative Life & Journey Of A DIY'ER

  • Home
  • Diy Projects
    • Handmade Cross Projects
    • Holiday & Seasonal Projects
    • Jewelry Tutorials
    • Mason Jars
    • Fun Upcyled Shutters & Spindles
    • Texas Projects
    • Upcycled Cans
    • Wood Projects
  • Quick and Easy Recipes
  • Shop Mixed Kreations
    • Mixed Kreations Zibbet Marketplace
    • Mixed Kreations Amazon Influencer
  • About Me
  • DISCLOSURES STATEMENT & PRIVACY POLICY
  • Recommendations
You are here: Home / Jewelry / Jewelry Tutorials / Easy DIY Sari Wrap Bracelet

Easy DIY Sari Wrap Bracelet

September 21, 2014 By: Linda @ Mixed Kreationscomment

If you enjoyed this post, don't forget to pin it for later!

76shares
  • Share
  • Tweet

Here’s a quick & easy diy sari wrap bracelet that I made and took my photos months ago, before we moved back in May. We have been so busy remodeling, painting, yard work, etc. that I just haven’t had time to work on it.

DIY Sari Wrap Bracelet

Along with all the work we have been doing I have also been trying to get my craft room in order. It is driving me crazy not being able to just go into my craft room and make something whenever I want. So I’m trying to get my craft room organized when I have any spare time. I’ve bought stack-able tubs and I’m sorting and labeling.

Here’s a quick and easy way to make a wrap bracelet using sari silk ribbon.
Powered By the Tweet This Plugin
Tweet This

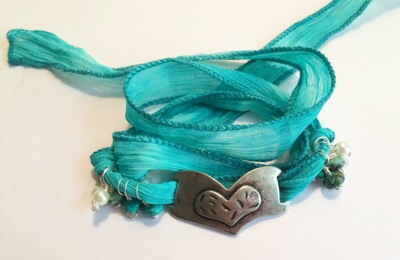
Diy Sari Wrap Bracelet

Back to the tutorial of my diy sari wrap bracelet that you can make and vary the beads, add charms, add lots of beads and charms, etc. Whatever you desire.

DIY Sari Wrap Bracelet

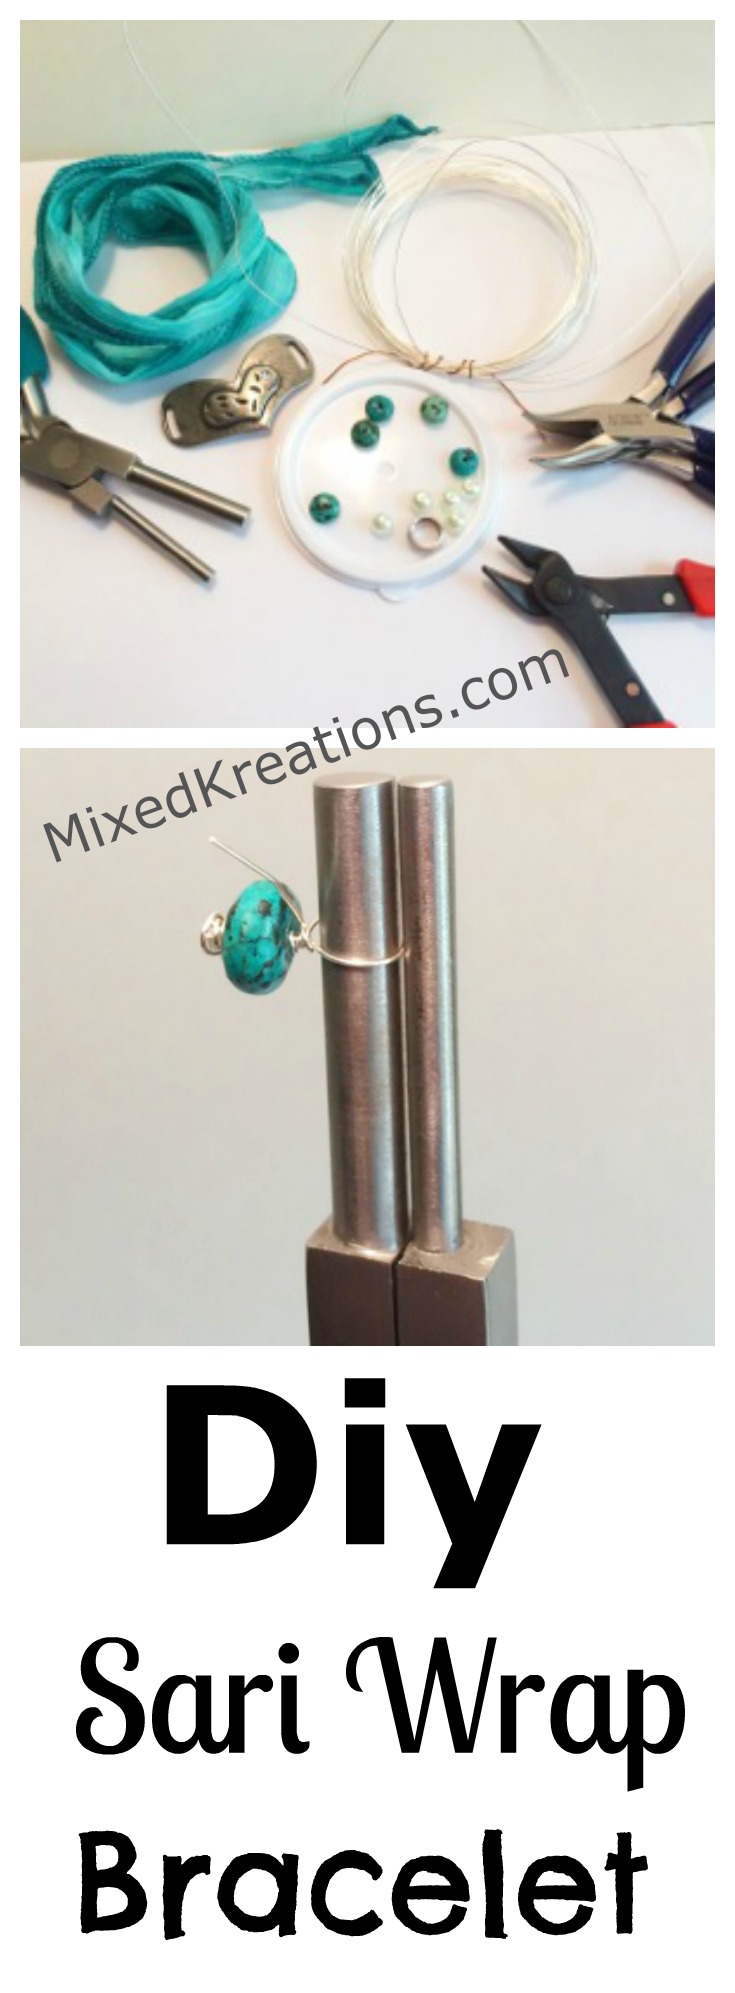
For this tutorial I made my own headpins from 20 gauge silver craft wire. You can use pre-made ones or make your own. That’s up to you.

IMG_5846.JPG

String your turquoise or bead of your choice onto your head pin.

IMG_5847.JPG

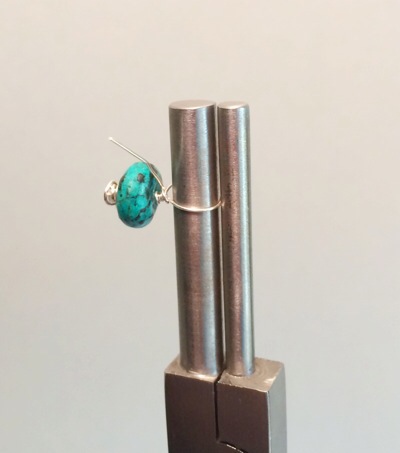
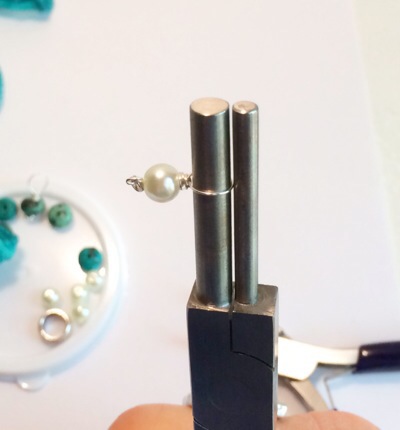
Using your mandrel pliers form a simple wire wrapped bead loop.

IMG_5848.JPG

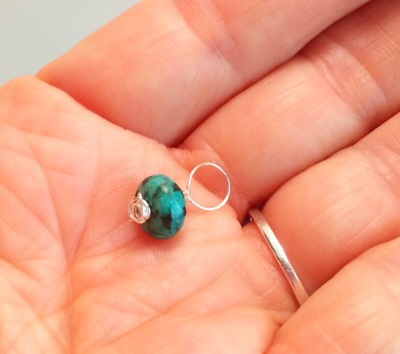
Continue making a simple wire wrapped bead loop.

IMG_5850.JPG

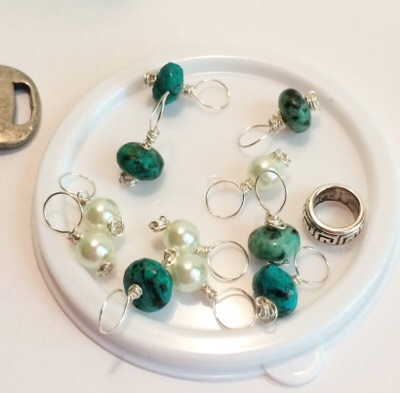
Until you have all of your beads done.

IMG_5851.JPG

IMG_5852.JPG

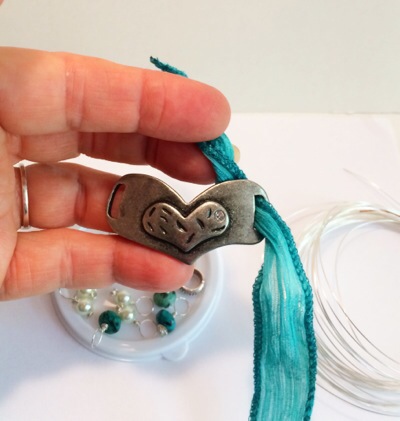
Now thread your ribbon through your decorative bracelet plank, and center.

IMG_5853.JPG

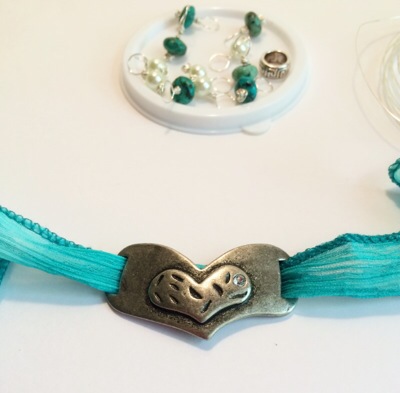
Start stringing your wire wrapped bead loops onto your ribbon in whatever order you desire.

IMG_5854.JPG

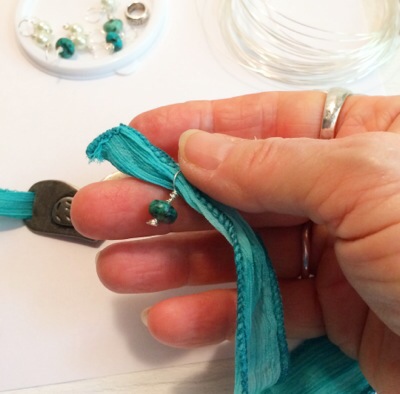
Be sure to add some on both sides of the decorative plank.

IMG_5855.JPG

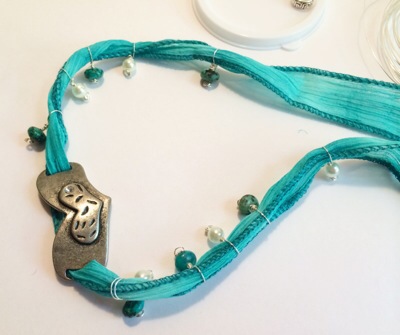
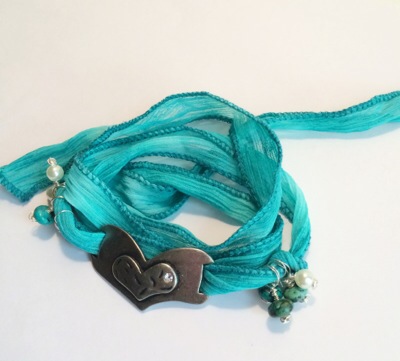
Once you have all your beads strung onto your ribbon there are two different ways you can secure your wrapped bracelet.

IMG_5856.JPG

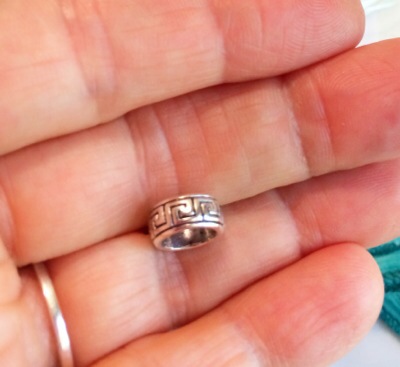
You can add a large hole decorative spacer bead by threading both of your ribbon ends through the bead.

IMG_5857.JPG

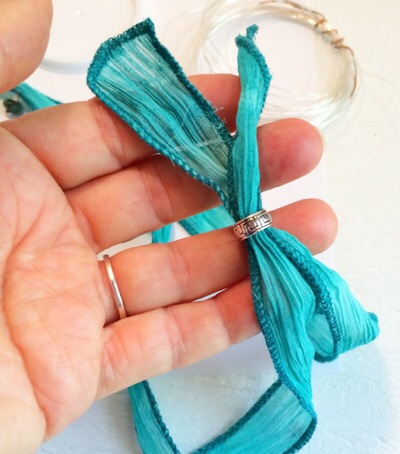
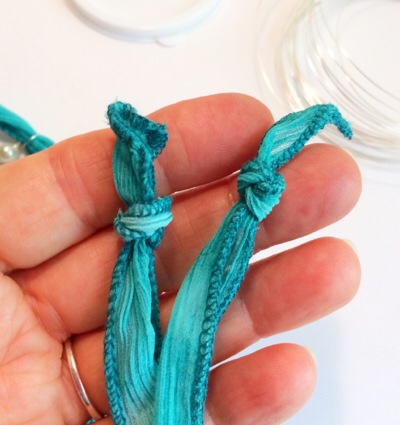
Tie a loose knot in both ends of your ribbon.

sari wrap bracelet

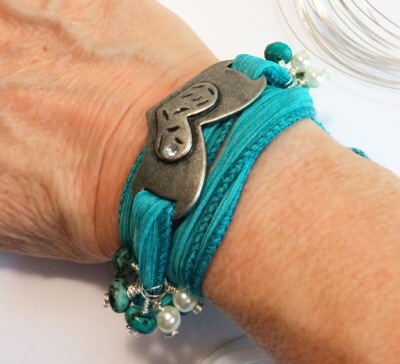
Wrap the bracelet around your wrist and slide the bead up to secure.

IMG_5859.JPG

Or you can leave the large hole bead off and just wrap around your wrist, then tie a bow.

DIY Sari Wrap Bracelet

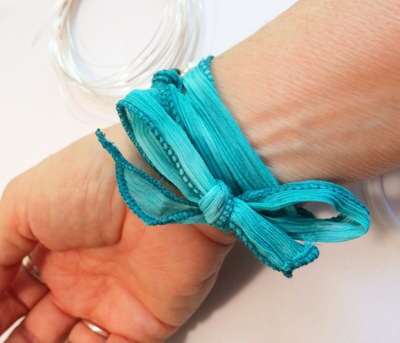
I prefer to wrap around and tie a bow, seems more secure.

DIY Sari Wrap Bracelet

Do you think I should add more beads to my DIY Sari Wrap Bracelet?

DIY Sari Wrap Bracelet

***This post contains affiliate links, if you click on an affiliate link & buy something I may receive a small commission at no extra charge to you. The affiliate money I earn helps pay the expenses to keep this site running. Please read my full advertising disclosure for more info. Thanks so much for your support!***
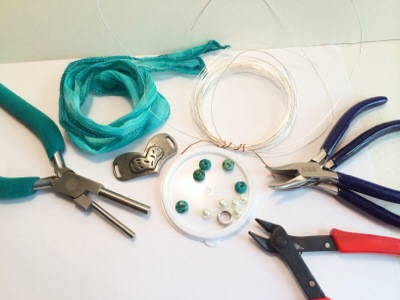
Material List

36″ Sari Silk Ribbon
5 Turquoise Rondelle Beads
5 Glass Pearls
1 Large Hole Silver Spacer Bead (optional)
20 Gauge Silver Craft Wire
10 headpins
1 Antique Silver Decorative Heart Shaped Bracelet Plank
Flush Cutters
2 Curve Nose Pliers
1 Round Nose Pliers
Round Mandrel Pliers

More Jewelry Tutorials You May Enjoy!

Copper wire wrapped paper beads
Copper and turquoise bracelet
Vintaj Key hole charm bracelet

Request a FREE Catalog from Fire Mountain

Diy sari wrap bracelet pinterest

If you enjoyed this post, don't forget to pin it for later!

76shares
  • Share
  • Tweet

If you enjoyed this post, would you mind taking the time to:
  • Share, or Pin for later reference.
  • Follow me on Facebook, Twitter, Pinterest
  • Leave a comment
Thank you so much for taking the time to comment. I love hearing from my readers, and appreciate the kind words.

Leave a Reply Cancel reply

Your email address will not be published. Required fields are marked *

CommentLuv badgeShow more posts

This site uses Akismet to reduce spam. Learn how your comment data is processed.

Thanks for sharing your thoughts and comments! I read and appreciate every single one!

Follow Mixed Kreations

Facebooktwitterpinterestyoutubeinstagram

5 Day Free Course – By Kelli & Crystal from Learn To Blog Hangouts

#LearntoBlog Hangouts
Zibbet shop Mixed Kreations

My Favorites on Amazon

My Amazon Influencer Shop

How to Make Rusty Cans

how to make rusty cans

Homemade Chalk Paint

diy chalk paint

How to Make a Flag From a Wood Shutter

how to make a 2 sided american flag

Easter Egg Jar

How to make a Easter egg jar

Diy Texas Tile Coasters

Texas Tile Coasters

Update a Thrift Store Find

How to Update a Hanging Box in 4 easy steps

Categories

Bits of the Past

By Kelli & Crystal From Learn To Blog Hangouts

#LearntoBlog Hangouts

Affiliate Marketing For Bloggers,by Tasha Arguso

Featured on Hometalk.com

Bloglovin

Follow

Waverly Chalk Paint

iconiconicon icon
Rakuten Affiliate Network Welcome Program
Grow and Make

Featured At

Featured At

Mixed Kreations featured in Country sampler

Featured at

mixed kreations is featured in Bella Crafts online magazine
The Pin Junkie

Ebay Affiliates

* Primitive Wall Decor & Home Decor * Aged Wooden Boxes * Galvanized Buckets * Primitive Signs

Amazon Affiliates

I am a participant in the Amazon Services LLC Associates Program, an affiliate advertising program designed to provide a means for sites to earn advertising fees by advertising and linking to Amazon.com.

Disclosures Statement

This policy is valid from 19 July 2013 This blog is a personal blog written and edited by me. For questions about this blog, please contact Linda @ ldkeesee@mixedkreations.com. This blog accepts forms of cash advertising, sponsorship, paid insertions or other forms of compensation. The compensation received will never influence the content, topics or posts made in this blog. All advertising is in the form of advertisements generated by a third party ad network. Those advertisements will be identified as paid advertisements. The owner(s) of this blog is compensated to provide opinion on products, services, websites and various other topics. Even though the owner(s) of this blog receives compensation for our posts or advertisements, we always give our honest opinions, findings, beliefs, or experiences on those topics or products. The views and opinions expressed on this blog are purely the bloggers' own. Any product claim, statistic, quote or other representation about a product or service should be verified with the manufacturer, provider or party in question. This blog does not contain any content which might present a conflict of interest. To get your own policy, go to http://www.disclosurepolicy.org

Copyright © 2021 · Modern Blogger Pro Theme By, Pretty Darn Cute Design