Mixed Kreations

The Creative Life & Journey Of A DIY'ER

  • Home
  • Diy Projects
    • Handmade Cross Projects
    • Holiday & Seasonal Projects
    • Mason Jars
    • Fun Upcyled Shutters & Spindles
    • Texas Projects
    • Upcycled Cans
    • Wood Projects
    • Jewelry Tutorials
  • Quick and Easy Recipes
  • Shop Mixed Kreations
    • Etsy Shop
    • Mixed Kreations Amazon Influencer
  • DISCLOSURES STATEMENT & PRIVACY POLICY
  • About Me
  • Recommendations
You are here: Home / DIY/Craft Projects / Diy Yard Stick Christmas Tree

Diy Yard Stick Christmas Tree

December 14, 2015 By: Linda @ Mixed Kreations13 Comments

If you enjoyed this post, don't forget to pin it for later!

9 shares
  • Share
  • Tweet

This Diy Yard Stick Christmas Tree was made from (you guessed it) a yardstick cut in different lengths 😀 I had first seen a yardstick repurposed into a Christmas tree over at Organized Clutter and had to make one of my own. Keep reading to see how I put my own spin on the repurposed yardstick Christmas tree.

How To Make A Diy Yard Stick Christmas Tree

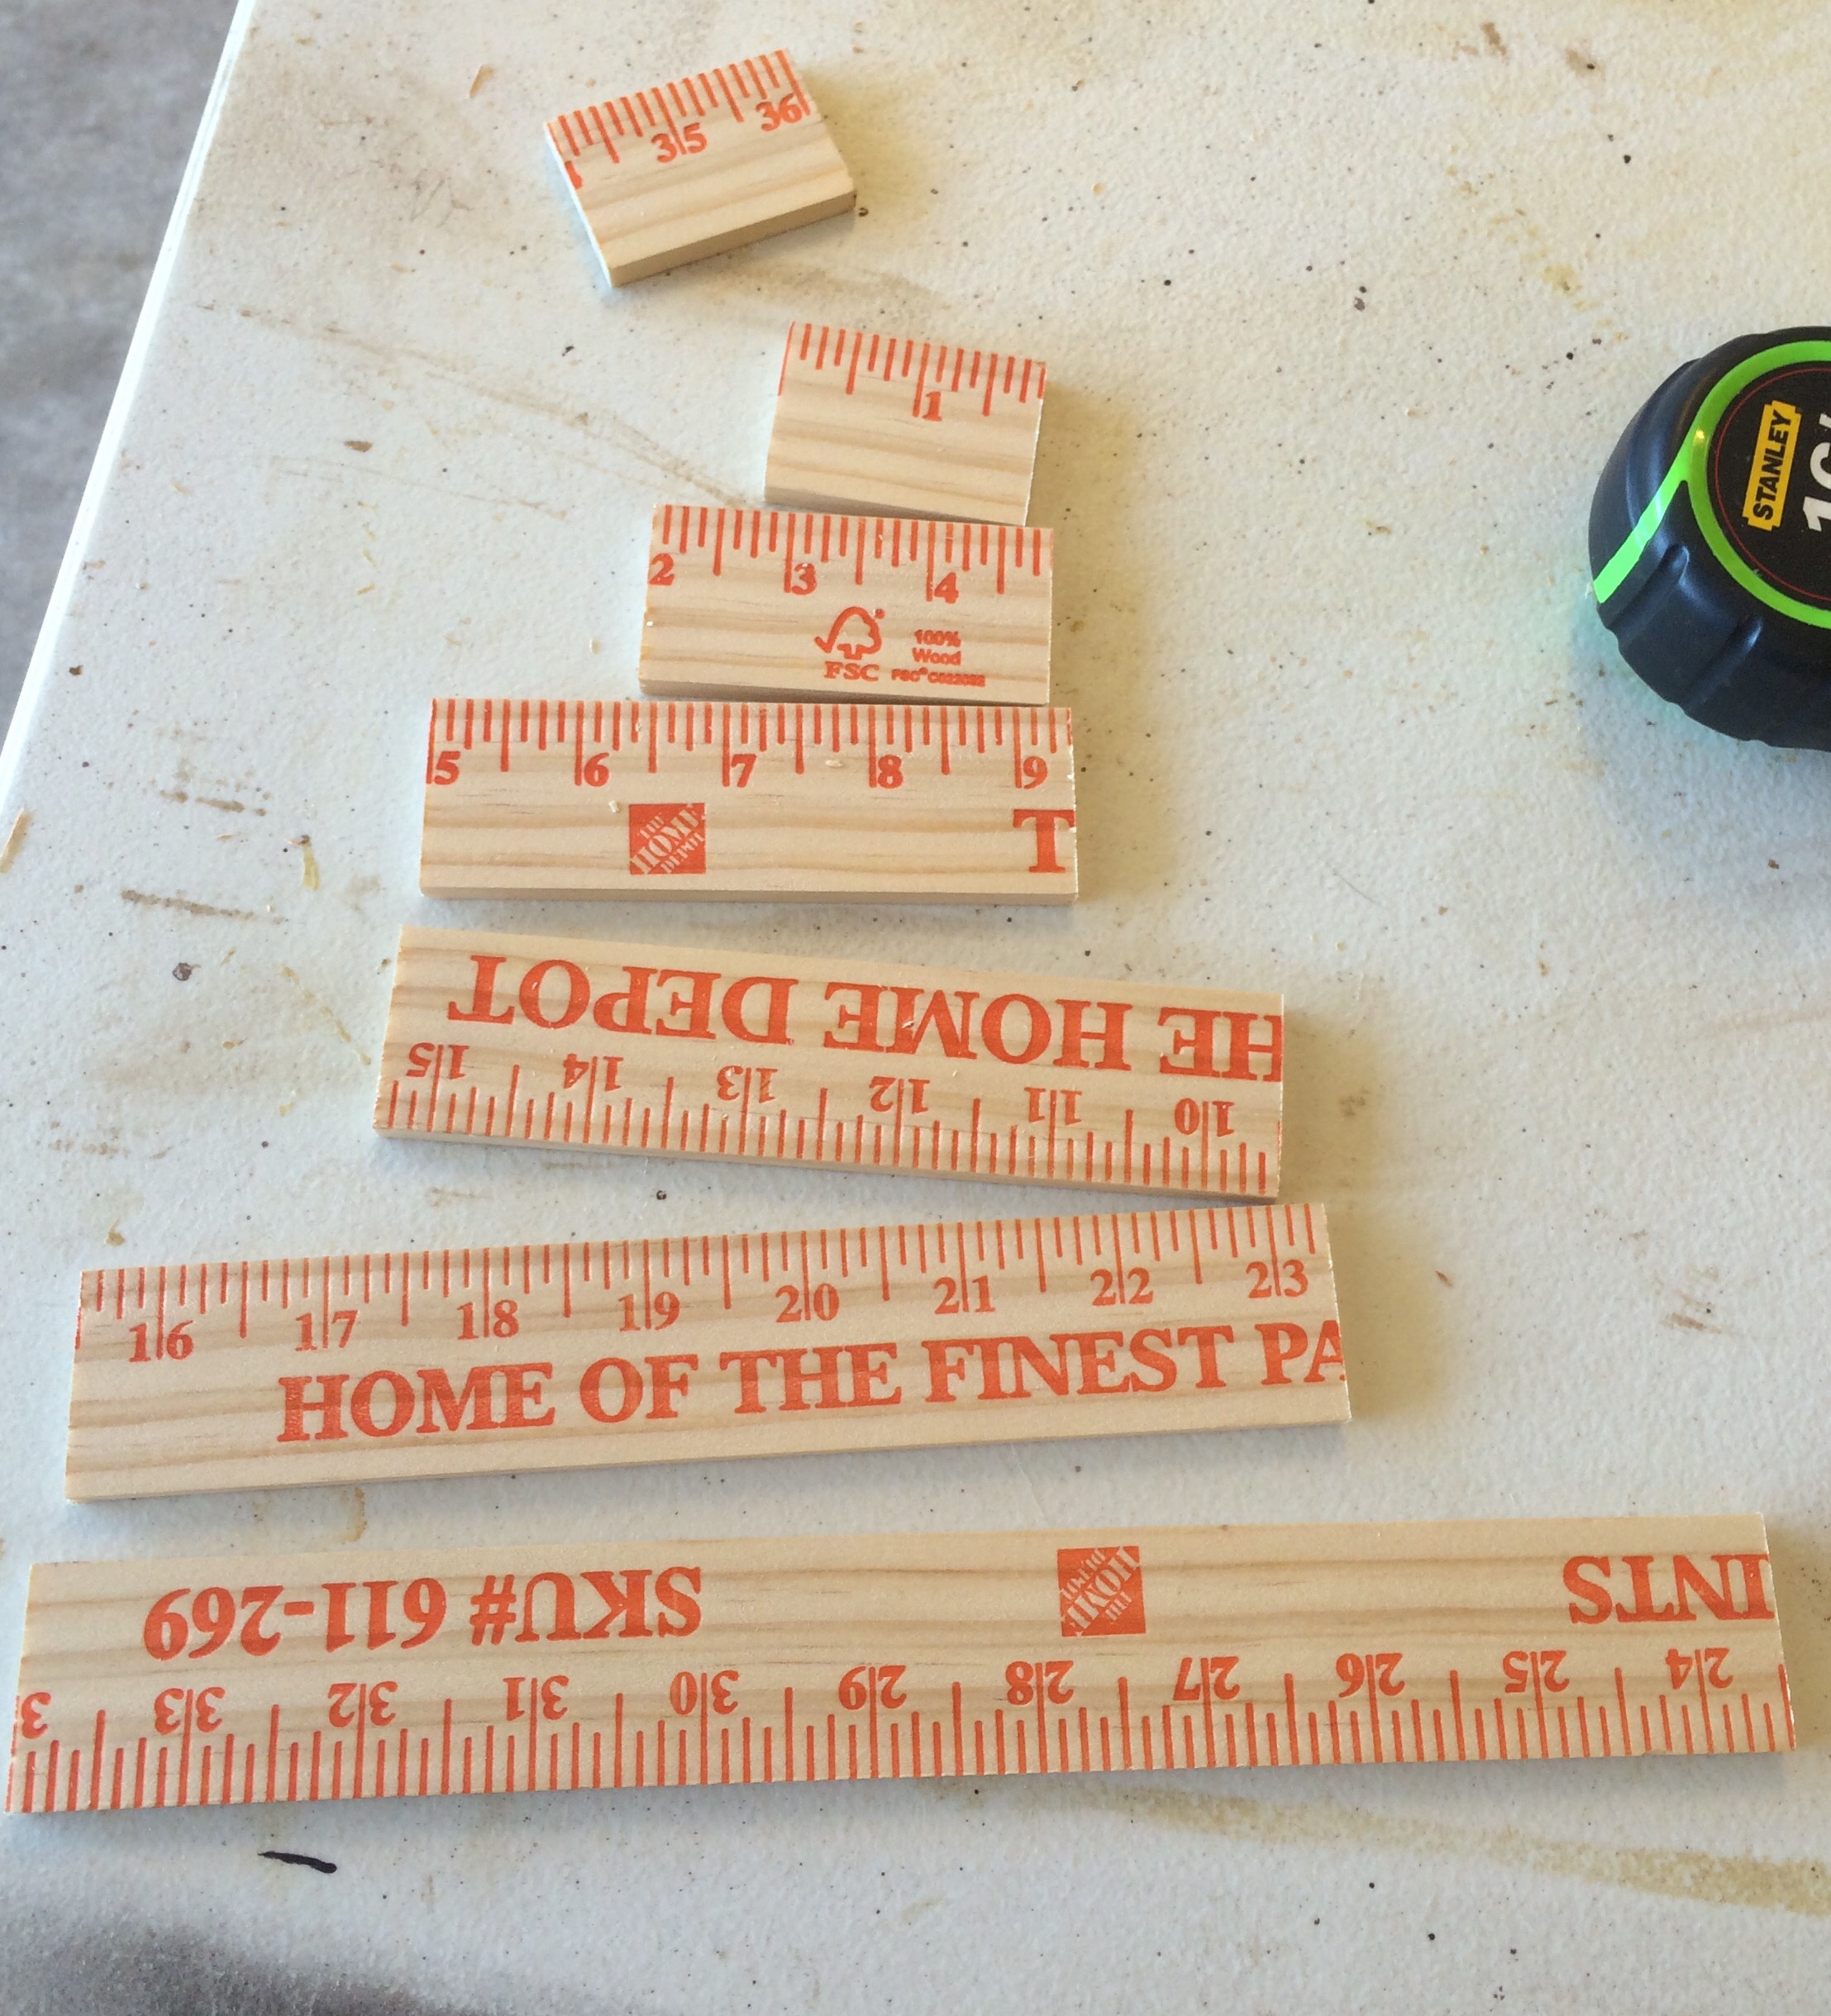
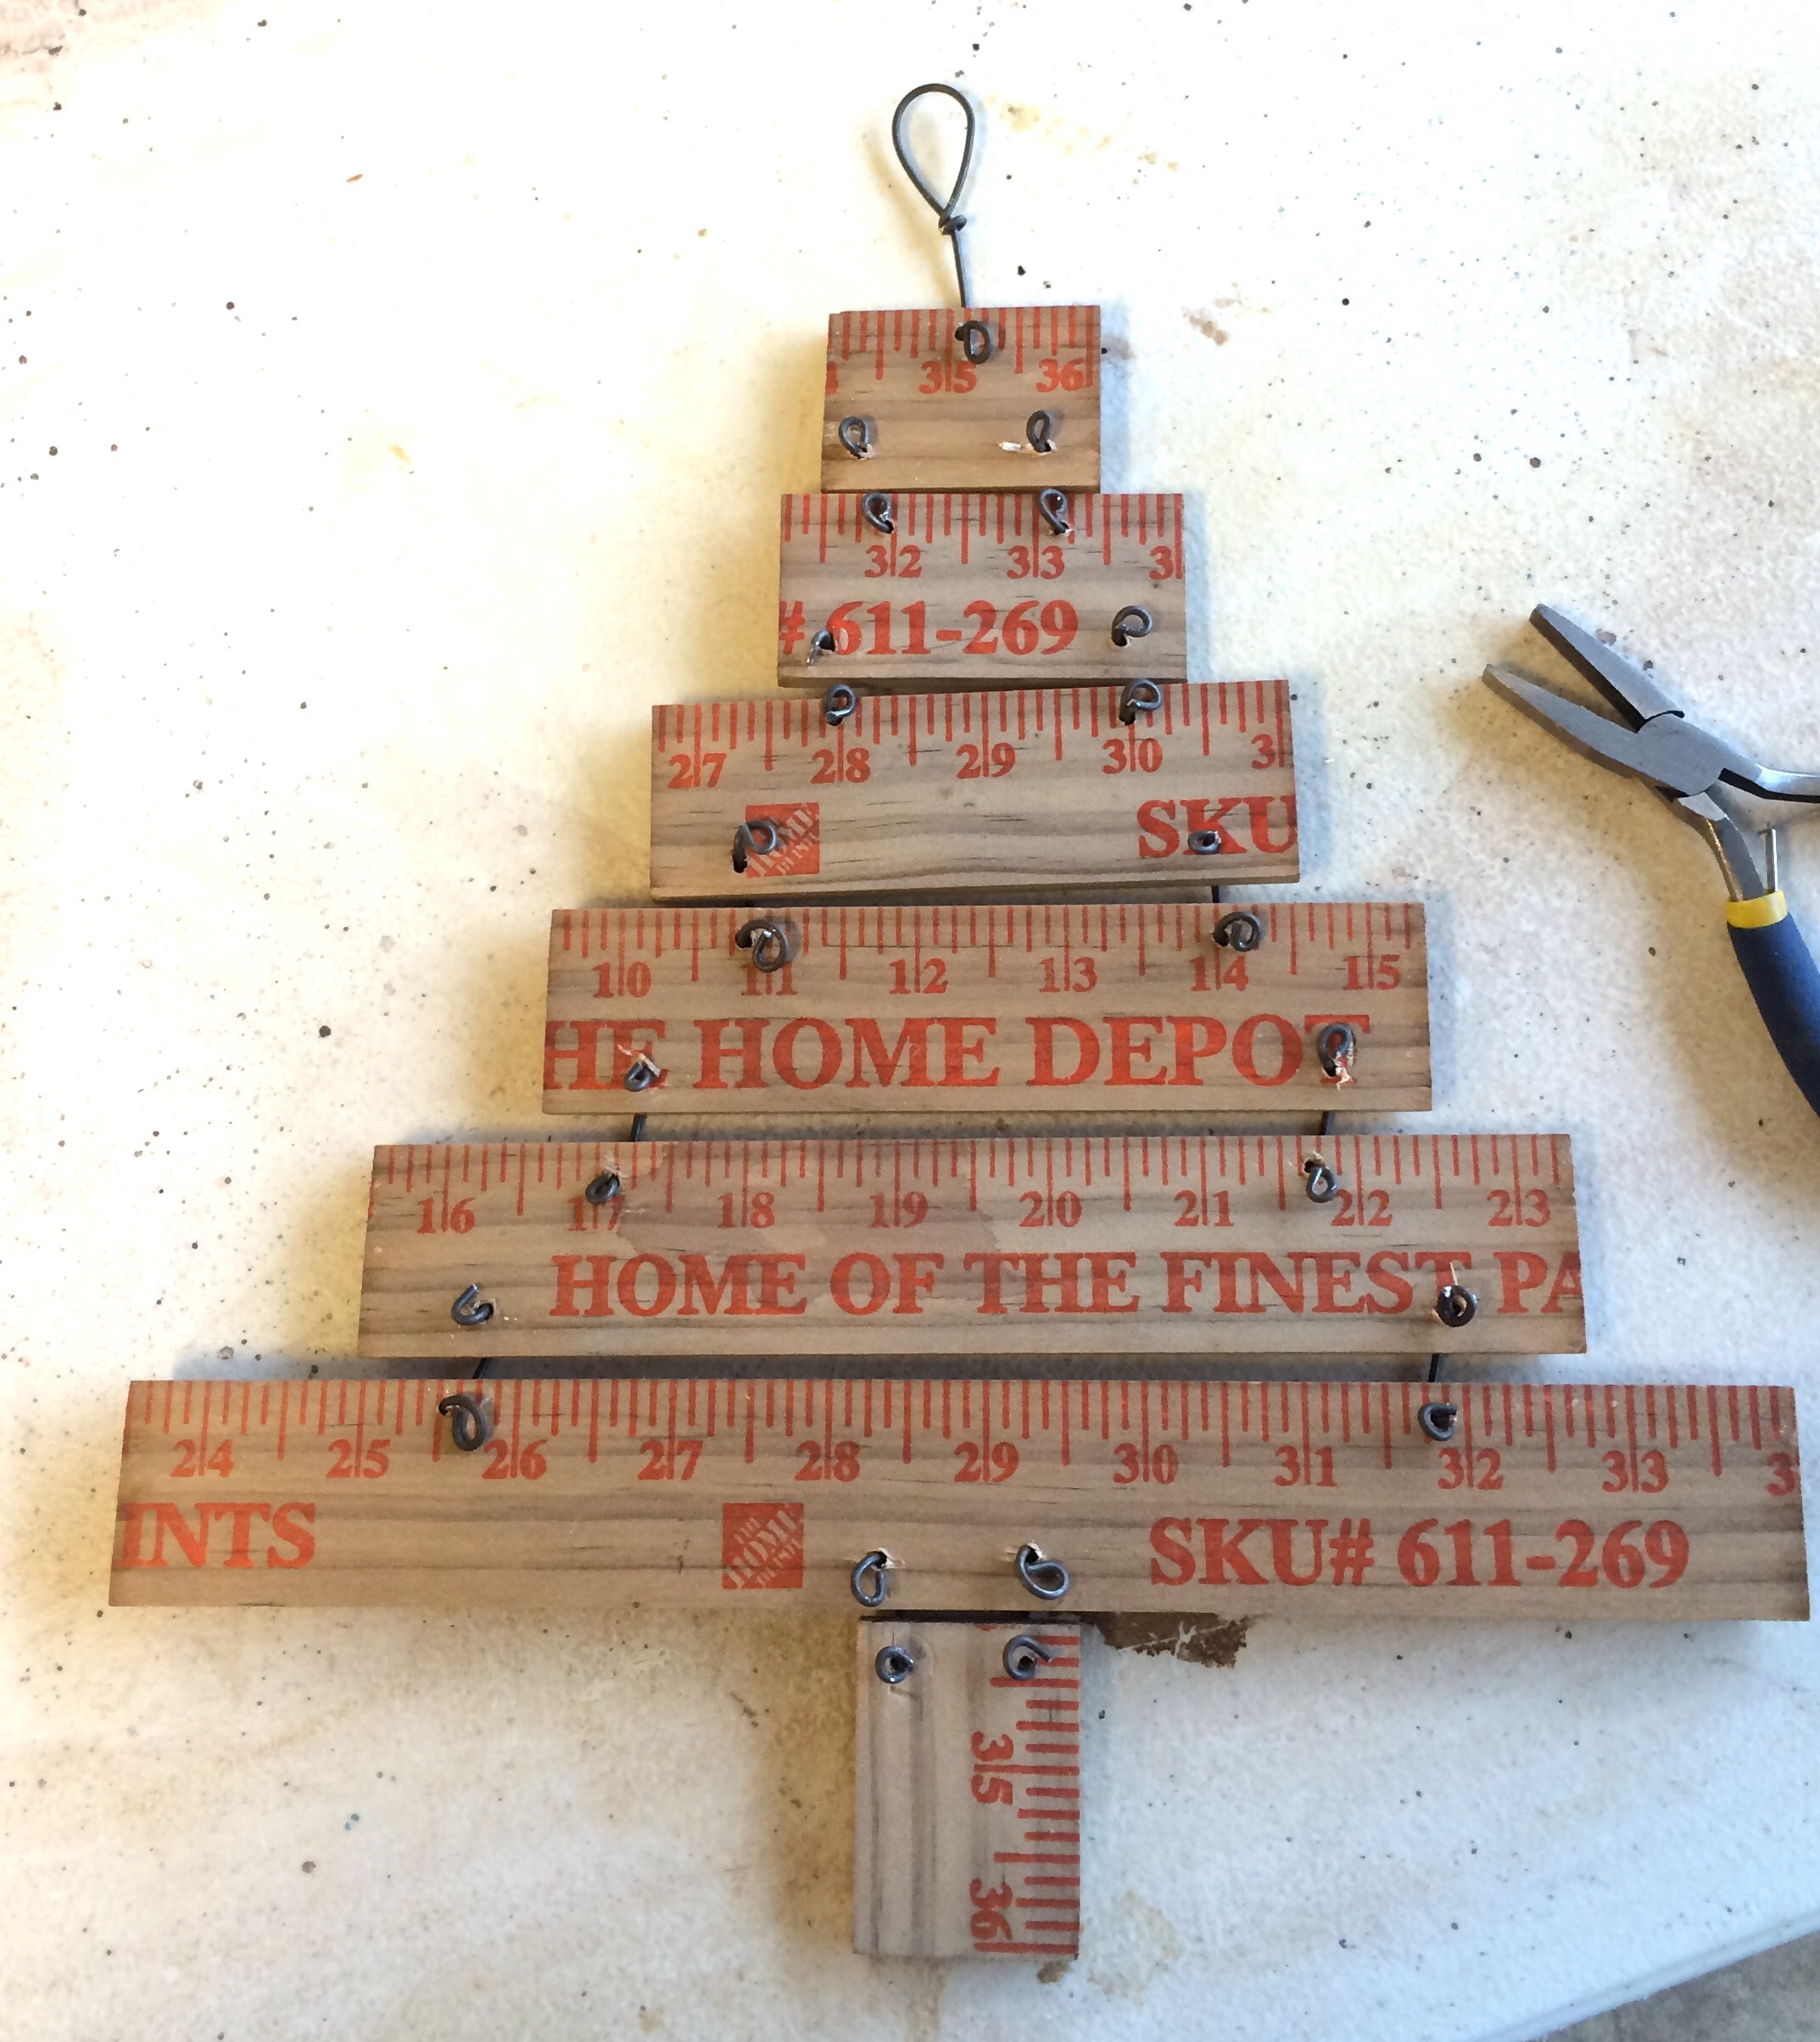
First cut the yard stick in different lengths to form a tree, and pre-drill your holes for attaching the diy yard stick Christmas tree together.

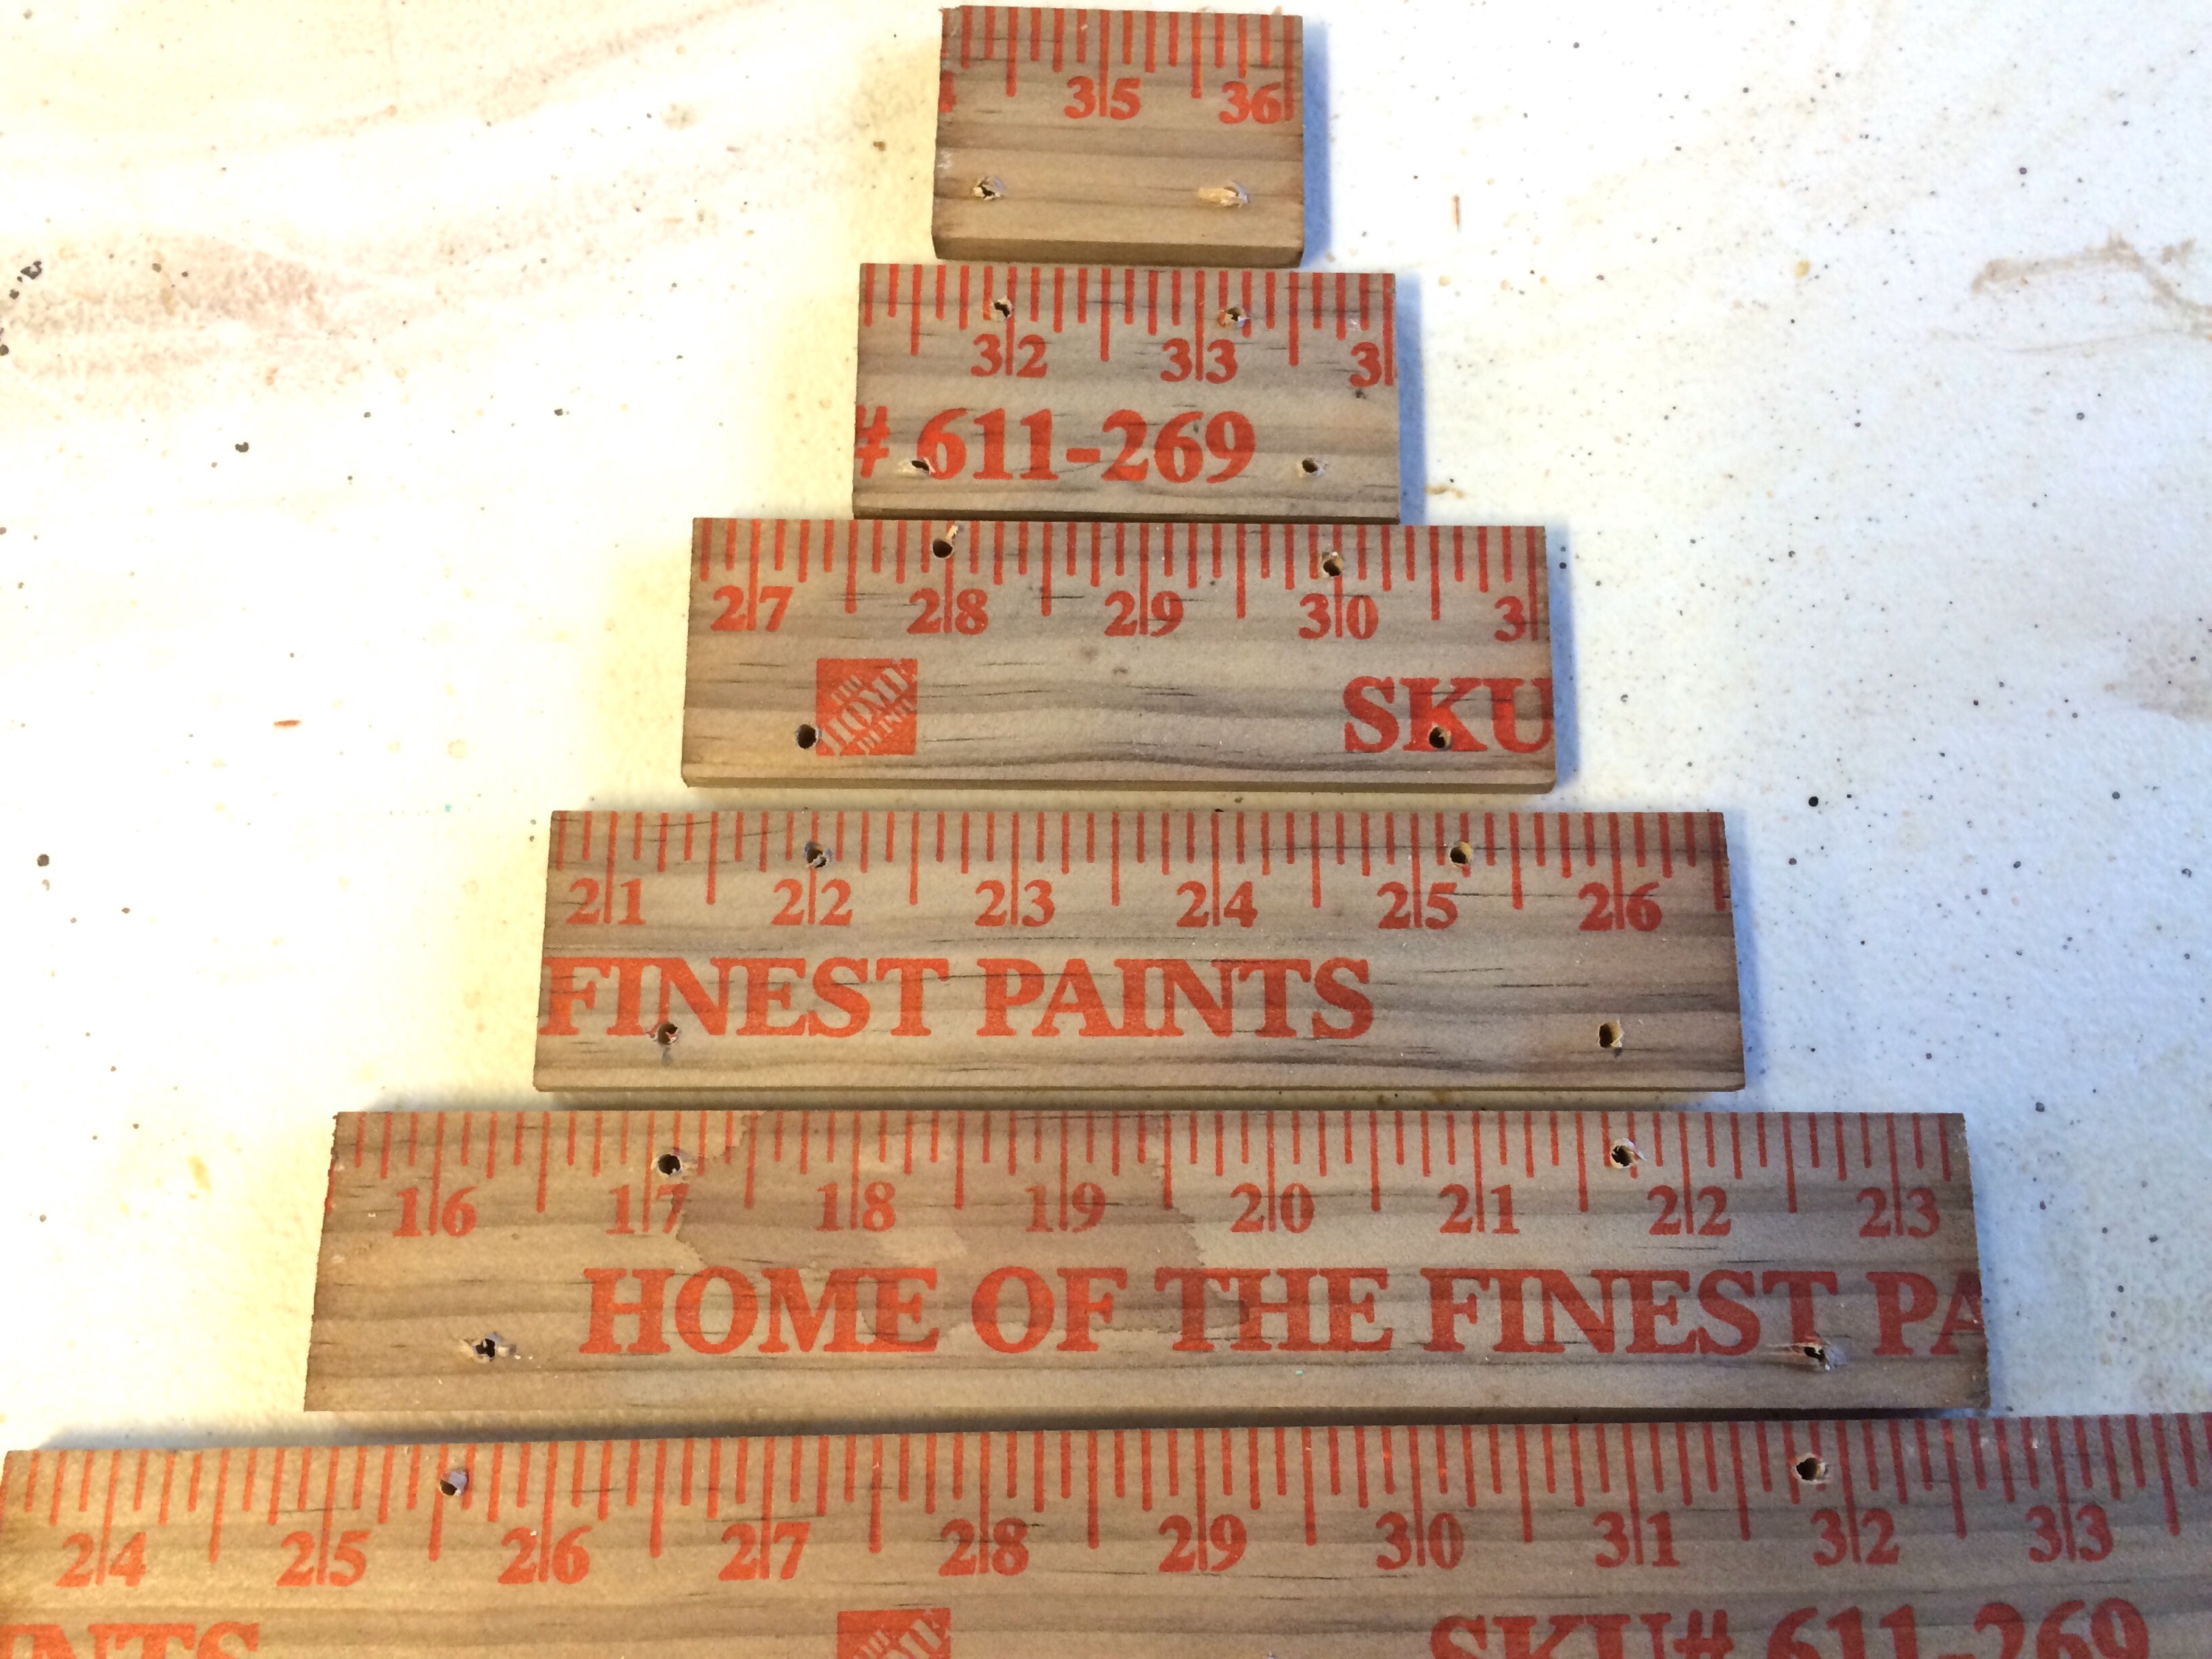
Then age the pieces with my wood aging solution, or you could water down some paint for a stain if you wanted to give it more color.

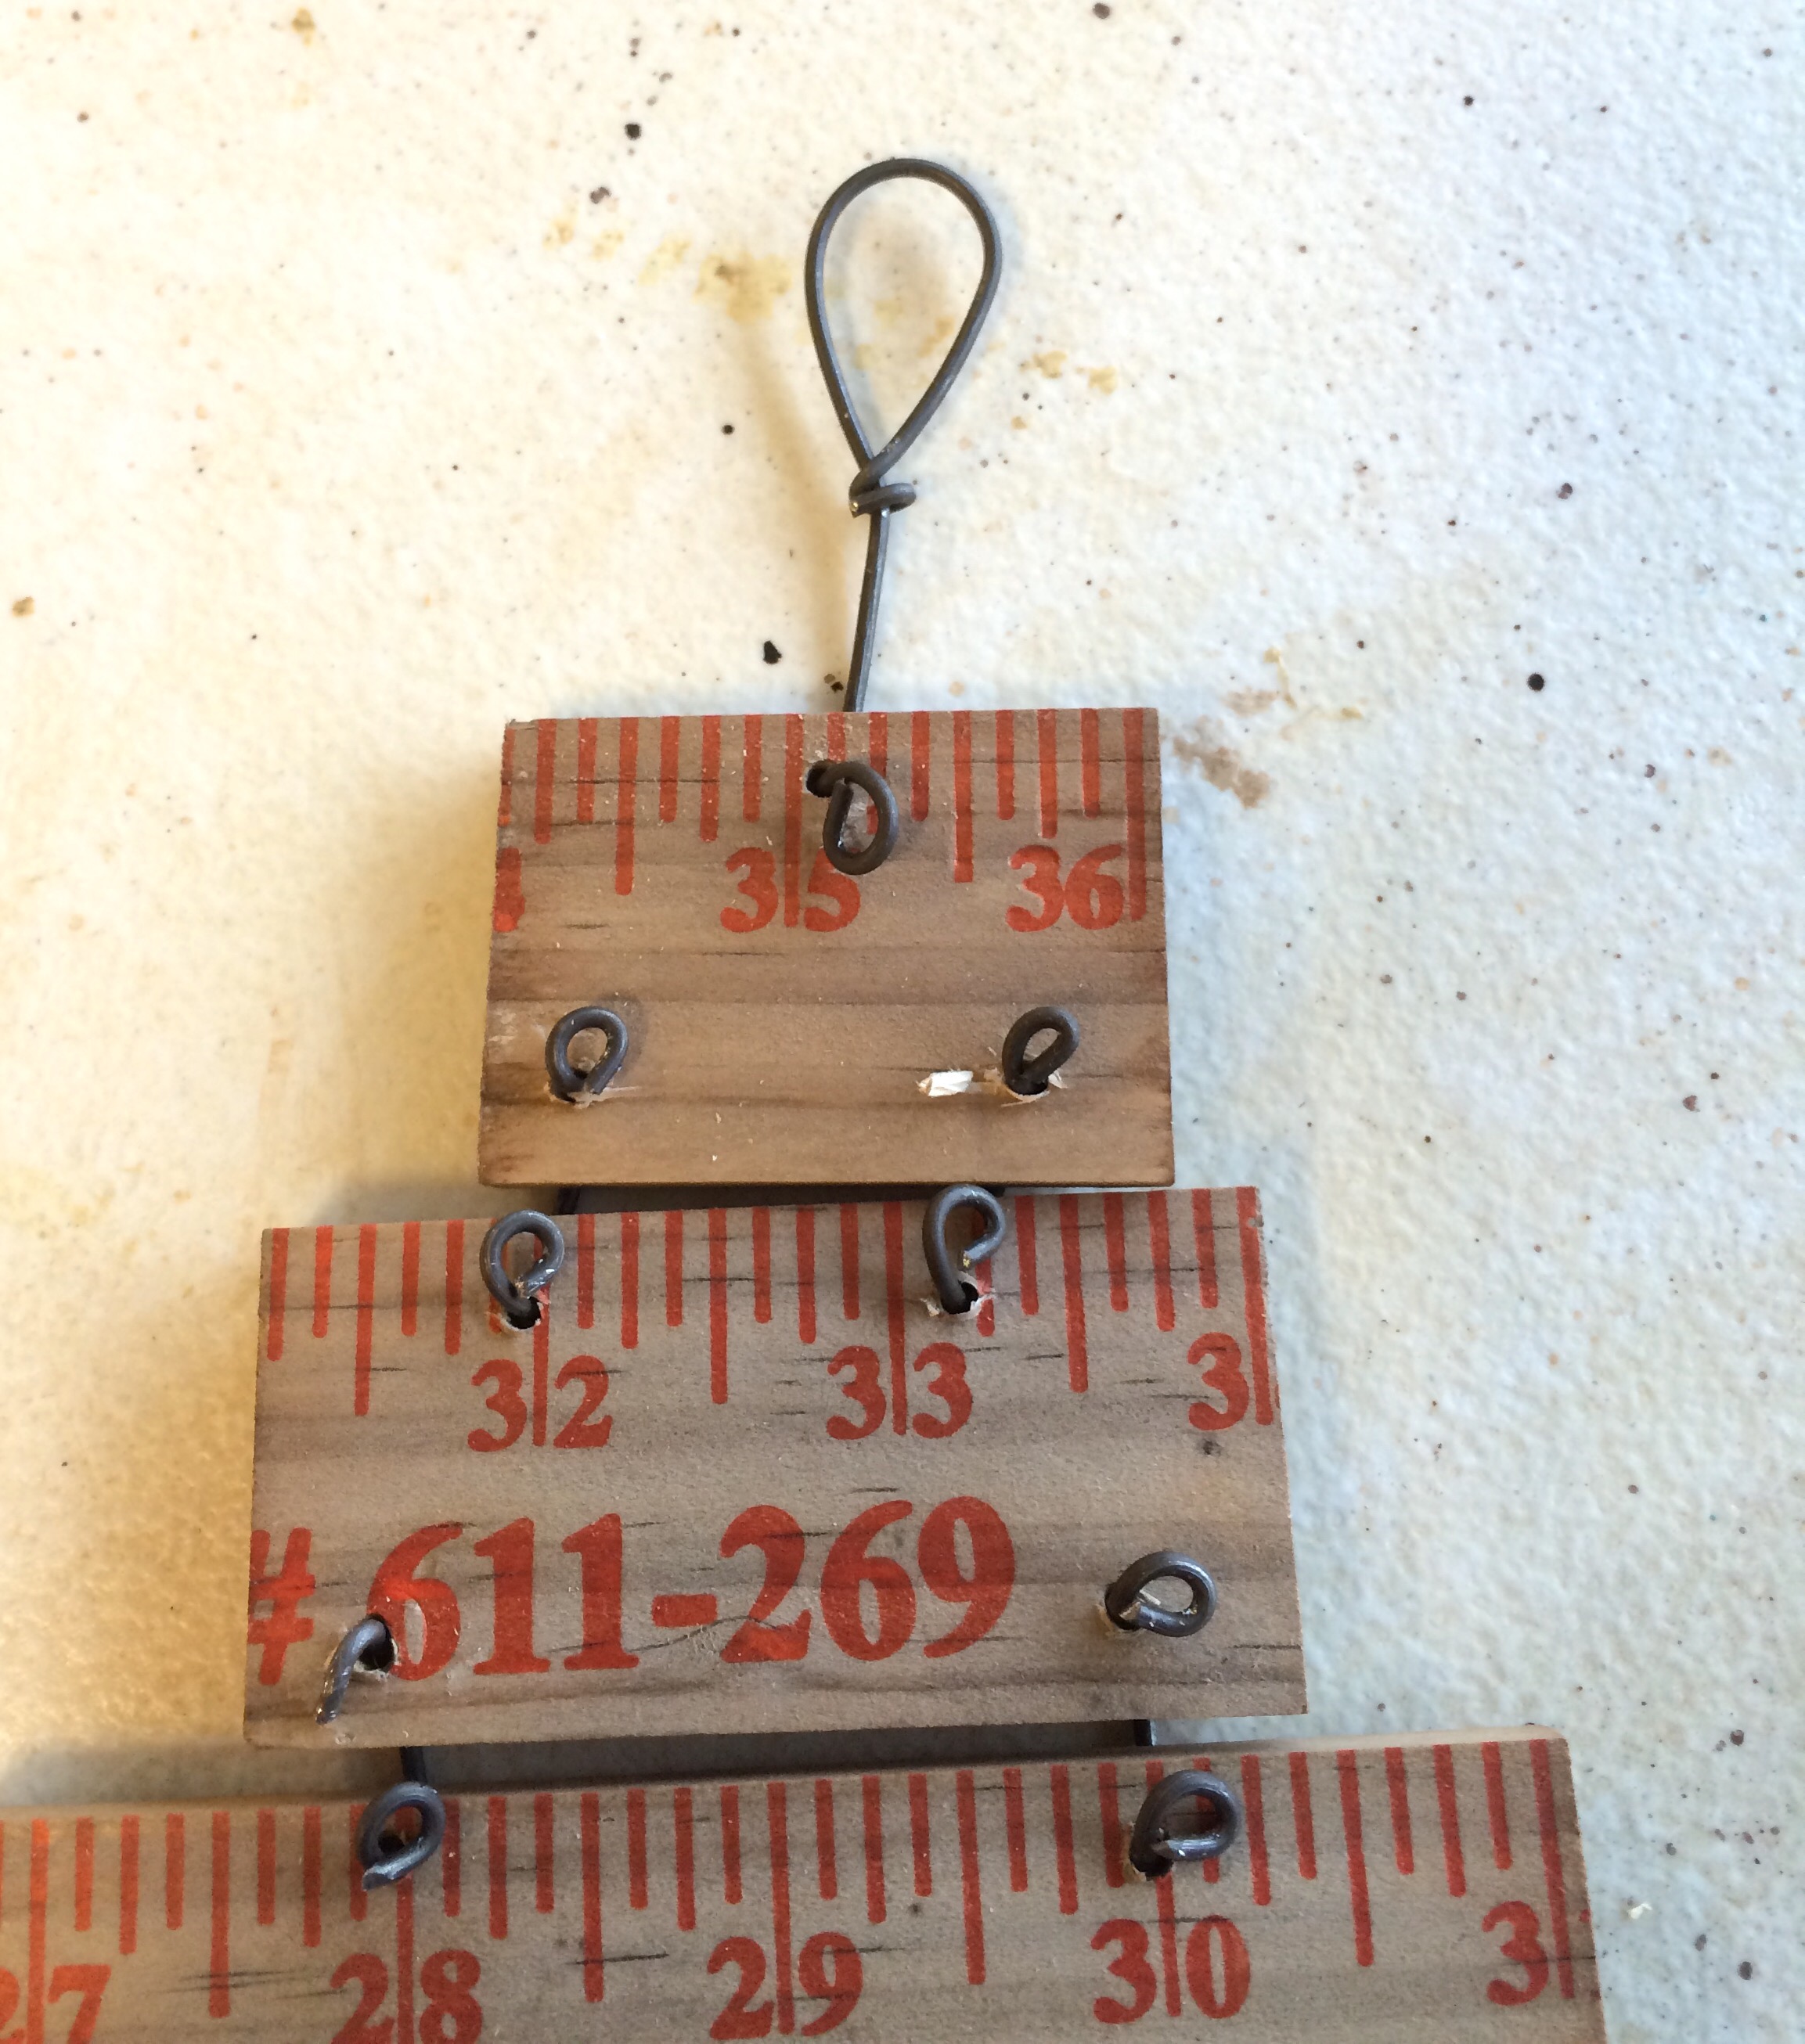
Next cut 12 pieces of wire in approximately 1 1/2″ lengths, then form the wire pieces into the shape of a large staple. These will be used as the ties to hold the tree together.

Line up the yard stick tree pieces and insert one end of wire in one side of your yard stick piece, and the other end into the other side of the next piece.

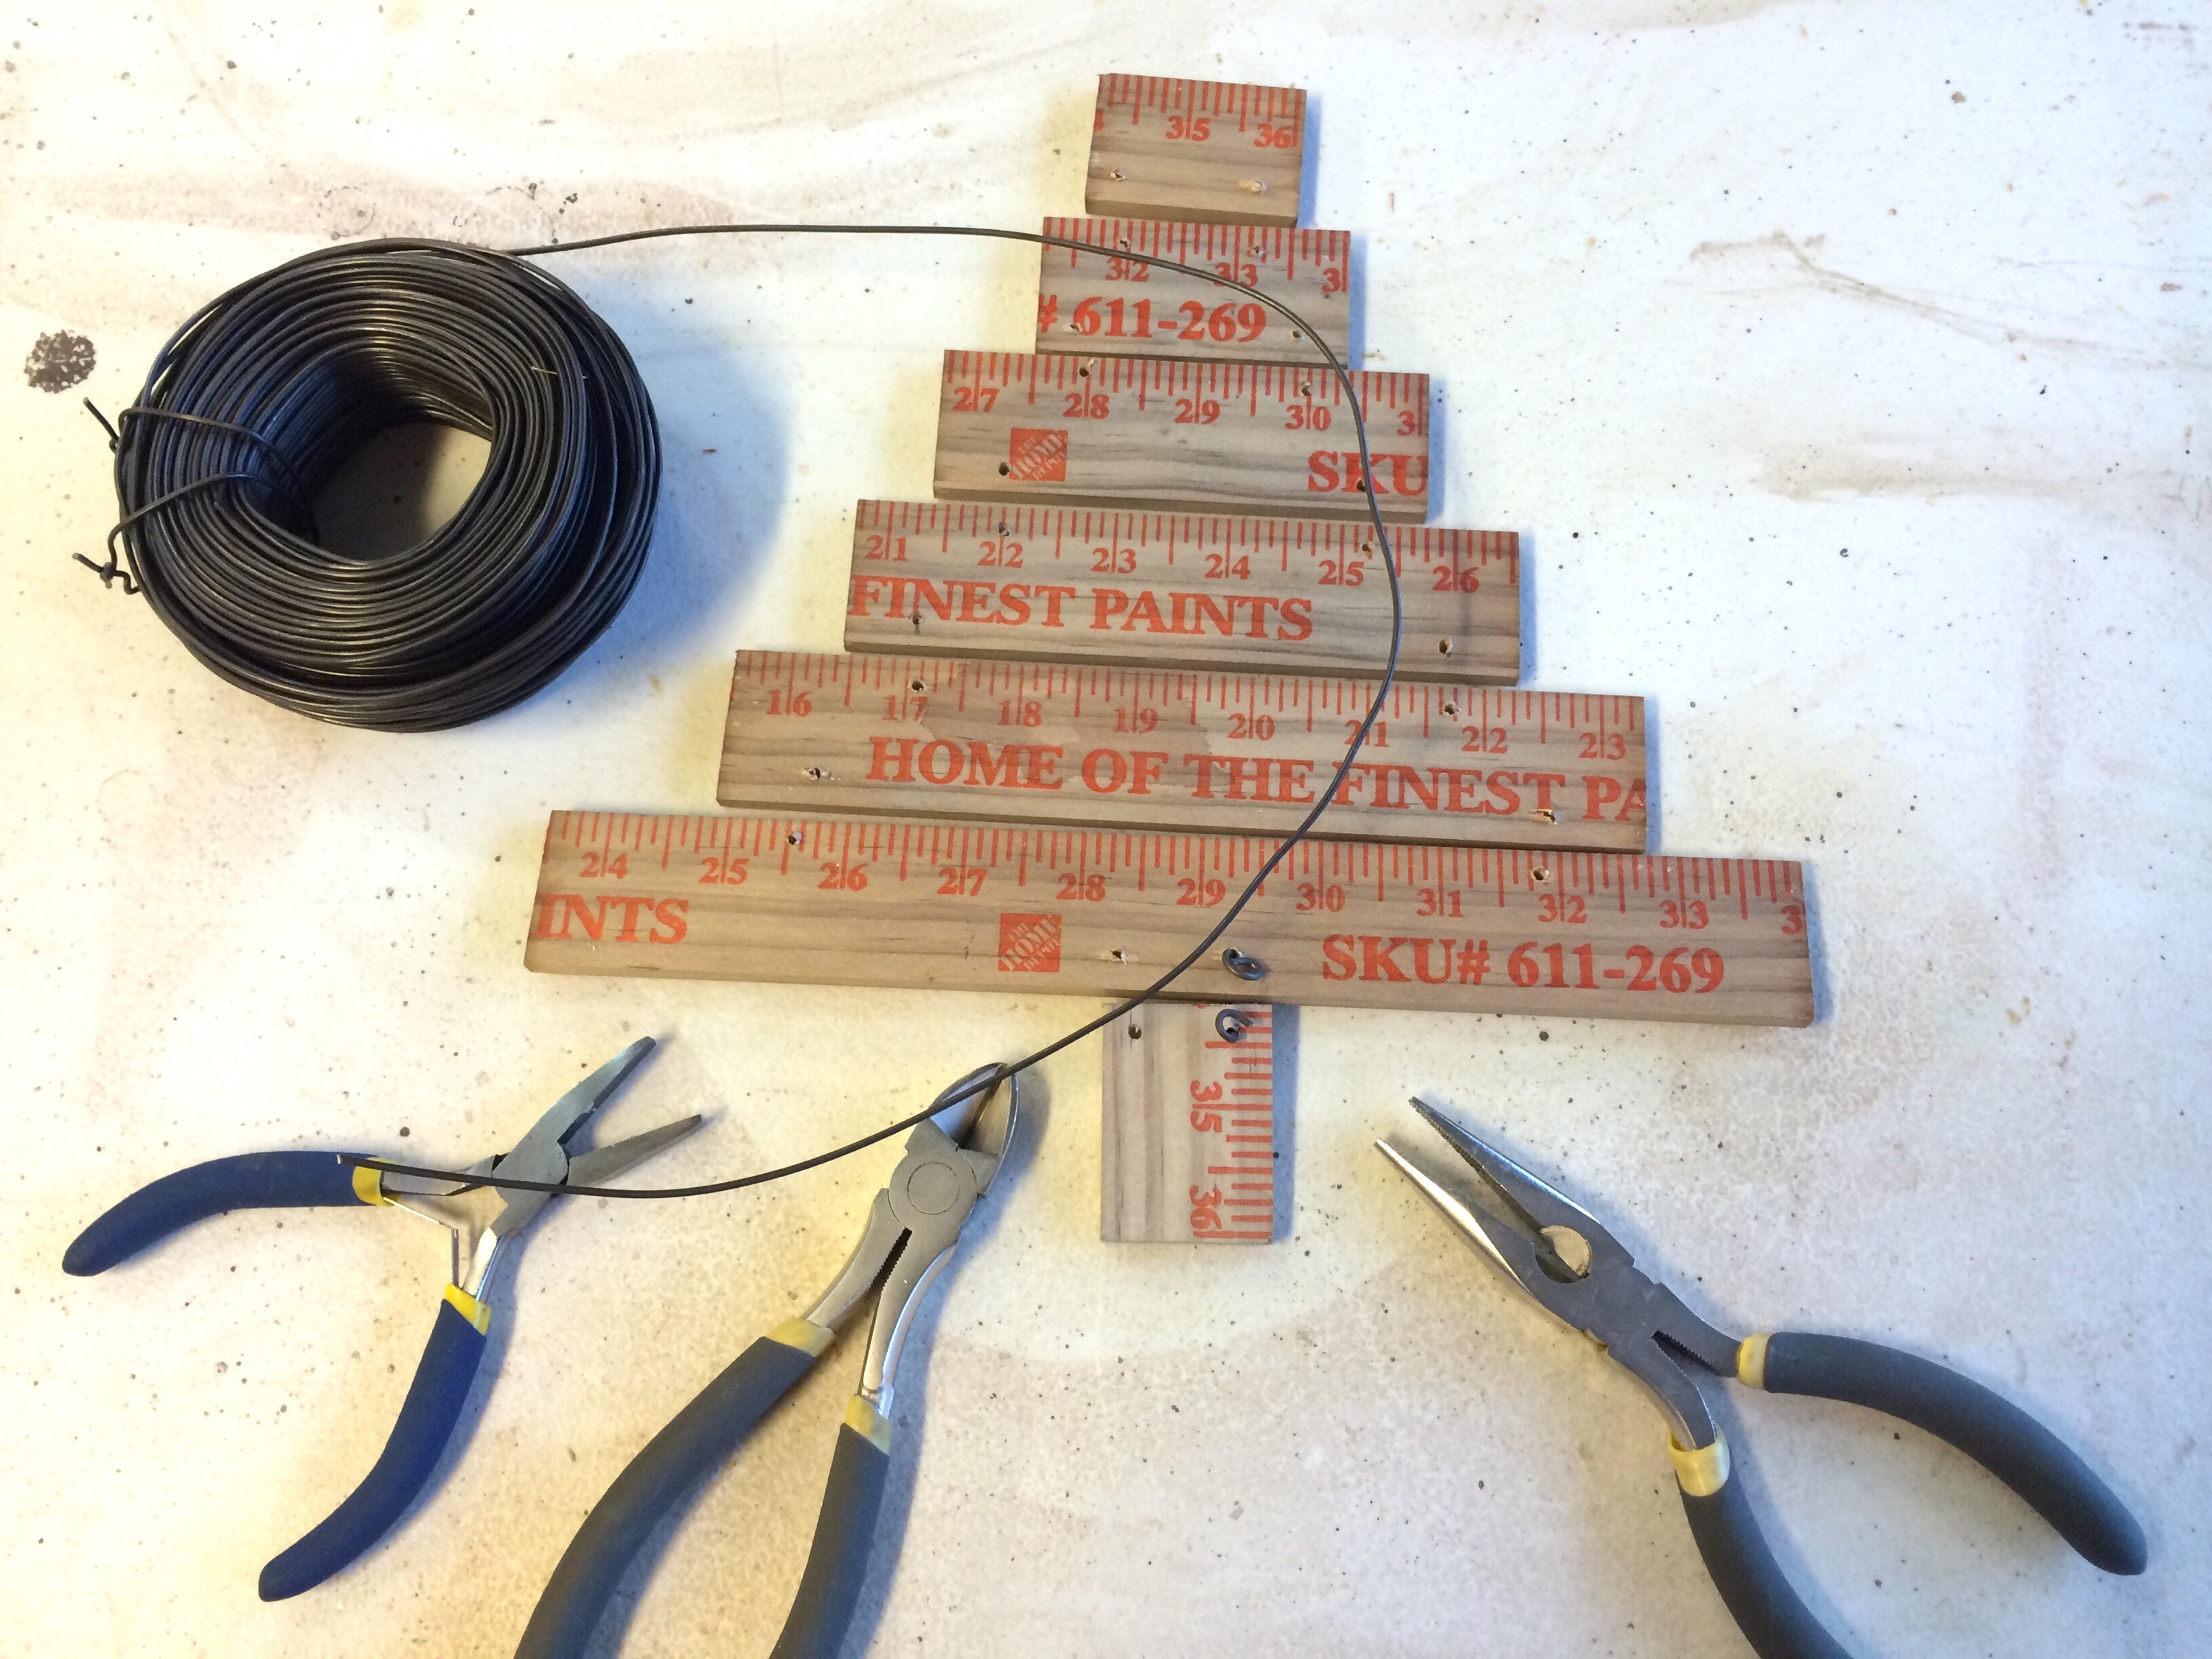
Using your needle nose or round nose pliers twist a little loop in each end to connect the pieces securing the pieces in place.

Continue adding the handmade staples until you have all the pieces of the diy yard stick Christmas Tree wired together.

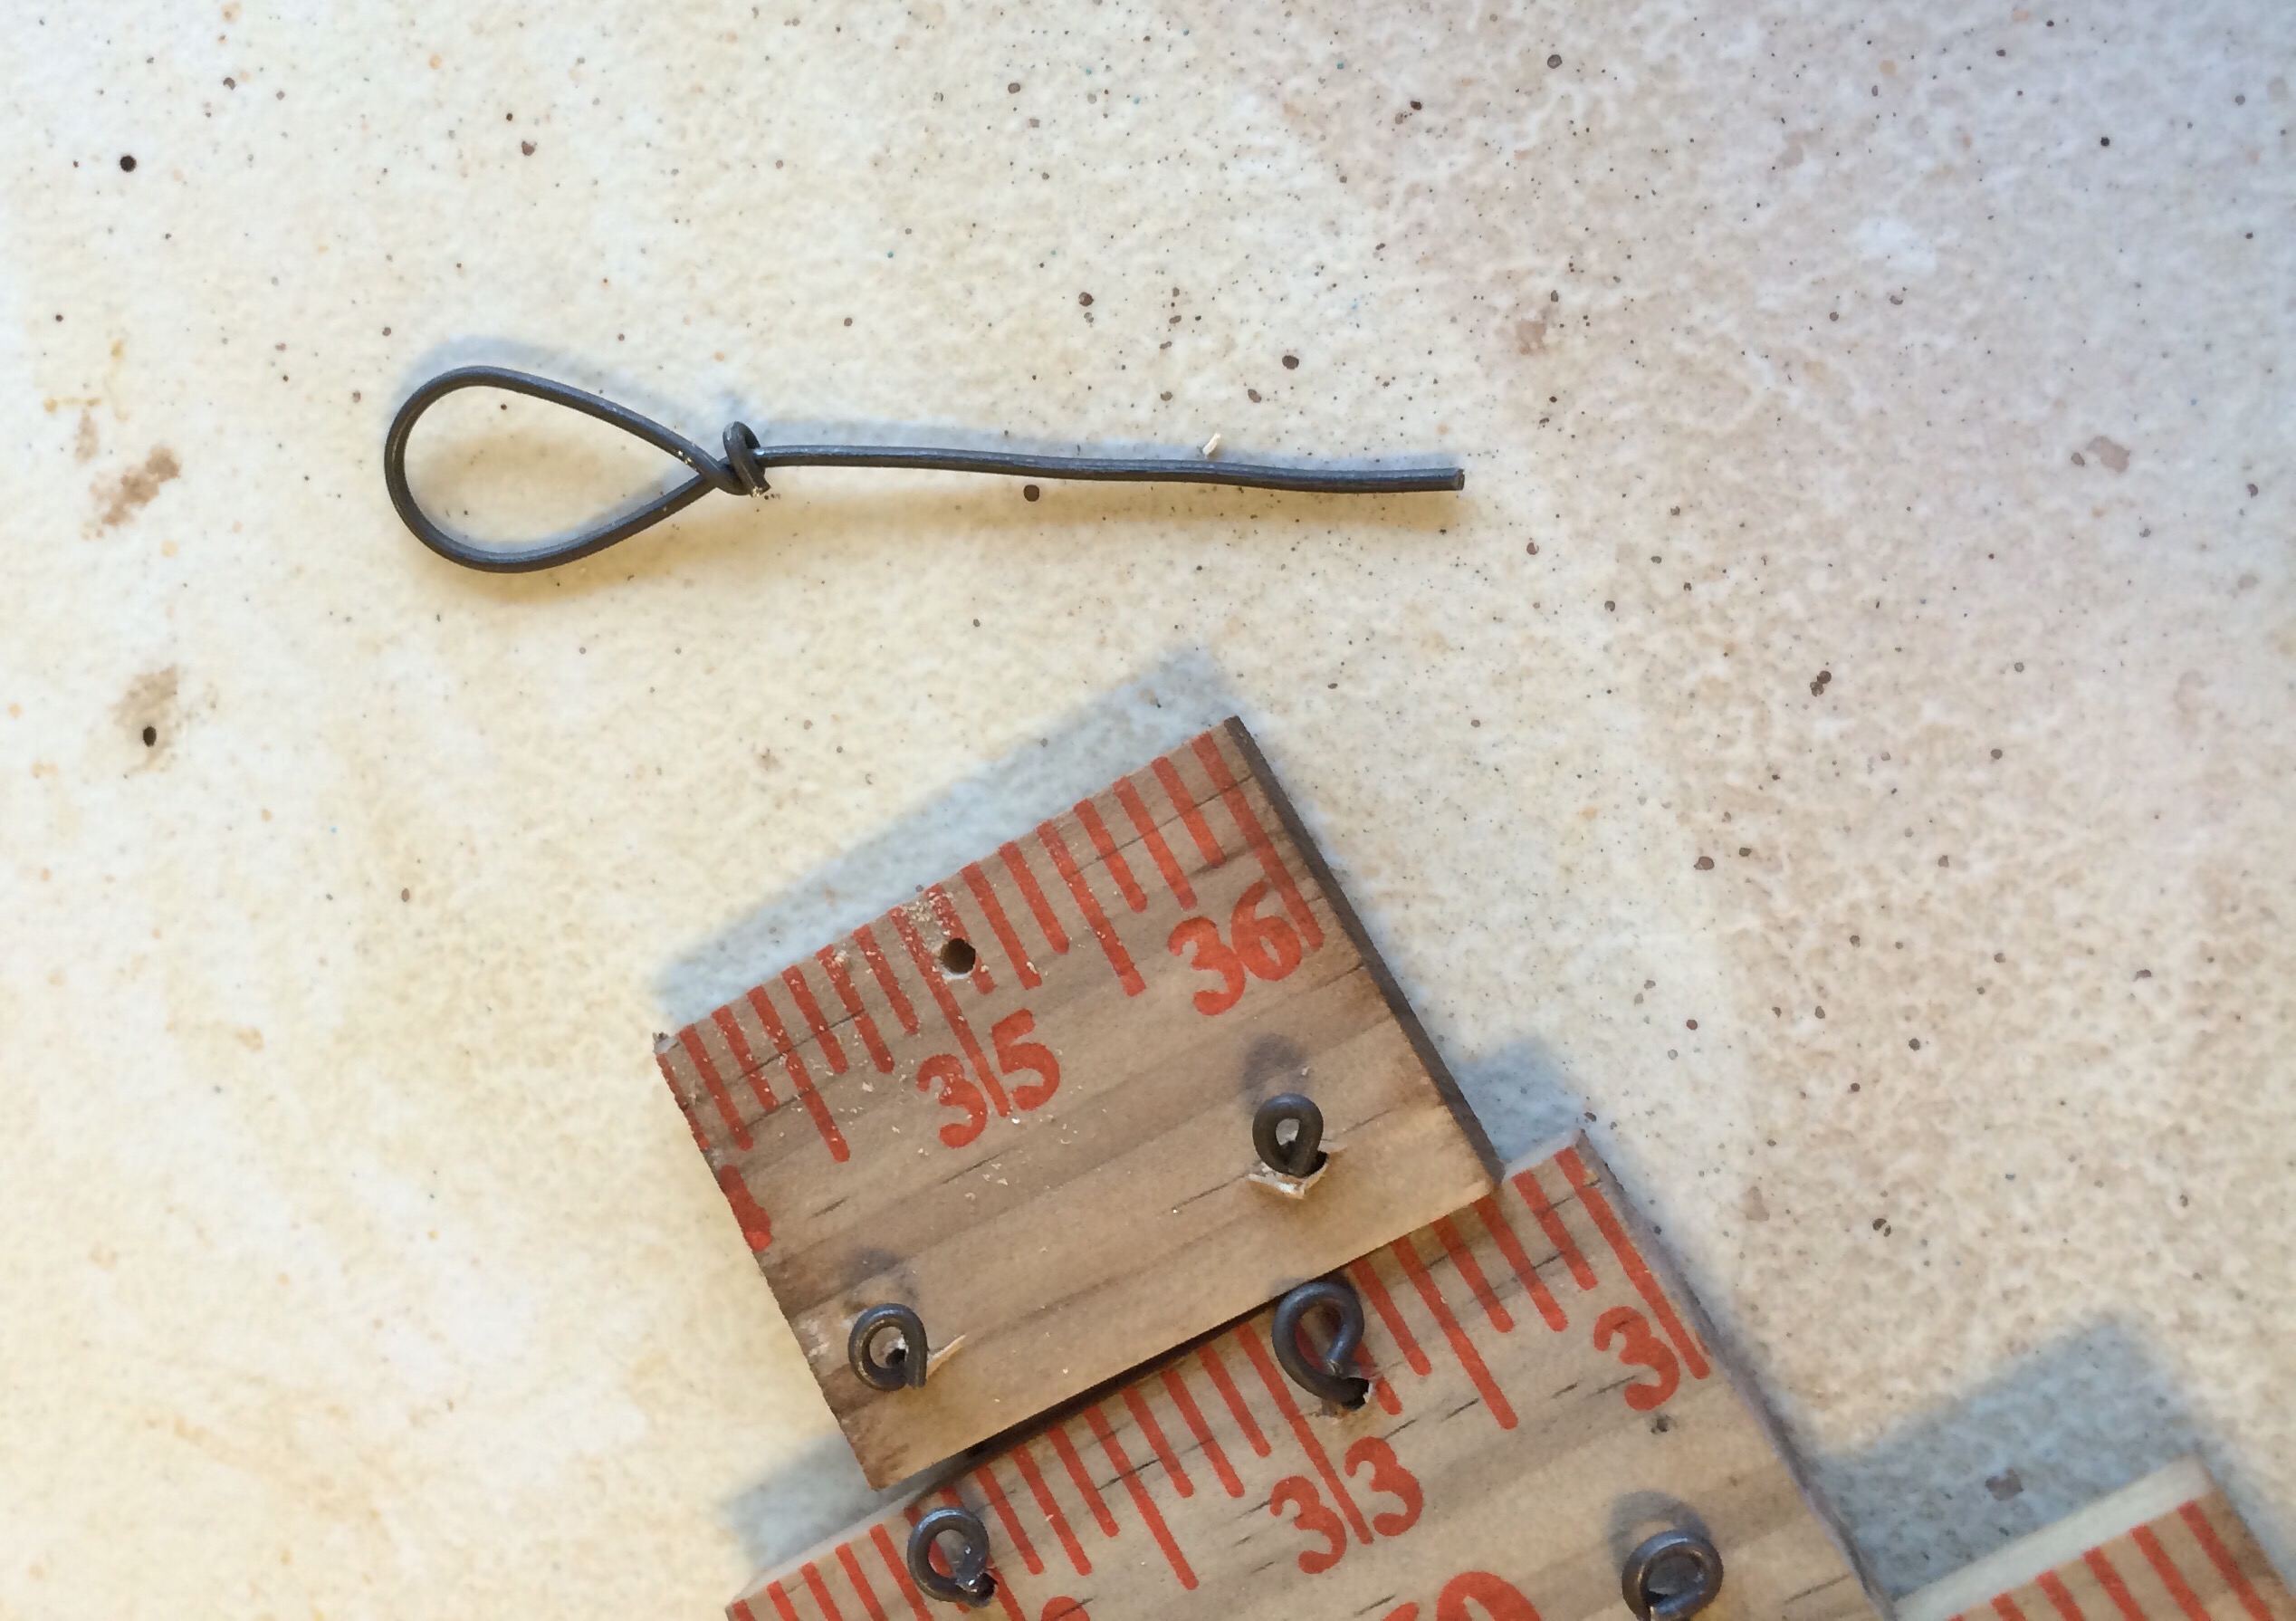
For hanging the tree cut a piece of wire 5″-6″ long, and form a large wrapped loop at one end then connect it to the top of your tree.

How to make a Christmas Tree out of a yardstick. #HolidayCrafts #YardstickCrafts
Powered By the Tweet This Plugin
Tweet This

Then give the end of the wire that is connected to the tree a little twist to hold it in place.

Now it’s time for the fun part decorating the tree. Use your imagination to see what you can come up with for decorating the yard stick tree.

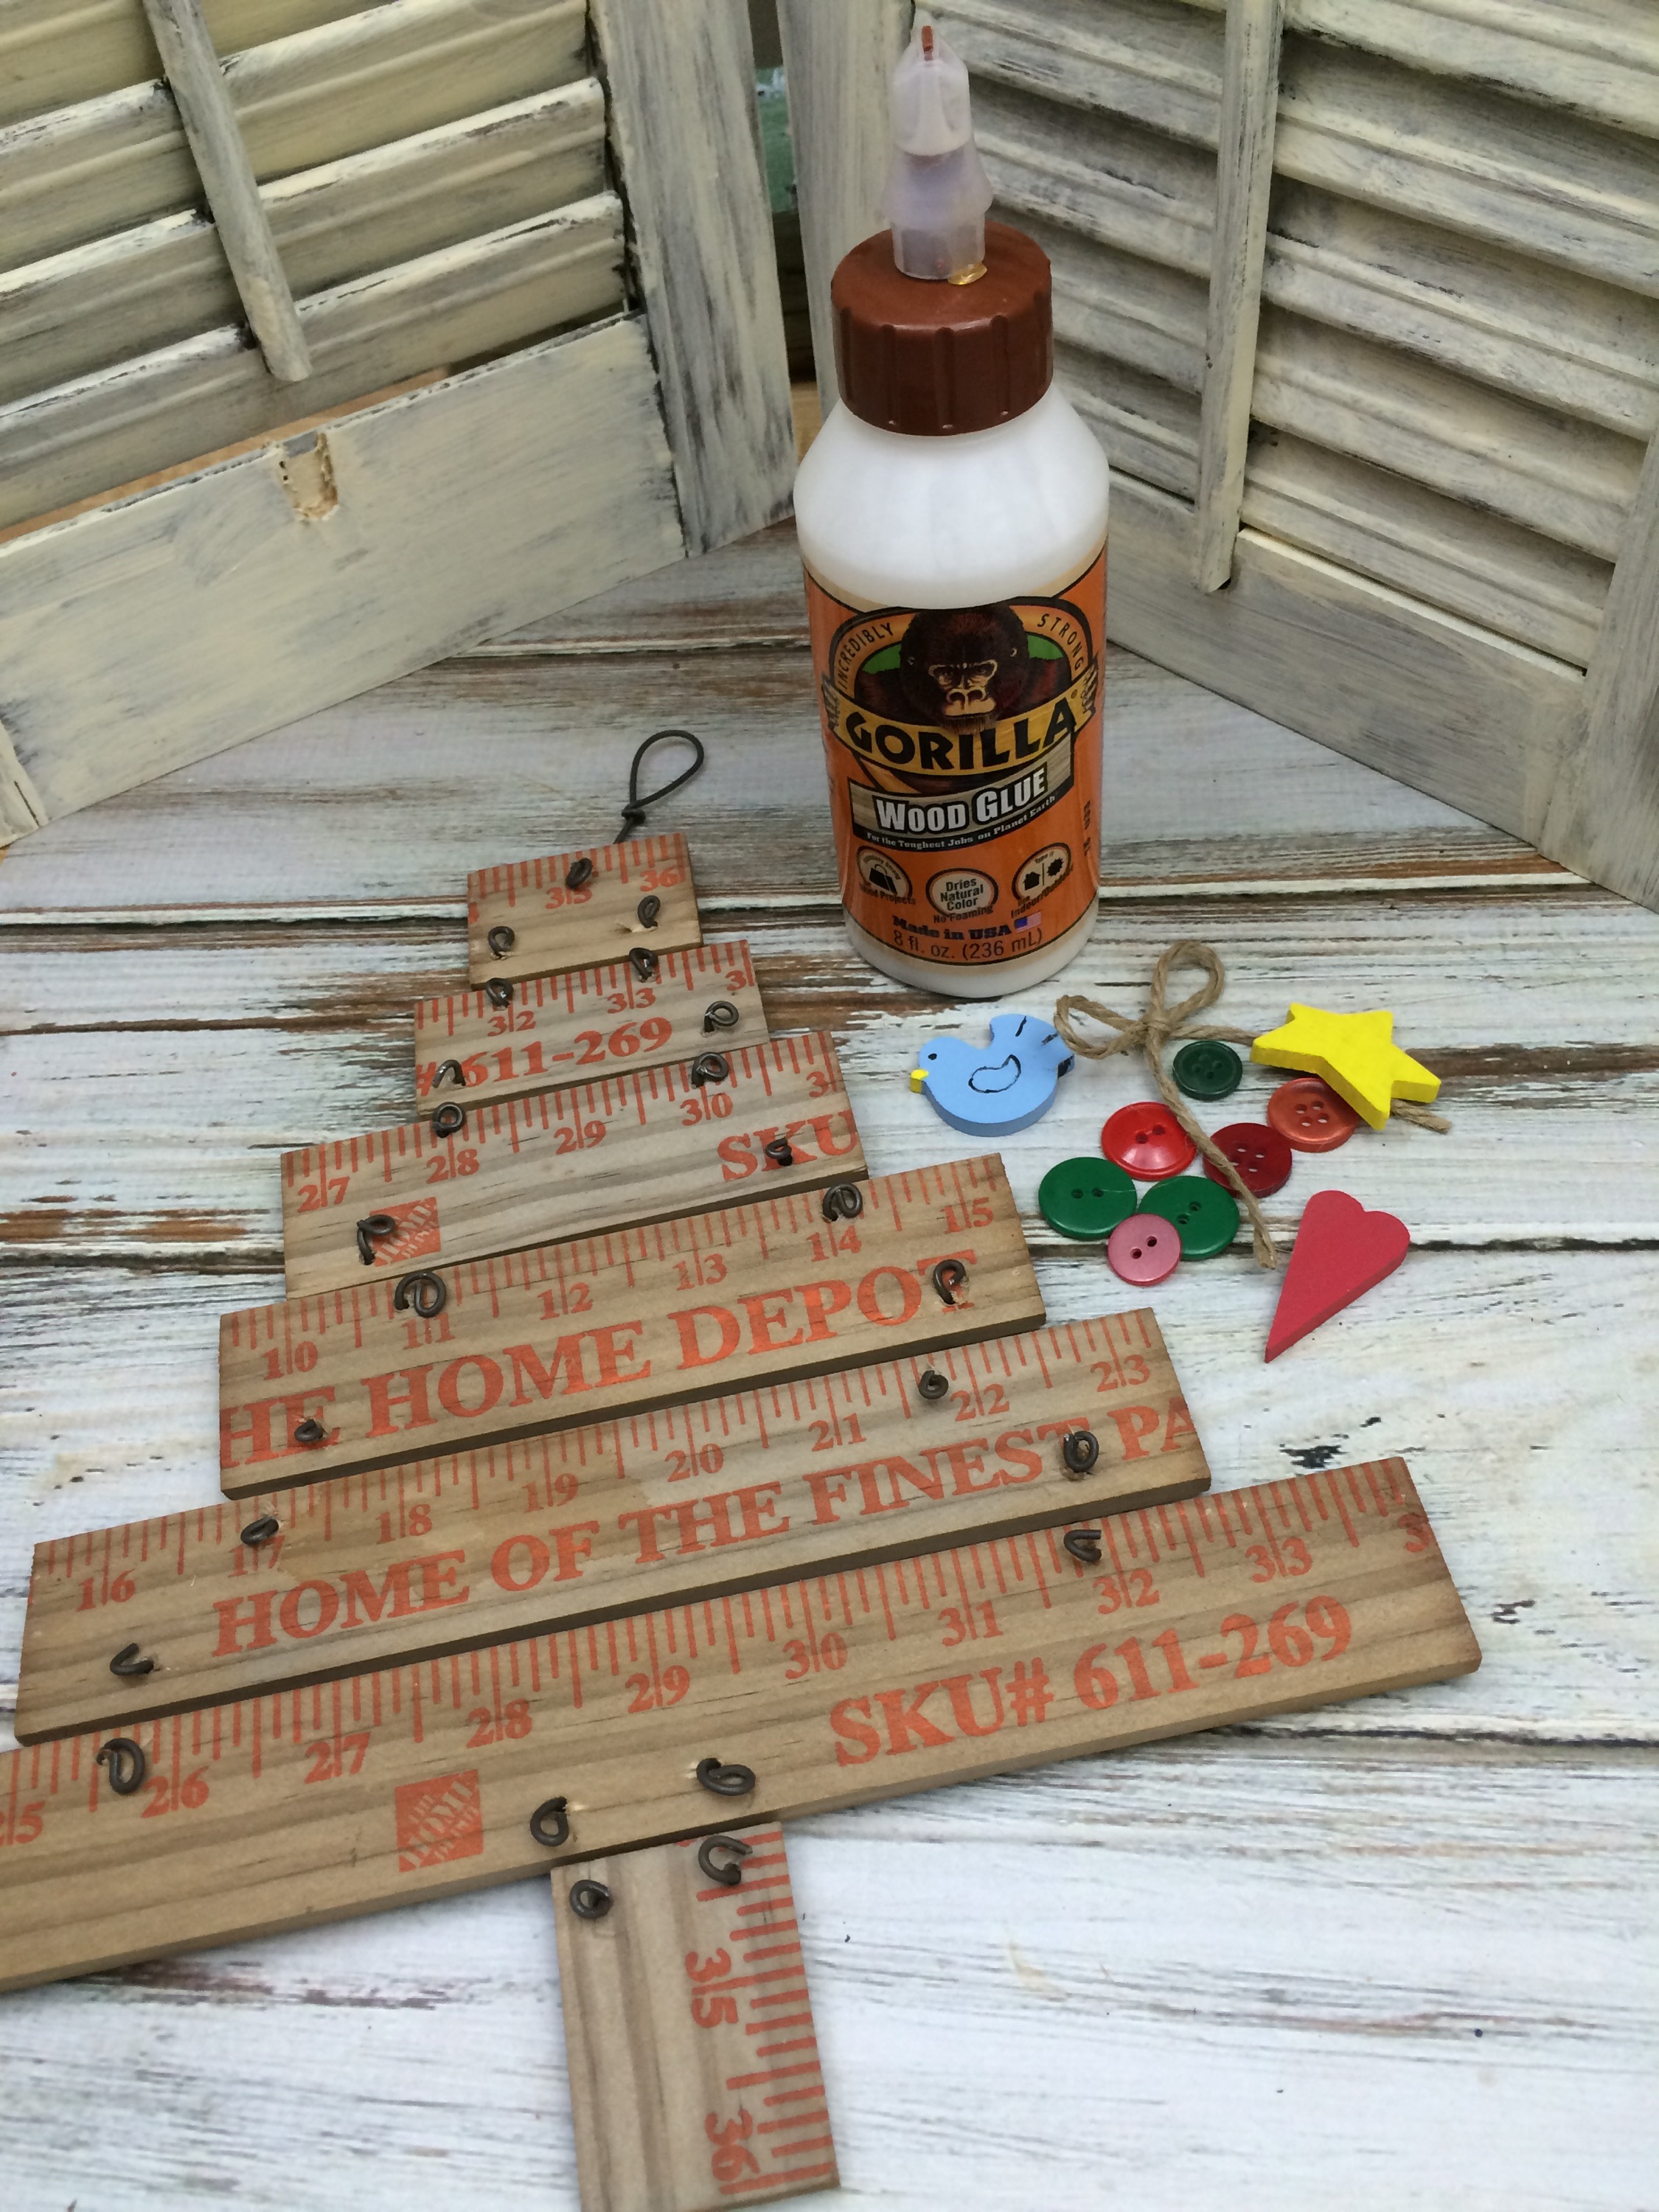
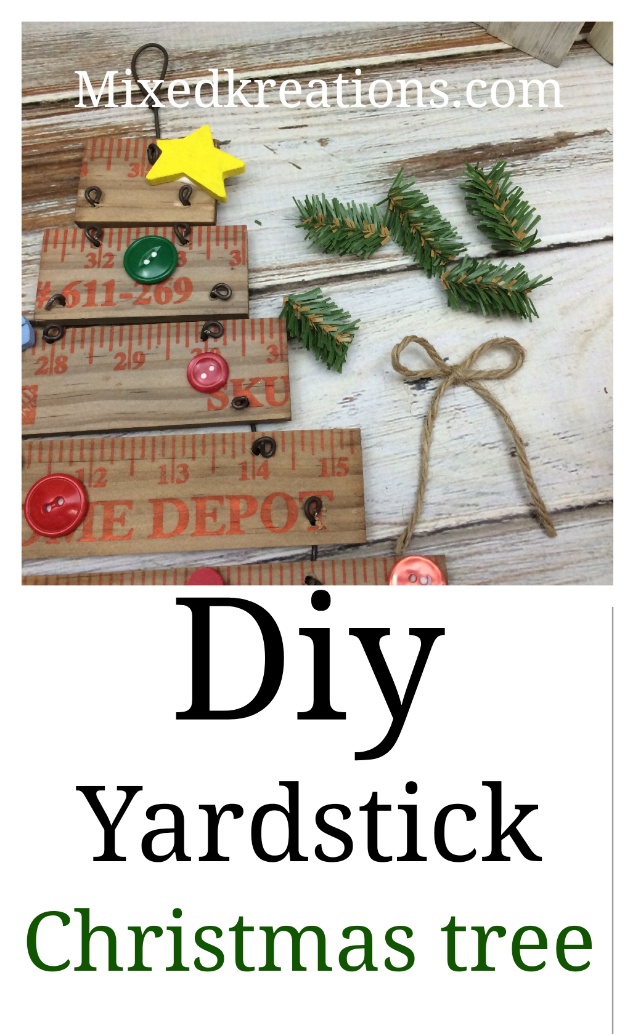
I used things that I had on hand, like buttons, wood bird, heart, star, and pine greenery.

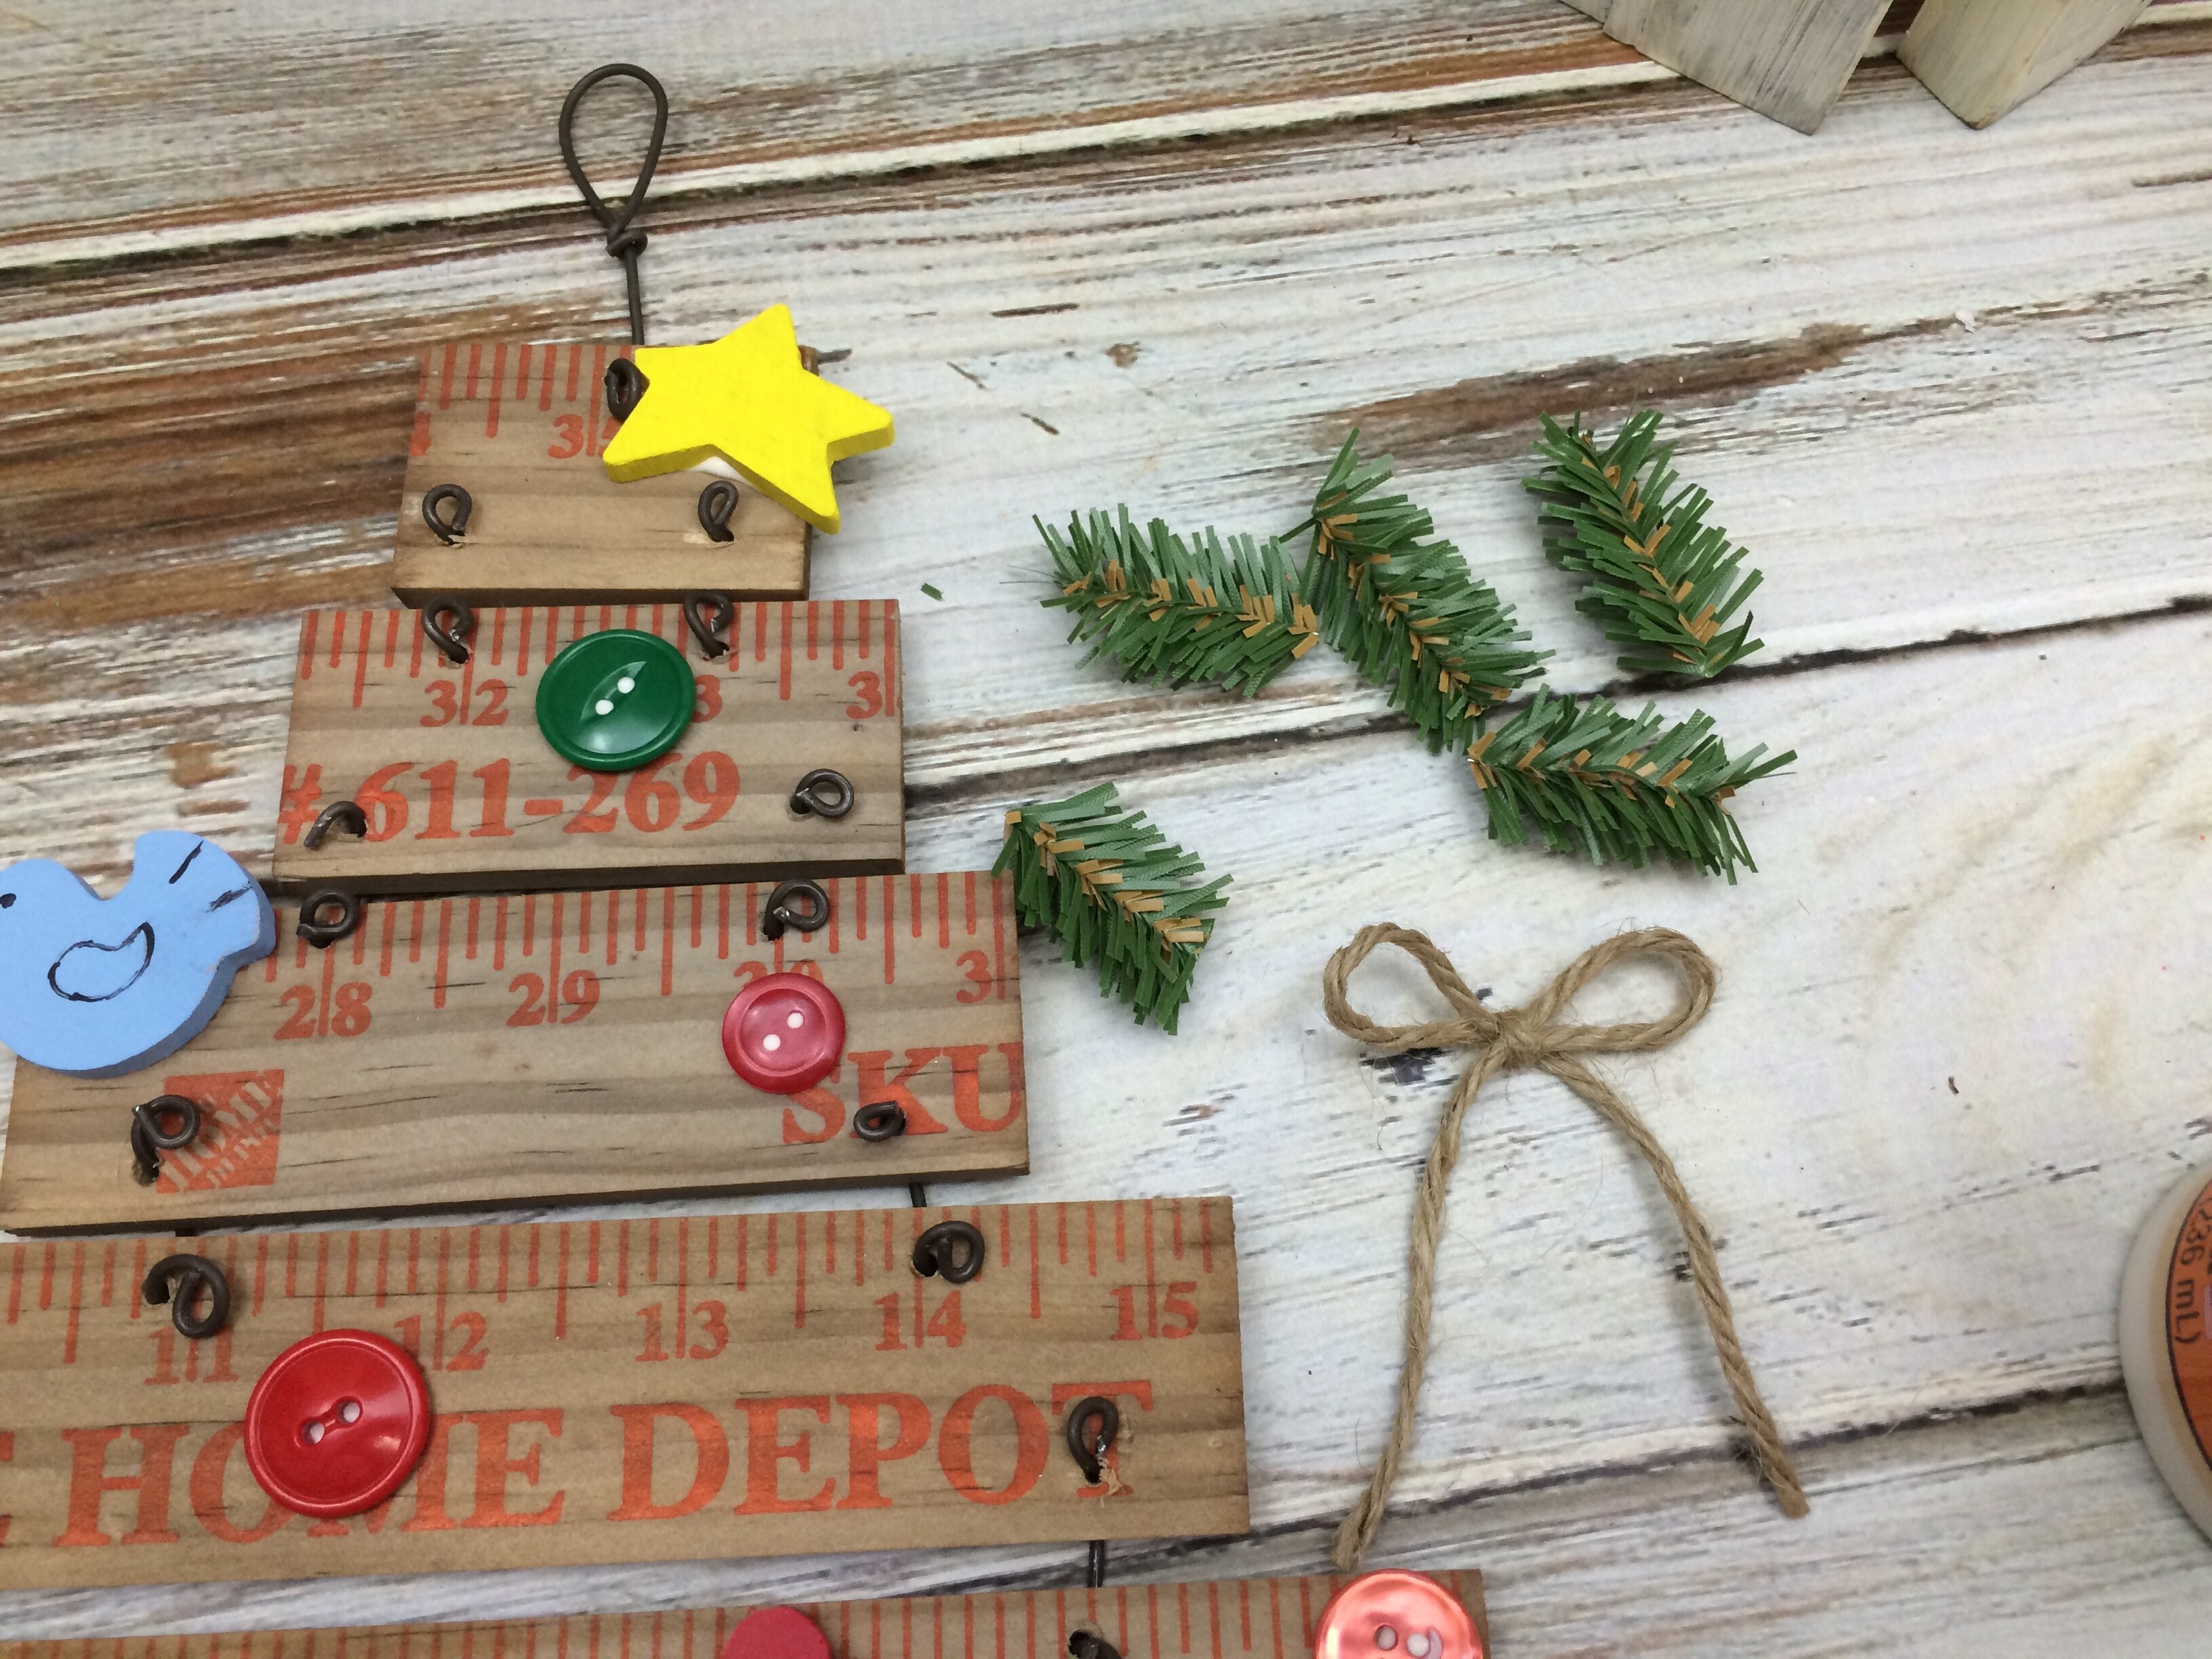
A twine bow was added to the star,

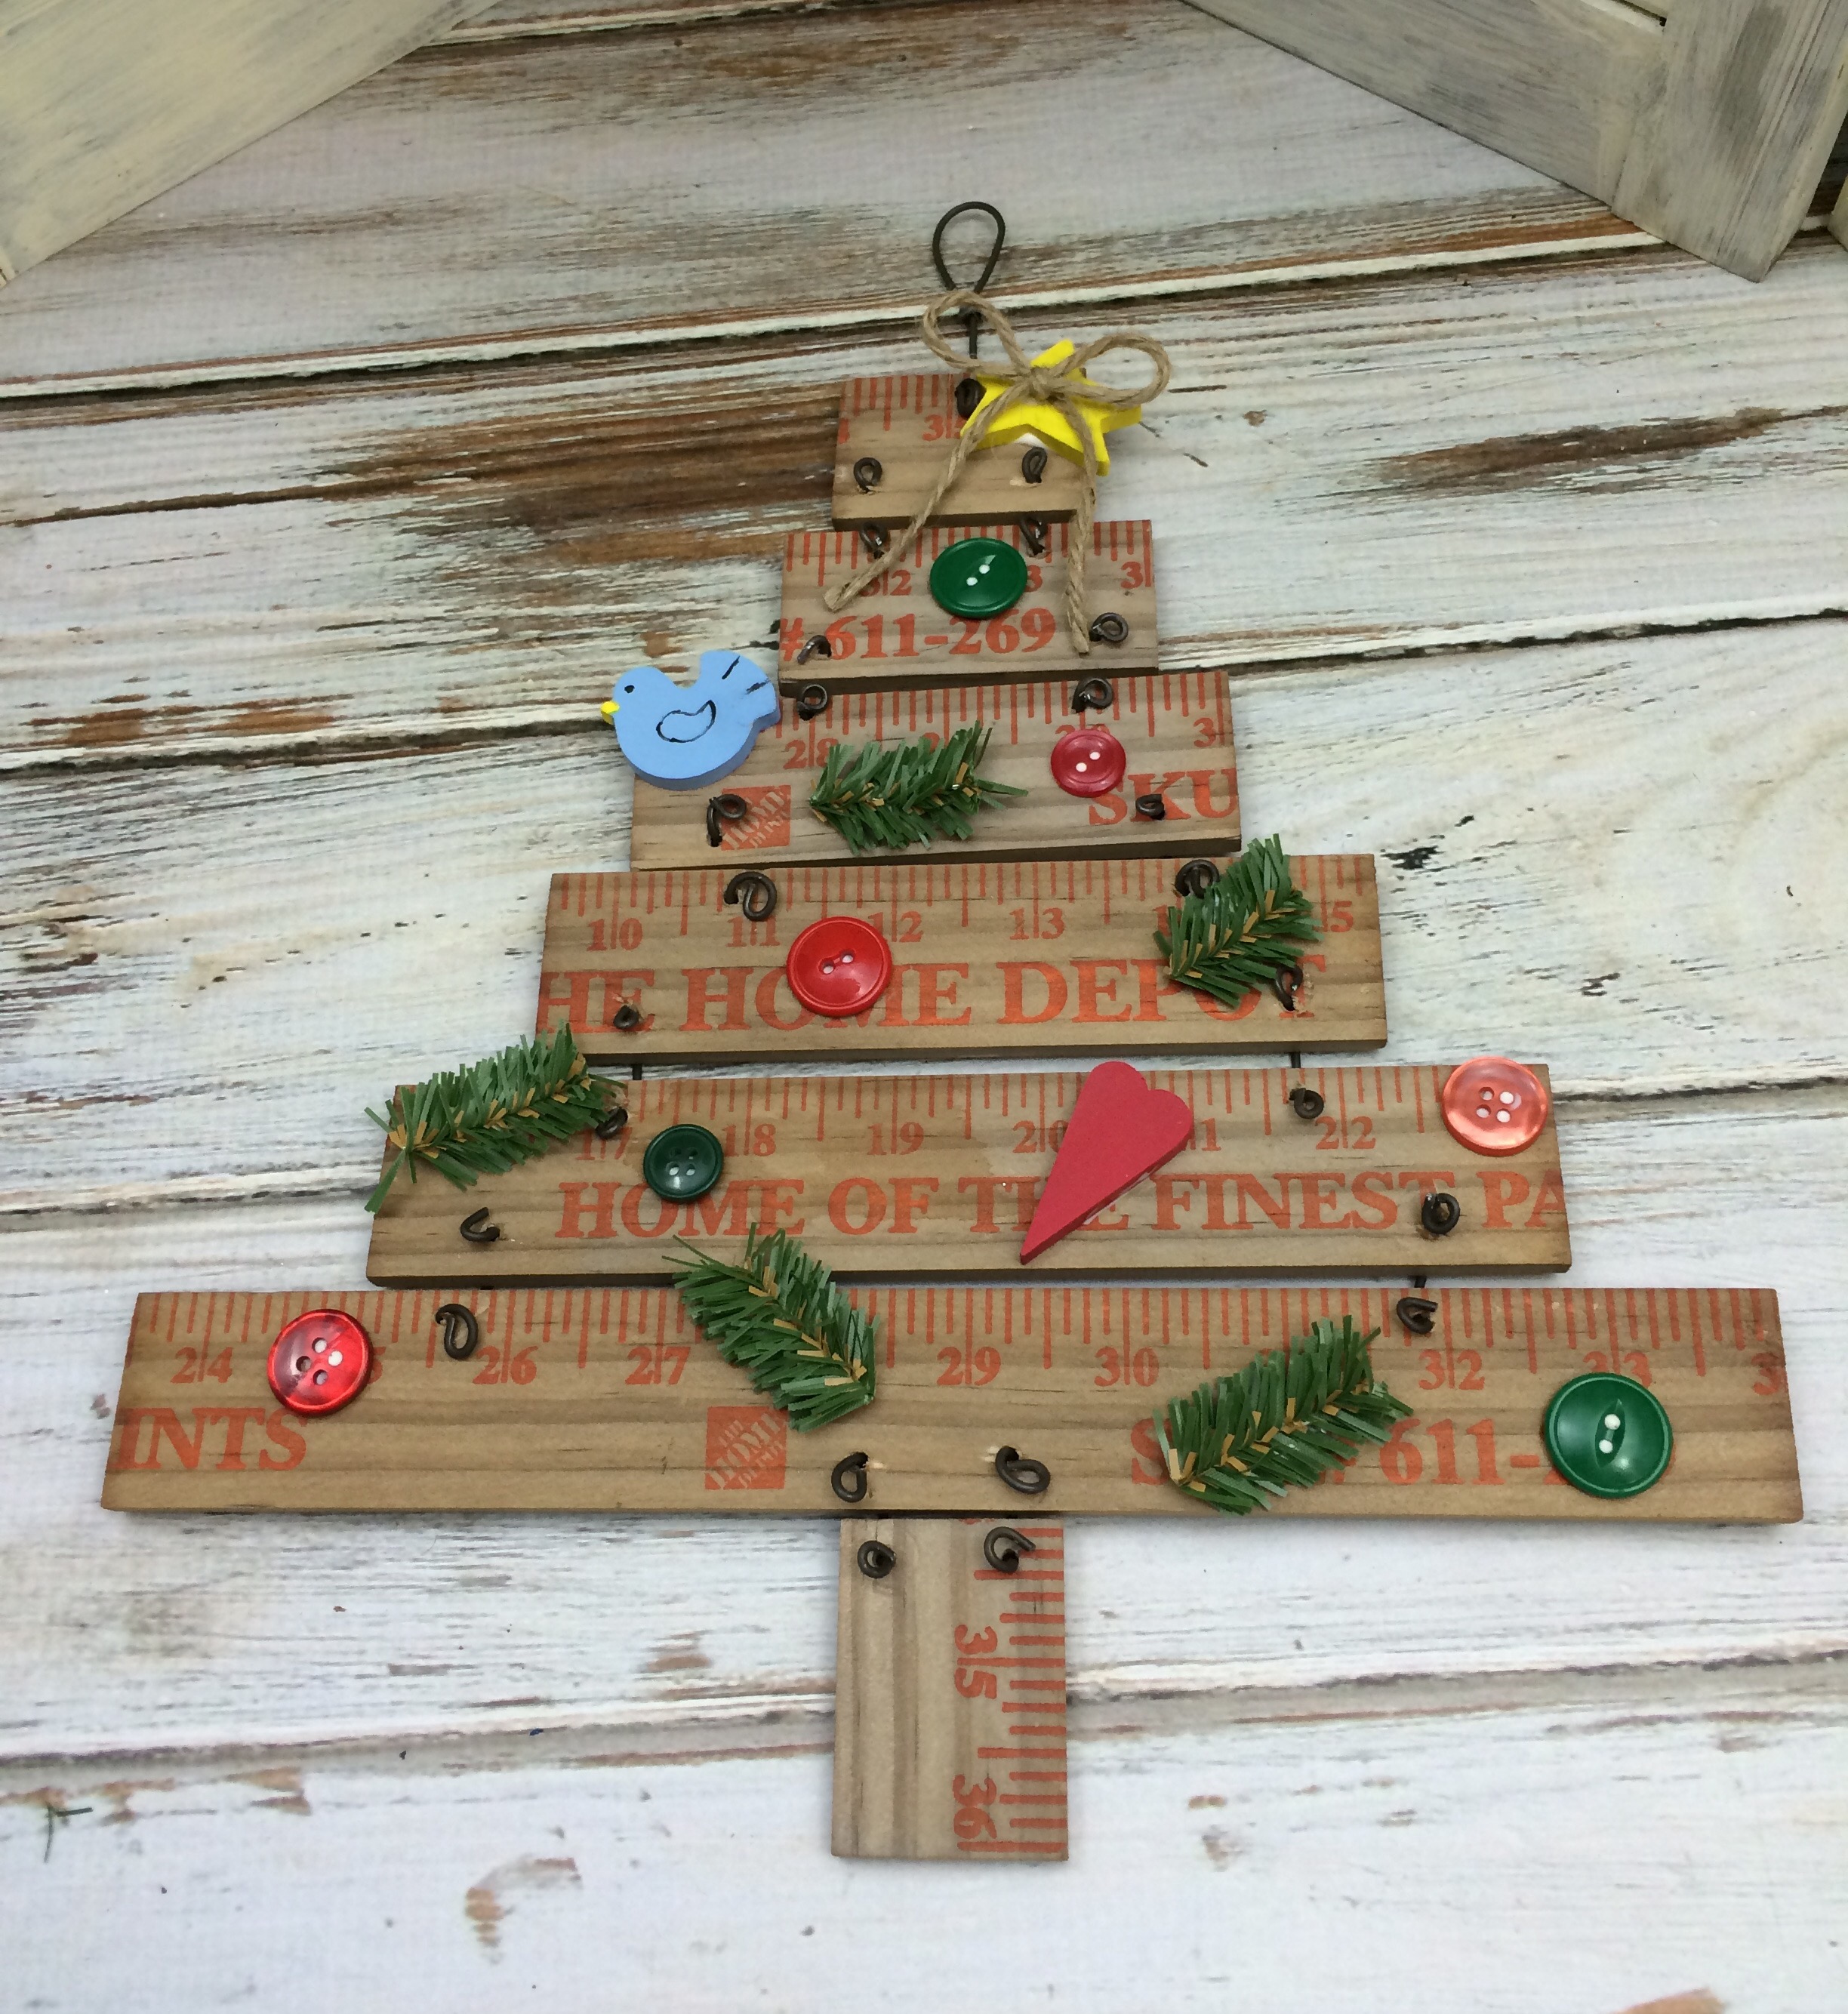
and small pieces of pine wire sprigs were then hot glued haphazardly onto the tree.

I think my Diy Yardstick Christmas Tree turned out pretty cute! What do you think?

Have you done any crafting with yard sticks? If so I would love to heard about it in the comments below.

More Holiday Projects You May Enjoy!

Burlap Tree on a wood picket
Diy Christmas Carolers
Diy Christmas Bath Salt Ornaments
Rustic Wood Snowman Block

*This post contains affiliate links, if you click on an affiliate link & buy something I may receive a small commission at no extra charge to you. The affiliate money I earn helps pay the expenses to keep this site running. Please read my disclosure for more info. Thanks so much for your support!*


Diy yardstick Christmas tree, how to repurpose a wooden yardstick into a Christmas tree for the holidays #repurposed #upcycled #diy #holidaydecor #Christmas Mixedkreations.com

If you enjoyed this post, don't forget to pin it for later!

9 shares
  • Share
  • Tweet

If you enjoyed this post, would you mind taking the time to:
  • Share, or Pin for later reference.
  • Follow me on Facebook, Twitter, Pinterest
  • Leave a comment
Thank you so much for taking the time to comment. I love hearing from my readers, and appreciate the kind words.

Comments

  1. Emma says

    December 17, 2015 at 7:58 am

    How creative! With a regular ruler it would be a cute gift idea for a teacher, too!
    Emma recently posted…Thoughtful Spot #117My Profile

    Reply
    • Linda @ Mixed Kreations says

      December 19, 2015 at 9:59 am

      Yes I think it would be a great gift for a teacher.

      Reply
  2. Carrie Groneman says

    December 18, 2015 at 8:24 pm

    This is SO clever:) I can’t believe how stinkin’ cute this is and creative. You did a fabulous job on the tutorial Linda and the pictures are great. LOVE it!
    Carrie Groneman recently posted…All Wrapped Up!My Profile

    Reply
    • Linda @ Mixed Kreations says

      December 19, 2015 at 10:27 am

      Thank you Carrie! I seen one similar on Pinterest I believe, so when I seen the yard stick in the paint department of Home Depot I snatched it up.

      Reply
  3. Nikki Frank-Hamilton says

    December 23, 2015 at 11:29 pm

    Linda, I love your DIY ruler tree! It’s right up my alley. It’s creative and rustic, exactly what I love. And you could do it in so many different ways and styles. I love the pieces that you have on hand, LOL, my tree would have earrings and hair bows. I think I’d need to find a few more interesting things. This little tree would be a welcome addition to our decor, I hope you are enjoying it. Merry Christmas my friend! xx
    Nikki Frank-Hamilton recently posted…#WAYWOW Community and LinkupMy Profile

    Reply
    • Linda @ Mixed Kreations says

      December 24, 2015 at 10:08 am

      What’s wrong with earrings and hair bows LOL! I think it would look cute with whatever you chose to embellish it with. That way it would be personalized to your style. I’m afraid I took it to my craft booth and it sold within the first few days. Thanks so much for stopping by and hope you have a Merry Christmas as well (-:

      Reply
  4. michelle says

    August 20, 2017 at 4:12 am

    Such an adorably cute idea Linda. I wish we could find the old style wooden rulers here in S Africa. I would love to try make these for Christmas

    Reply
    • Linda @ Mixed Kreations says

      August 24, 2017 at 10:34 am

      Thanks Michelle! Do you not have hardware stores in Africa? If so maybe you could find a wooden yardstick there. I’m going to let you in on a little secret. Country Sampler contacted me about featuring this yard stick Christmas tree, or my rag wrapped star ornament in the Christmas magazine. I’m so excited! They are going to send me a copy when it comes out. I won’t believe it until I see it with my own eyes.

      Reply
  5. Katrin says

    November 21, 2017 at 3:45 pm

    Linda this is so clever and I love the yard stick look. It’s rustic and fun with all the cute ornaments you added!

    Reply
    • Linda @ Mixed Kreations says

      November 27, 2017 at 6:04 pm

      Thank you Katrin! I would like to make a larger version now.

      Reply

Trackbacks

  1. Diy Christmas Carolers - Christmas Decor - Mixed Kreations says:
    November 15, 2017 at 7:03 am

    […] Diy Yard Stick Christmas Tree Easy Rag Star Ornaments Diy Rustic Wood Snowman […]

    Reply
  2. DIY Yard Stick Christmas Tree – Online Shop For Ornaments says:
    October 27, 2018 at 7:48 am

    […] For some fun Christmas decor turn a yard stick into a Christmas tree. Cut different lengths then wire them together. Get the kids to help decorate the tree with objects found around the house.  This tutorial is easy to follow and can be seen here. […]

    Reply
  3. 27 Christmas Tree Ideas - Craftsy Hacks says:
    October 20, 2021 at 9:11 am

    […] Source: mixedkreations.com […]

    Reply

Leave a Reply Cancel reply

Your email address will not be published. Required fields are marked *

CommentLuv badgeShow more posts

This site uses Akismet to reduce spam. Learn how your comment data is processed.

Thanks for sharing your thoughts and comments! I read and appreciate every single one!

Follow Mixed Kreations

Facebooktwitterpinterestyoutubeinstagram

My Favorites on Amazon

My Amazon Influencer Shop

Homemade Chalk Paint

diy chalk paint

How to Make Rusty Cans

how to make rusty cans

How to Make a Flag From a Wood Shutter

how to make a 2 sided american flag

Easter Egg Jar

How to make a Easter egg jar

Diy Texas Tile Coasters

Texas Tile Coasters

Update a Thrift Store Find

How to Update a Hanging Box in 4 easy steps

Categories

By Kelli & Crystal From Learn To Blog Hangouts

#LearntoBlog Hangouts

Dominate Course

LearntoBlog
Featured on Hometalk.com
Rakuten Affiliate Network Welcome Program
Grow and Make

Dollar Tree

Creative Fabrica Font Bundles

Font Banner - Free Fonts

Featured At

Featured At

Mixed Kreations featured in Country sampler

Featured at

mixed kreations is featured in Bella Crafts online magazine
The Pin Junkie

Canva Photo Editing

Amazon Affiliates

I am a participant in the Amazon Services LLC Associates Program, an affiliate advertising program designed to provide a means for sites to earn advertising fees by advertising and linking to Amazon.com.

Disclosures Statement

This policy is valid from 19 July 2013 This blog is a personal blog written and edited by me. For questions about this blog, please contact Linda @ ldkeesee@mixedkreations.com. This blog accepts forms of cash advertising, sponsorship, paid insertions or other forms of compensation. The compensation received will never influence the content, topics or posts made in this blog. All advertising is in the form of advertisements generated by a third party ad network. Those advertisements will be identified as paid advertisements. The owner(s) of this blog is compensated to provide opinion on products, services, websites and various other topics. Even though the owner(s) of this blog receives compensation for our posts or advertisements, we always give our honest opinions, findings, beliefs, or experiences on those topics or products. The views and opinions expressed on this blog are purely the bloggers' own. Any product claim, statistic, quote or other representation about a product or service should be verified with the manufacturer, provider or party in question. This blog does not contain any content which might present a conflict of interest. To get your own policy, go to http://www.disclosurepolicy.org

Copyright © 2023 · Modern Blogger Pro Theme By, Pretty Darn Cute Design