I am so excited to share these Easy Diy Tin Can Pumpkins. Their super easy to make and so darn cute, and a great way to keep tin cans out of the landfill, and a fun and inexpensive way to decorate for the holidays.
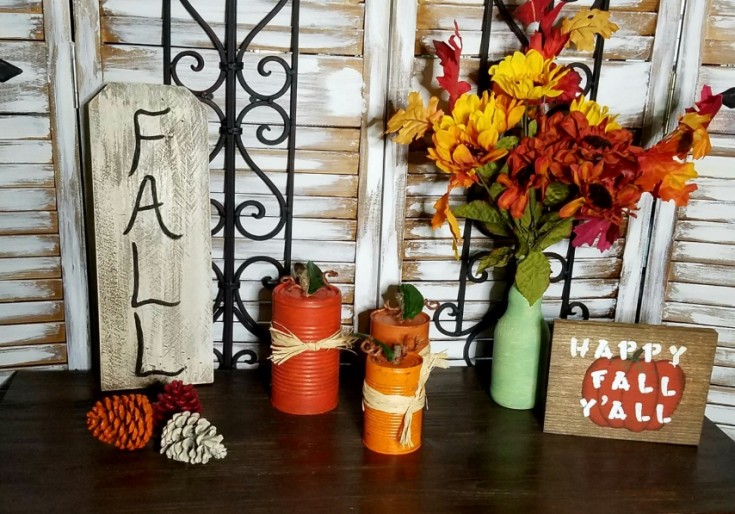
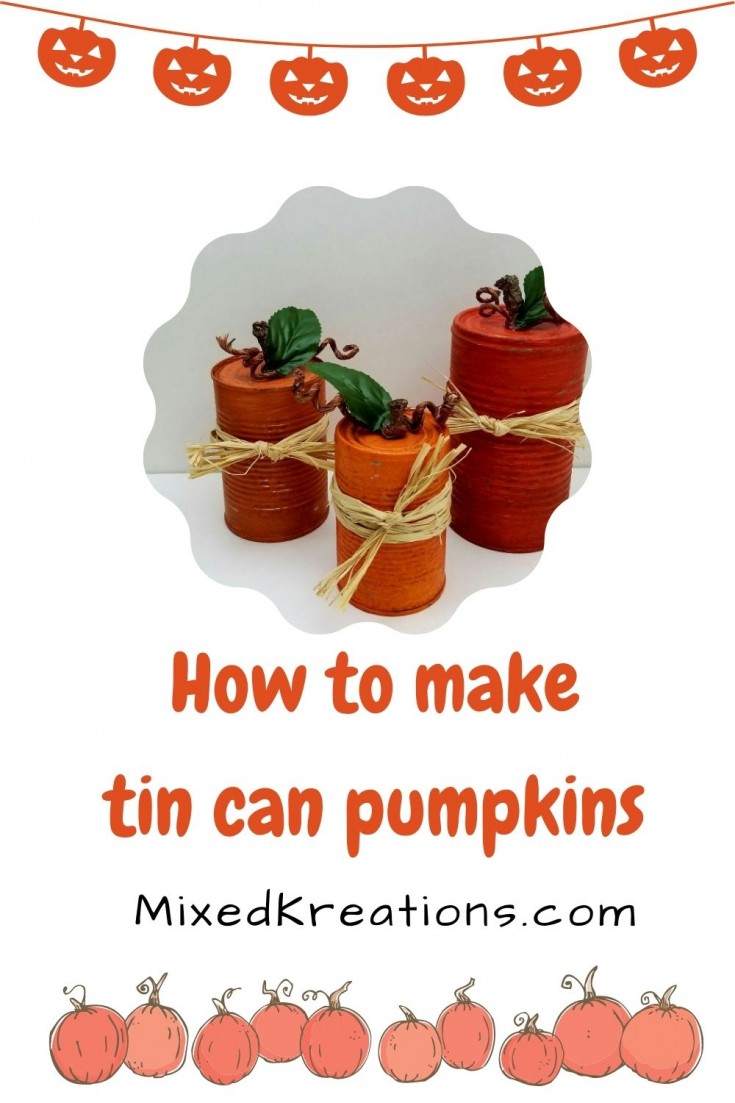
Easy Diy Tin Can Pumpkins
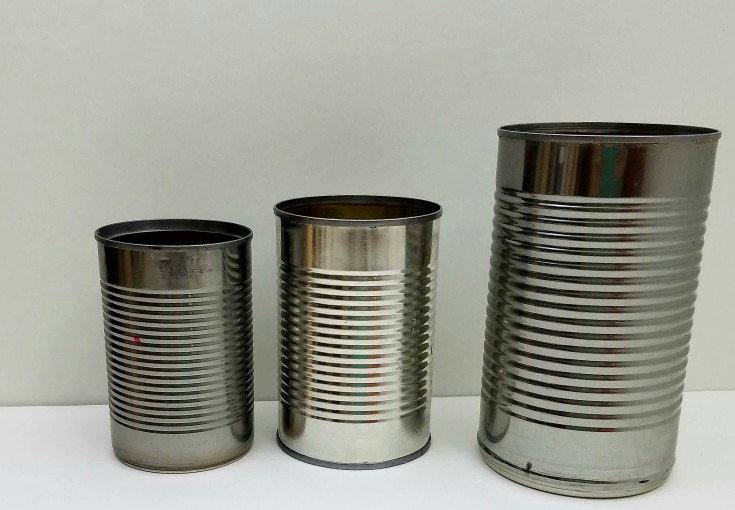
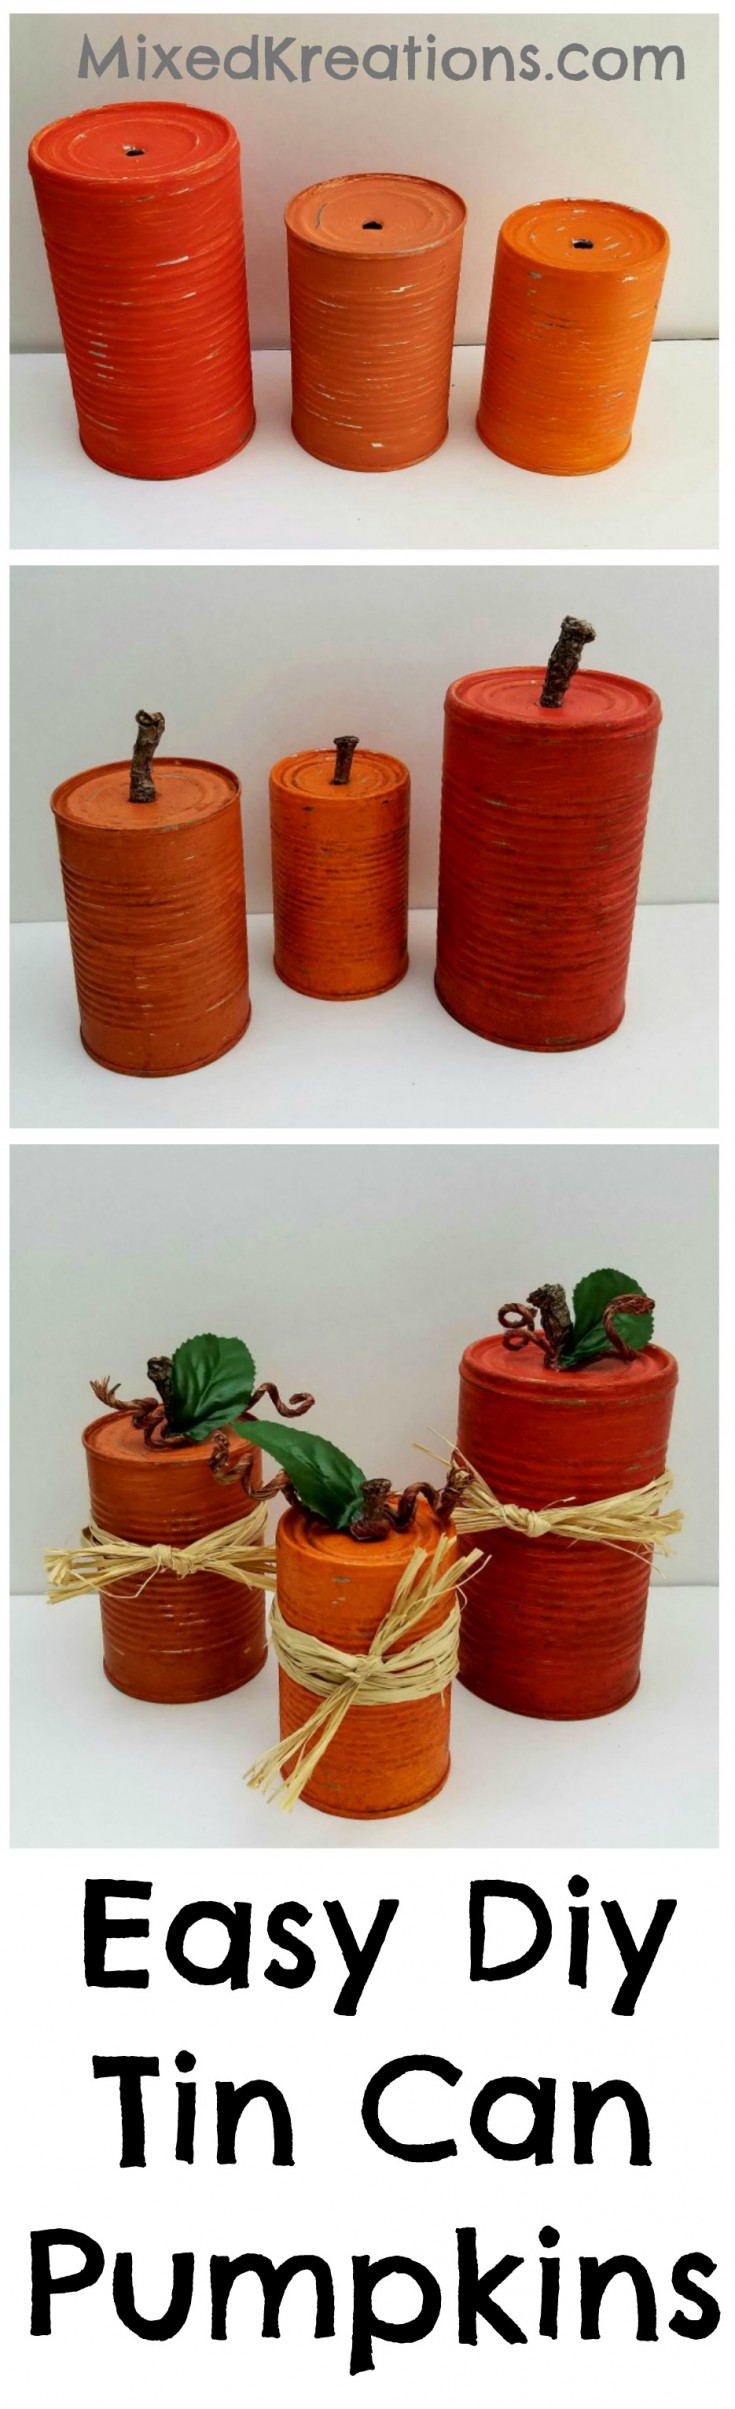
Gather your tin cans, clean the sticky gunk from the labels off the cans
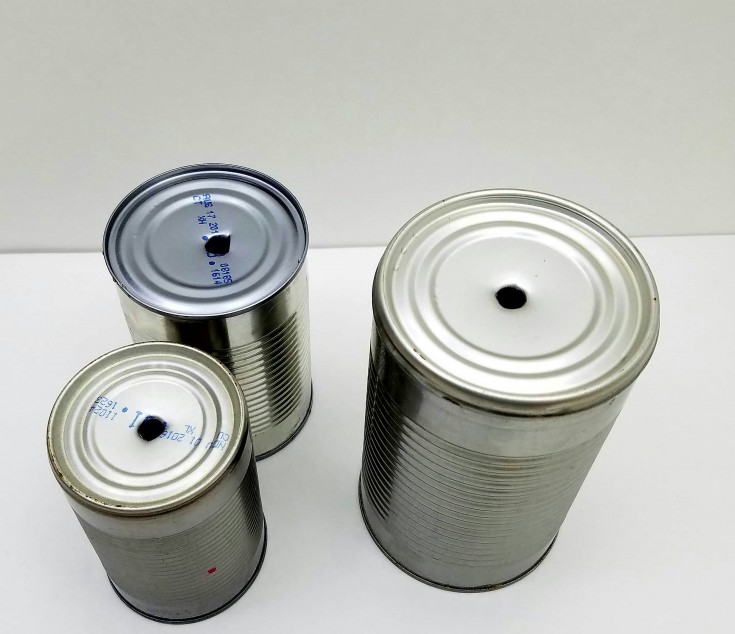
Next use a small nail and poke a hole in the bottom center portion of each can then use a screwdriver to enlarge the holes just large enough for your twigs to fit into.
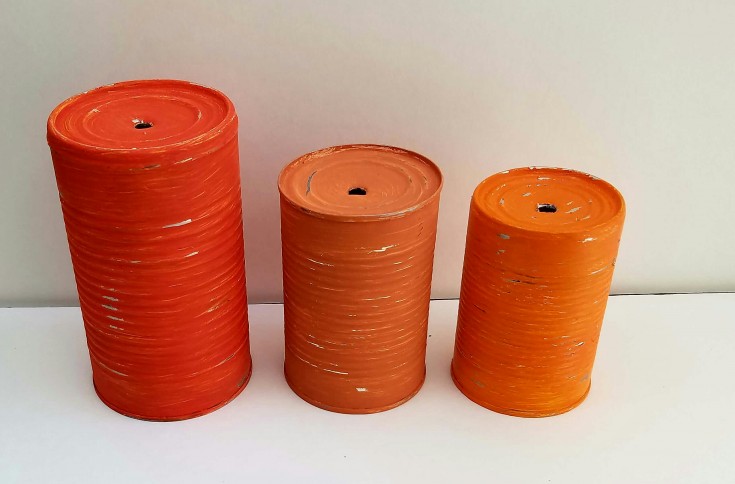
Paint your cans different shades of orange or whatever color you choose.
Once dry distress your cans using sandpaper to add a little bit of rustic charm to your tin can pumpkins.
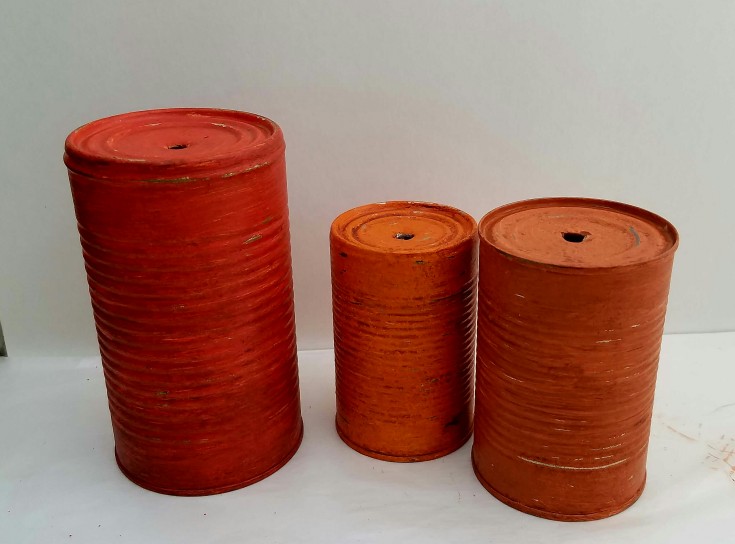
After that I added my favorite antiquing medium.
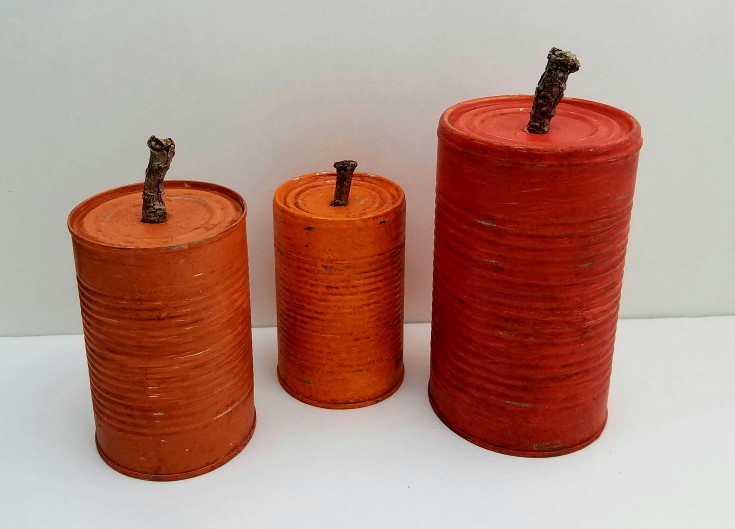
Now hot glue your Twigs into the holes. I glued mine from the inside of the tin cans.
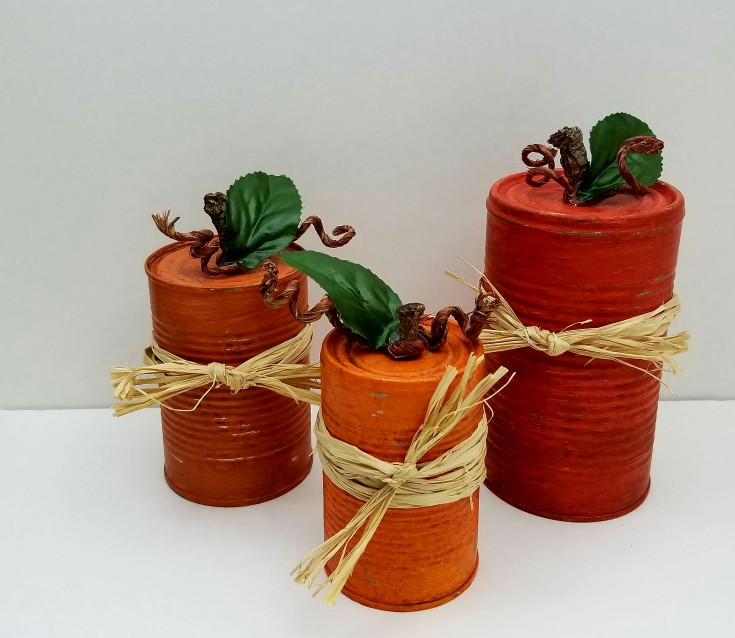
Next I added my wire for the tendril’s. The wire had some kind of material over it that made it resemble wood, not sure of the name but I found it at Michaels. You could just use regular wire and add a patina to it, like I did on my wood pumpkins.
Using a pencil a added the curls in the tendril’s. Then I hot glued some leaves that I had cut off of some flower sprigs.
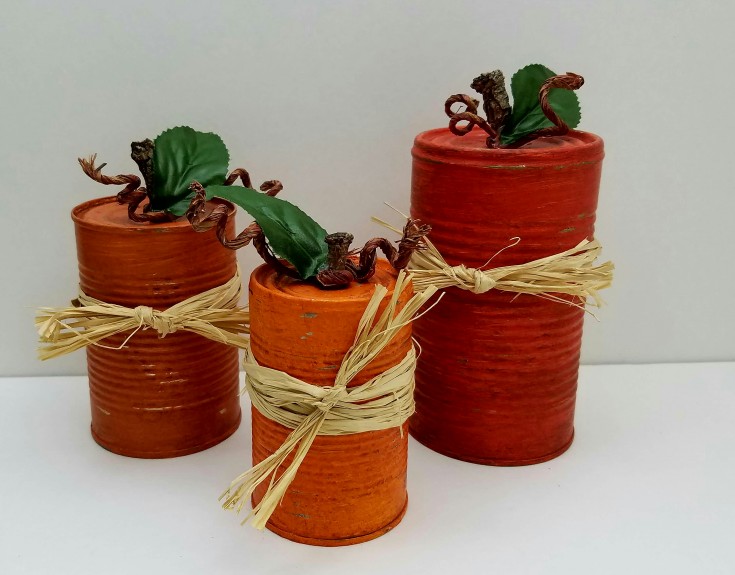
I finished off my Easy Diy Tin Can Pumpkins by tying some strands of raffia around the cans. I love how they turned out, I think their adorable!
*This post contains affiliate links, if you click on an affiliate link & buy something I may receive a small commission at no extra charge to you. The affiliate money I earn helps pay the expenses to keep this site running. Please read my full advertising disclosure for more info. Thanks so much for your support!*
Supplies Needed
Tin Can of various sizes
Nail (to poke holes in bottom of the cans)
Screwdriver (to enlarge the holes)
Twigs
Green Floral leaves
Wire
Antiquing Medium (I love this stuff)
Variety of orange acrylic paints
Raffia
Optional – patina
What kind of Fall crafts have you been working on?
More Fun Tin Can Projects
Quick and Easy Repurposed Tin Cans
How to Make Rusty Tin Cans
Grungy Can
Love the idea! So cute ♥
Thank you Summer, and thanks for stopping by!
Linda you know how much I love repurposes. And this one is absolutely adorable. Love the earthy colors you chose and the pretty details to complete the pumpkins.
Thanks Mary! I think that this is one of my favorite repurposed projects. I just think that they turned out adorable!
These turned out beautifully Linda. I’m fascinated with how you made those stems, I really love the curly wirly bits next to the twig. It makes the whole thing look so rustic and real. Love it!!
Thanks Michelle! I just happened onto the wood looking coated wire at Michael’s. I love how it turned out.
This would be a really cute project to do with children. I am pinning it to my munchkin board. Thanks for posting.
Thanks Leanna! I’m sure the little ones would enjoy making these easy tin can pumpkins. Thanks for pinning!
Decor doesn’t have to be expensive! These are adorable.
Thanks Terri! No it doesn’t, and it’s fun repurposing things that normally go in the trash.
What a fun craft idea. Adorable!
Thanks Renee! They are so easy too!
Howdy Linda! What a great idea…and so darned cute. When all the pumpkins are round and plump, I love your ‘lean’ pumpkins. And i’ve used that wrapped wire in the past and really like it. It works great with your rustic pumpkins.
Wishing you a lovely weekend.
Hugs, Lynn
Thanks Lynn! I guess they are lean pumpkins, lol. Love the wire, it really looks like wood, pretty cool!
Hope you have a Great Weekend as well!
You amaze me with your talent to look at something that would normally go into the recycle bin and see something so cool in it. I would never in a million years have thought of this. They are so adorable. I like them more than real orange pumpkins, for decor purposes. I like the unusual, and this is definitely that! Thanks for sharing your creative ideas, you inspire me!
Thanks Nikki! When first making them I wasn’t so sure how they would look, but I absolutely love how they turned out.
What a fun craft idea. The can pumpkins looks wonderful. Pinning to share. Thanks so much.
Thank you Joy! I am loving how they turned out. If I had more time I would make more in a variety of colors. There’s always next year.
Hii, i don’t have a blog but i would like to know when and what color to use patina and what kind of paint to use.
Hi Linda! You can use acrylic paints or chalk paints. I used an antiquing gel to give it the aged look. The antiquing gel is used after you paint the cans, and their dry. Thanks for stooping by!
Hi, I loved your idea for the cans something for me to try they r soooo cute
Thank you Audra! You will have fun with these! They are super easy to make, and you can make them in whatever colors you like. Thanks for stopping by!