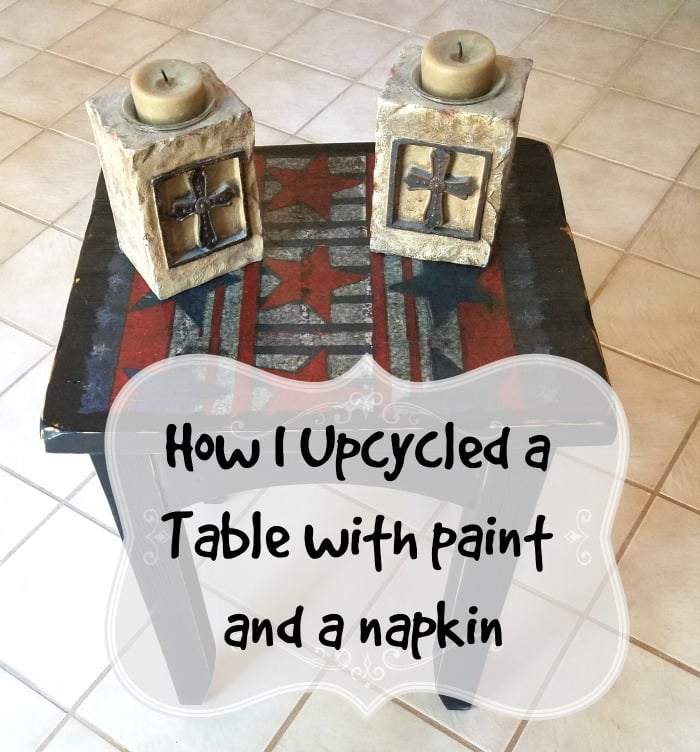
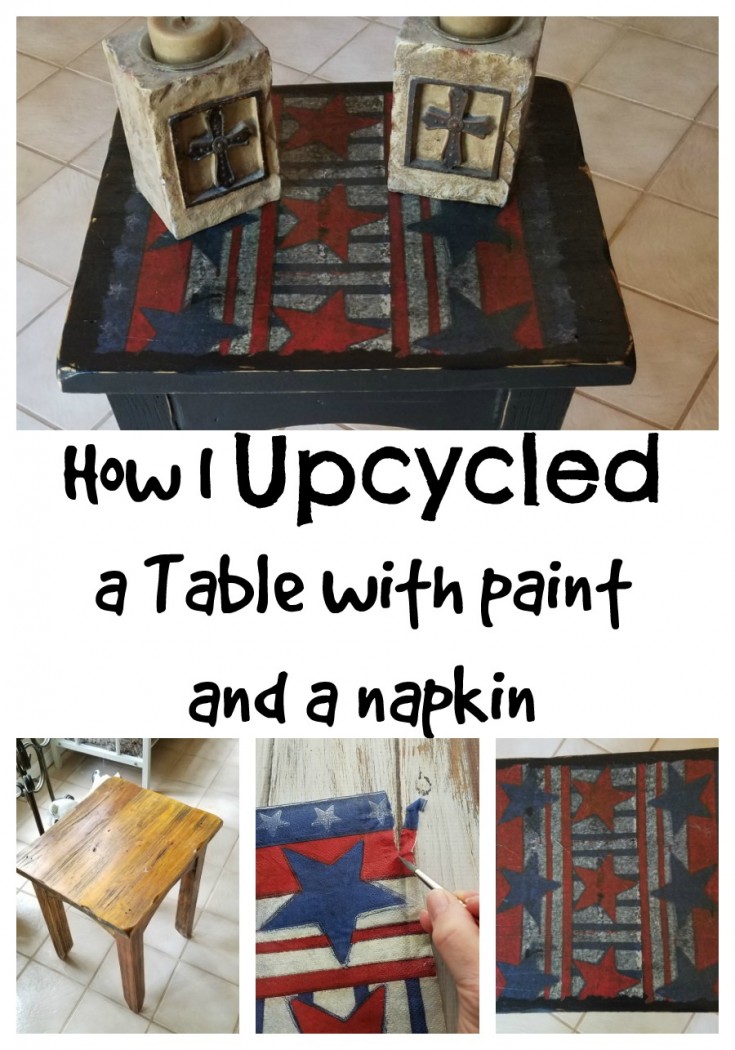
Hi All! Can you believe Fall is just around the corner? Is it cooling off in your neck of the woods yet? Here in Texas we’ve been having some unusually cooler weather. For a few days, we will be in the 80’s, then back up to the 90’s. Well enough of the crazy weather, today I want to share my “How to Upcycle a Table with paint and a napkin”.
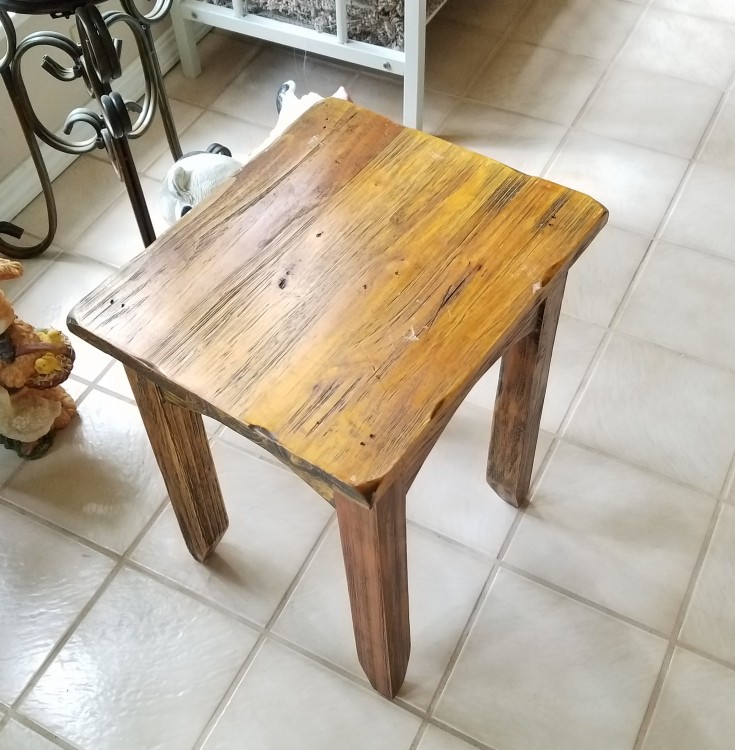
This little table has been sitting in the garage ever since we moved here a few years back. Since I have been wanting to paint a piece of furniture black, LOL. If this is large enough to be considered furniture.
I decide this little wooden table would be perfect to start with to see how I will like something painted black.
Also, I have been wanting to try out a decoupage napkin. So, this small wood table is going to be my guinea pig. It will be painted black with a decoupaged napkin on top.
While out looking for pretty napkins I ran across one with stars and stripes. This will be the one I will use, I think that it will look pretty nice with the black table.
***This post contains affiliate links, if you click on an affiliate link & buy something I may receive a small commission at no extra charge to you. The affiliate money I earn helps pay the expenses to keep this site running. Please read my full advertising disclosure for more info. Thanks so much for your support!***
Material List For Upcycled Table
Small wood table
Paper napkin
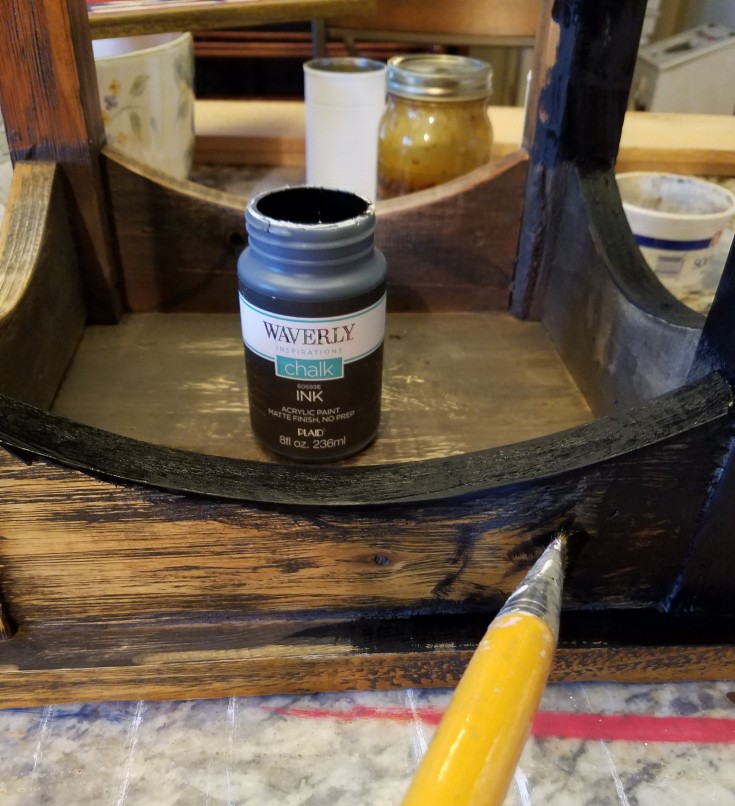
Black chalk paint
Mod Podge
Paint brush
Course sandpaper
[tweetthis display_mode=”box”]How to give a small table a new makeover with some paint, and a paper napkin. [/tweetthis]
How to Upcycle a Table
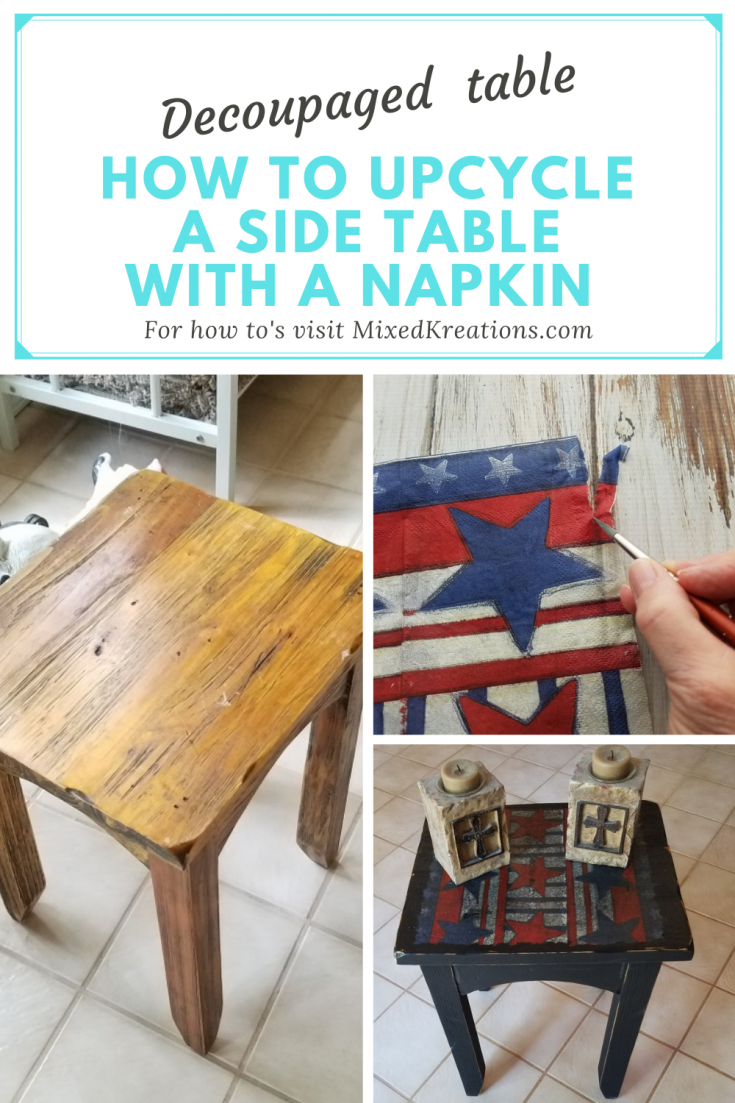
First I started off by giving the table a good cleaning since it’s been sitting in the garage for several years it was needing one.
Next, I gave it two coats of black chalk paint letting each coat dry thoroughly.
Then I separated the two-ply napkins, and cut off the pieces that I would be using.
One side of each napkin had a straight cut with matching pattern. Because I will be butting the two ends together.
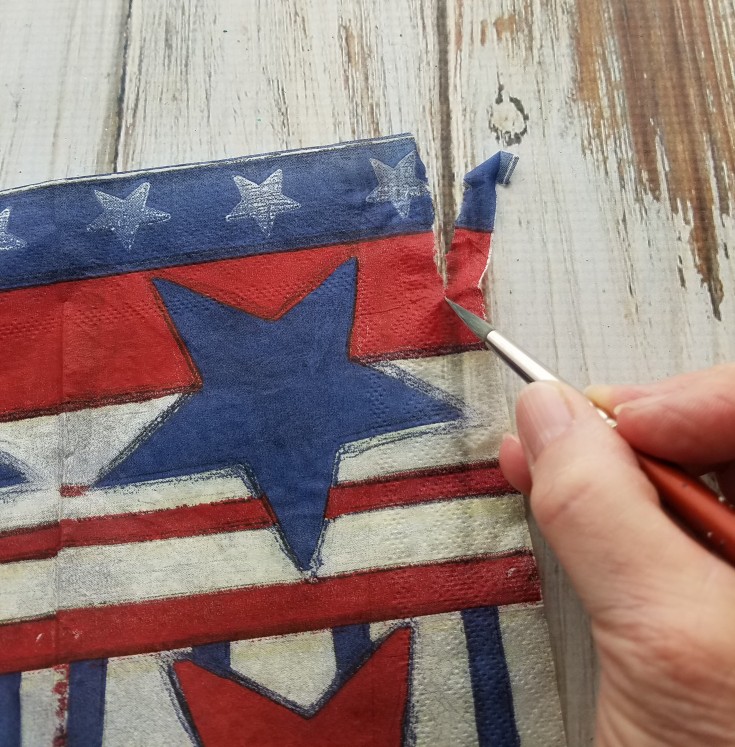
The other three sides I used my paint brush and ran a bead of water around the three sides then torn the edges off to form slightly rough jagged edges.
I positioned the napkins in place then starting on one end using Mod Podge underneath to stick it down in place. Trying to get it as smooth as possible without wrinkles which is very hard to do. No worries I will take care of the wrinkles later.
After letting this dry thoroughly, I then took the little table to the garage. Using my course sandpaper, I roughed up the edges so that some of the wood underneath showed through.
Next, I lightly went over the top of the napkin sanding off what wrinkles that I had adding to the overall rustic look that I was seeking.
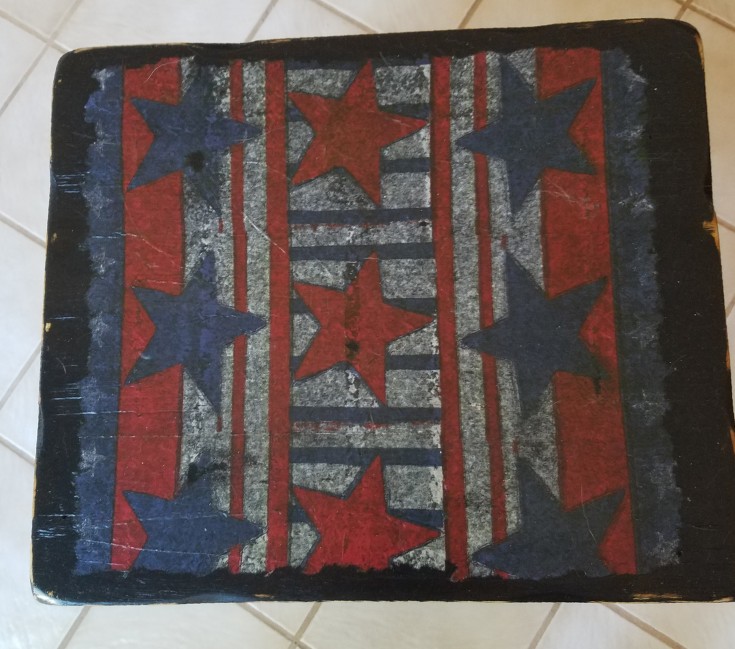
Dusted it off then took it back in, and gave the top two coats of Mod Podge to seal and protect the napkin.
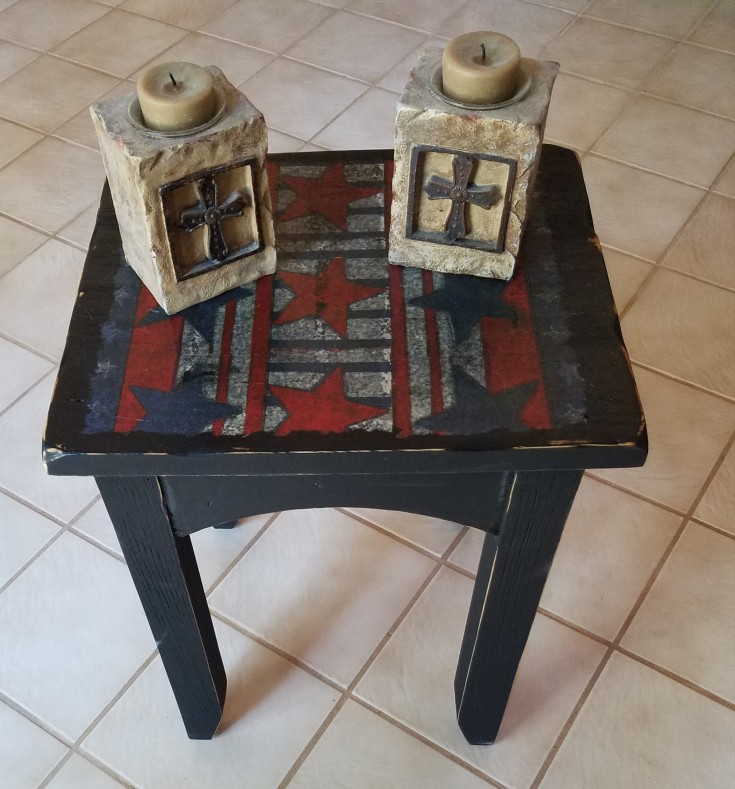
That’s how to upcycle a table with paint and a napkin, and I am loving how it turned out. Now maybe I will get the courage to paint something larger in black. Like my Kitchen table!
Have you tried decoupaging napkins before? If so please share in comments below. I love reading your comments, it makes my day. 🙂
Linda that is quite a transformation. It went from boring wood to statement making black! Love it and the pretty decoupage on top.
Thanks Mary! Ive been wanting to paint something black. Trying to get up the nerve to paint my kitchen table.
This is so cool Linda – I love the colour and the decoupage, you really have transformed it!
Thank you Sarah! I’m happy with how it turned out, and I do like the black. Now if I can get the nerve to paint my kitchen table this way.
I’ve done several napkin decoupage jobs, and I enjoy using them. They’re fun! Love your little table! It looks good painted black, and like the contrast of the napkin.
Thank you Florence! With this piece I didn’t have to worry so much about wrinkles, but I don’t see how others get theirs so smooth.
I love the decoupage. I’ve never tried it myself, but I’m itching to. 🙂 The table turned out great!
Thank you Amy! For me it’s harder getting those wrinkles out, but with this piece I didn’t really have to worry about it.
Isn’t that lovely Linda. The black paint seems to show through the napkin adding to that worn, distressed look. I can never seem to modge napkins without them breaking. Maybe it’s the type of brush I use. Did yours have soft bristles?
Thank you Michelle! Mod Podge napkins isn’t easy when it comes to getting it smooth. Since I wanted it to look rustic I didn’t worry so much about the wrinkles. Once dry I sanded over the top, and it took the wrinkles off just adding to the rustic look. The bristles weren’t hard but they were stiff.
I have never tried this, but I am so interested in the process. It looks great and I really like how you sanded the edges, it looks like it was meant to be there.
We have a lot of black painted furniture in our home. It does seem to collect dust more often, but love have it looks against our light grey walls.
Pinning this to save, I want to try it one day, thanks for the great step by step!
Thank you Nikki! I’ve been wanting to paint our dinning room table black, but haven’t thought about it gathering dust. Hmmm I may have to think on this more. But I do love how the black looks when distressed. Thanks for pinning!
Love the torn napkin on the edges Linda! I’ve seen napkins used in drawers and drawer edges before and have always loved how they look. This is a fun table project! Pinned!
Thank you Wendi! It was a fun project! I’ll have to try it in drawers sometime, that would be pretty. Thanks for pinning!
That looks great!! I have been wanting to play around with the napkins on somehthing but I have not done it yet…now I want to get going on it.
Thanks Pam! I need to find some vintage looking napkins, I have several projects I would like to try. Can’t wait to see what you come up with.