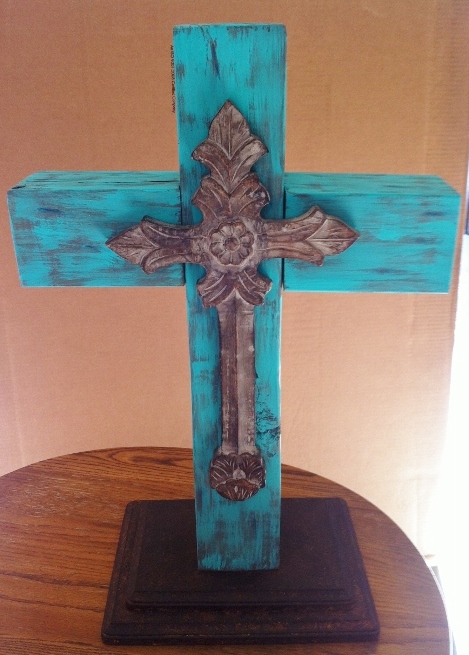
I made this turquoise wood cross out of a solid wood post so it is very sturdy. The cross can be made and then decorated however you like to fit in with your own home decor. This tutorial will show you how to connect the pieces together to for this sturdy wood cross.
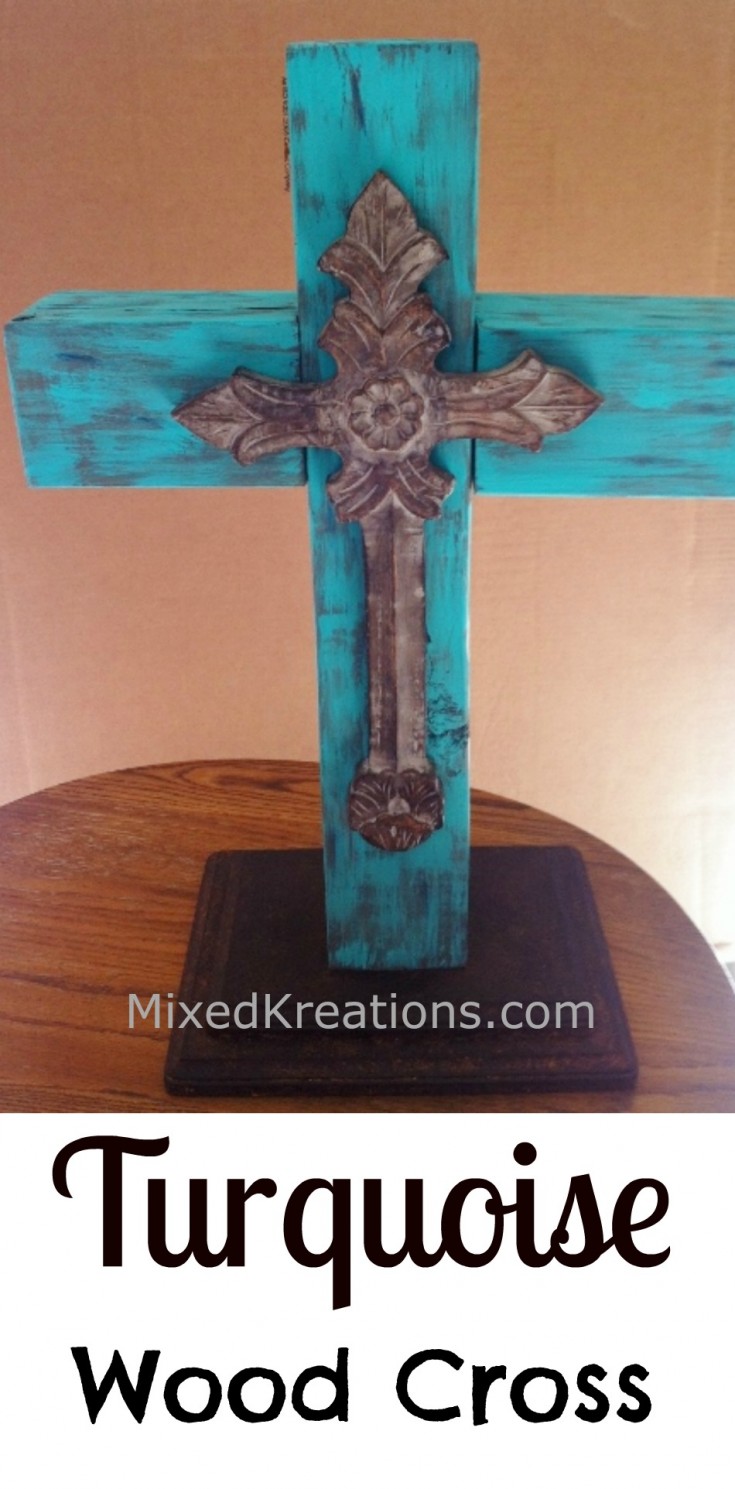
How To Make A Turquoise Wood Cross

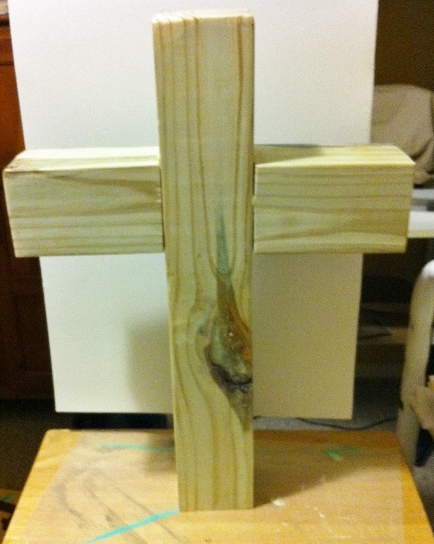
This turquoise wood cross was made using 3 1/2″ x 3 1/2″ post (aka 4″x4″ post).
I cut two pieces 6″ long, and one piece 21″ long.
Then I measured down 5″ from the top of the 21″ long piece. Marked off where my 6″ pieces will attach. Next mark the center of each piece. (as shown in example above).
Once I have the centers marked I then drill my holes for the dowels that I am using to hold my cross together. Drill the hole in your 21″ piece all the way through, the 6″ pieces need to be about 1 1/2″-2″ deep.
Cut two wooden dowels about 3″-3 1/2″ long.
Squirt some wood glue in the holes of the two 6″ long pieces, and gently tap the wooden dowels into the holes leave half of the dowels sticking out.
Next squirt a little glue into one side of your 21″ piece hole, and some on the end of the wood piece. ( if your squirt too much it will run out the other end before you attach the other piece). Tap the 6″ piece with dowel into the hole gently until the piece fits snug.
Attach other 6″ piece the same as above, just add a little extra glue in the hole.
Attach wood clamp for few hours till glue dries.
Cross Base
This particular cross I used two wood plaques that I purchased at Hobby Lobby for the base of my cross. I used two different sizes and stacked one on top of the other.
Center your cross on the bottom of the larger base, and mark off the 3 1/2″ x 3 1/2″ square.
Now stack the two bases, centering the smaller one onto the larger, and clamp together if needed. Drill three holes through the bottom marked off square area of the larger base, counter sink the hole.
Stand wooden cross upside down, and center the larger base onto the bottom of the cross again so you can pre-drill your holes into the bottom of the cross.
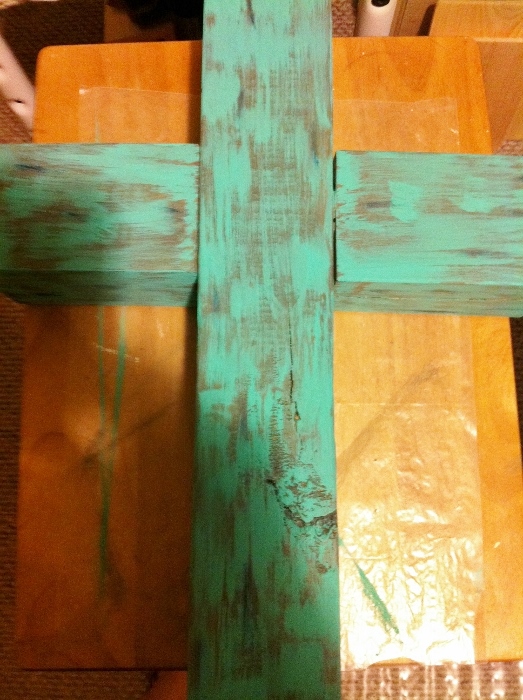
Painting The Cross And Base
Once all holes have been pre-drilled you can start painting your cross. I like the old rustic style, so I used the dry brushing technique for this cross. I choice turquoise color because I love the color, plus it is a popular color.
Dry brush one side at a time letting each side dry thoroughly before turning over to paint other sides.
I painted my wood base with the faux leather look.
Securing Wood Cross To The Base
Once everything is dry you can connect the wood cross to the wood base.
Add some glue to bottom of smaller base, center on larger base (matching screw holes). Using 3″ screws start screwing the two bases together leaving a little of screw tip showing through top of smaller base.
Set cross upside down, add a little glue on the bottom, match screw tips to holes on bottom of cross. Then screw on tightening the screws gently.
Now I laid the cross down flat on its back, and broke out the gorilla glue (one tough glue where a little goes a long way, found that out the hard way).
Using the gorilla glue (a little goes a long way) I centered the carved cross and glue it down on the larger wood cross, stacking a few books on top for weight until the glue dries overnight.
All Done!!! Now you have a beautiful free standing rustic turquoise wood cross that can sit on a table, mantle, by the fireplace, on your porch, or wherever you choose.
My next cross I’m thinking of painting black with a brown base, then sanding the edges. What do you think? Do you think that would look good? Or do you have any suggestions for my next cross?
***This post contains affiliate links for your convenience. Please read my full disclosure for more info. Thanks so much for your support!***
Turquoise Wood Cross Supply List
Wood 4×4 post
Wood base
Gorilla glue
Acrylic paint
3″ screws
Wood dowel
Drill
Counter sink bit
Hammer
Paint brush
Miter saw
More Cross Tutorials You May Enjoy!
Easy diy layered rustic wood cross
Faux leather cross with wings
Vintage zebra print block with cross
What a beautiful job you did Linda! The tutorial was excellent and your choice of paint color was spot on! The smaller cross that you glued on is exquisite with its delicate carvings.
Mary-the boondocks blog recently posted…Blogs We Love Award
Thank you Mary! I picked the smaller cross up at Canton trade day. We love going there and I find lots of goodies there for my crafting.
Linda, this looks like a big job and you did it well!!! I like the colour you chose, it looks really aged and rustic! Very nice!!
Thank you Katrin! I love turquoise I use that color in a lot of my crafts. It really wasn’t that hard to make.
I love turquoise too. Beautiful cross
Thank you Carol! Turquoise is one of my favorite colors.
wow i can’t believe you made this from scratch! it looks great!
Charlotte recently posted…The #YumTum Linky – #2 – 21/1/16
Thank you Charlotte! It really wasn’t that difficult. And I save all the scrap wood from our remodeling.
This is really beautiful. Thank you for the step by step tutorial!
Jessica recently posted…Five Things Friday #5
Thank you Jessica! It is actually pretty easy. Thanks for stopping by!
I love that color! How did you know turquoise was my favorite color? I just love how rustic the whole thing turned out. I’m not ready to start nailing boards together yet in my craft room. But, I’ll get there someday! In the meantime, I enjoy seeing what you make. 🙂
Gina recently posted…The Things We Hide: A Lost Mother
Thank you Gina! Turquoise is my favorite color as well. Pretty soon you will need a larger craft room when you start expanding your creating. (=;
Linda! Wow! I love love LOVE this! That blue is my new accent color in our master bedroom, too. I have a little desk and new chair with that color in a portion of the room and love my little space for writing now. That cross would be perfect. Thanks for the great idea!
Blessings and smiles,
Lori
Lori Schumaker recently posted…7 Suggestions for Raising Your Children God’s Way
Thank you Lori! I love the turquoise too, my new favorite blue. Would like to try and paint some furniture that color, but haven’t mustered up the nerve yet for painting something big in that color.
Good Morning Linda…lovely creation. Love the color and the dry brush technique you used. For such a vibrant color, there is a ‘peace’ about the cross. I know you will have such joy and contentment looking at your creation, wherever you decide to put it.
Have a fantastic weekend
Lynn
Lynn recently posted…A Passel of Pretty, Fancy Shmancy DIY Pillows
Thank you Lynn! I love the dry brush technique, most of my projects get that technique. I love turquoise, my new favorite color. Hope you have a wonderful week.
Good morning Linda….i loved your cross and I must say that the chosen color was perfect. It gave me such a warm feeling inside. My morning started off badly and I was very frustrated. I’m calm now, i smiled as soon as I saw your beautiful creation. Thank you so much for sharing.
Blessings,
Raquel Martinez
Thank you Raquel! I’m glad you are feeling better, and hope the rest of your day is a great one!