Mixed Kreations

The Creative Life & Journey Of A DIY'ER

  • Home
  • Diy Projects
    • Handmade Cross Projects
    • Holiday & Seasonal Projects
    • Mason Jars
    • Fun Upcyled Shutters & Spindles
    • Texas Projects
    • Upcycled Cans
    • Wood Projects
    • Jewelry Tutorials
  • Quick and Easy Recipes
  • Shop Mixed Kreations
    • Etsy Shop
    • Mixed Kreations Amazon Influencer
  • DISCLOSURES STATEMENT & PRIVACY POLICY
  • About Me
  • Recommendations
You are here: Home / DIY/Craft Projects / repurposed/upcycled / How to Update a Hanging Box in 4 Easy Steps

How to Update a Hanging Box in 4 Easy Steps

August 23, 2017 By: Linda @ Mixed Kreations12 Comments

If you enjoyed this post, don't forget to pin it for later!

366 shares
  • Share
  • Tweet

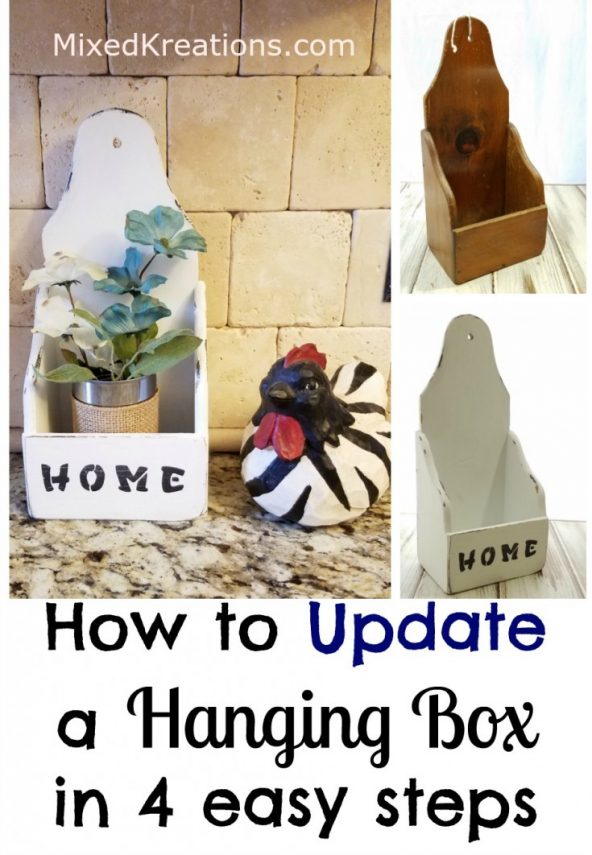
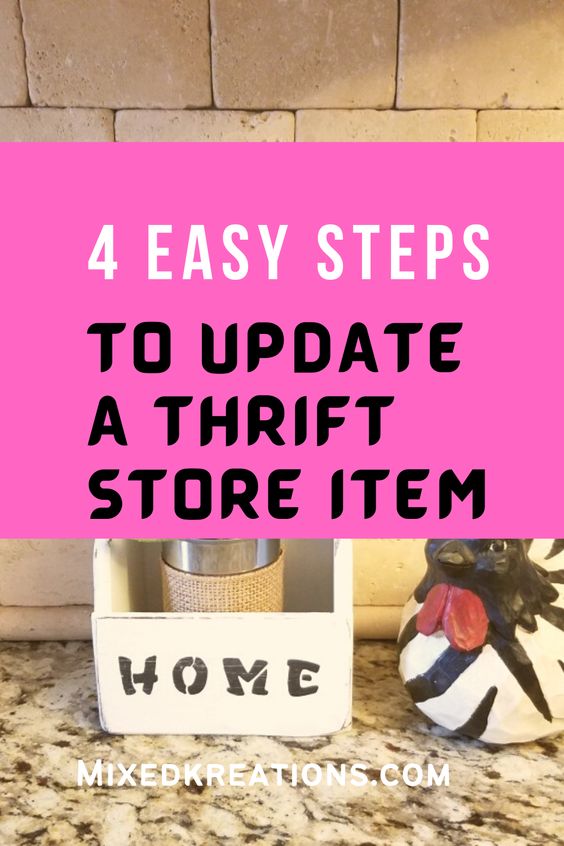
Hi All! I cannot believe that August is more than half way over. I am not ready for the holiday’s, they are creeping up way to fast. I haven’t even started on holiday projects yet, I have gotten stuck on painting everything the farmhouse style, like how to update a hanging box in 4 easy steps.

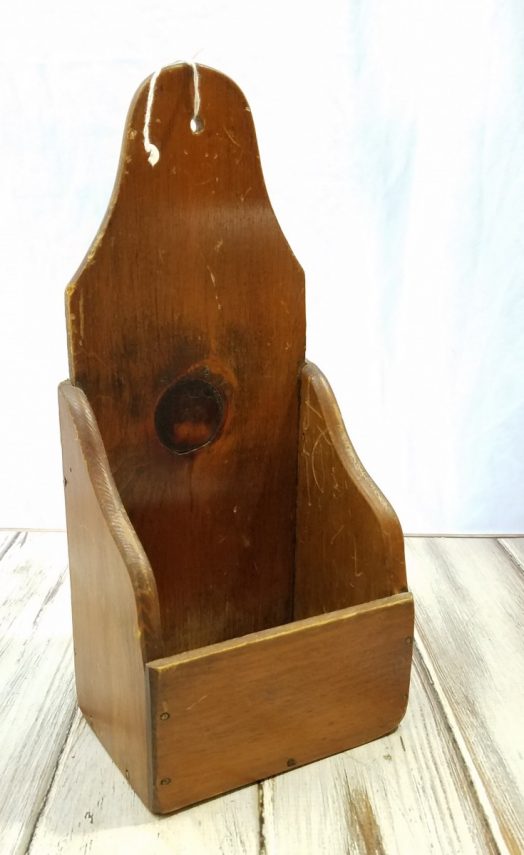
I found this cute little hanging box at the thrift store for $1.99 and just couldn’t pass it up. That’s my kind of price, I’m cheap. Just ask the hubby! But I think of myself as being frugal not cheap. If it’s more than a few dollars or I can make it myself I will not buy it.

Update a Hanging Box

***This post contains affiliate links, if you click on an affiliate link & buy something I may receive a small commission at no extra charge to you. The affiliate money I earn helps pay the expenses to keep this site running. Please read my full advertising disclosure for more info. Thanks so much for your support!***

Material List

Thrift store box
White chalk paint
Black chalk paint
Letter stencils
Stencil brush
Sand paper
Burlap ribbon

Update a Hanging Box

To update a hanging box, you will need to start with a clean box. I didn’t get photos of each step, but it is very simple so I will just walk you through each step.

1. The first step is to give your box two coats of white chalk paint letting each coat dry thoroughly.
2. Next stencil the word HOME onto the front of your box using black chalk paint.
3. Once dry take the box outside, and sand the edges, and lightly sand the front and sides.
4. Last step take back inside, and smear just a dab of black chalk paint on the edges of the box. This adds to the
distressed look.

How to Update a Hanging Box in 4 easy steps

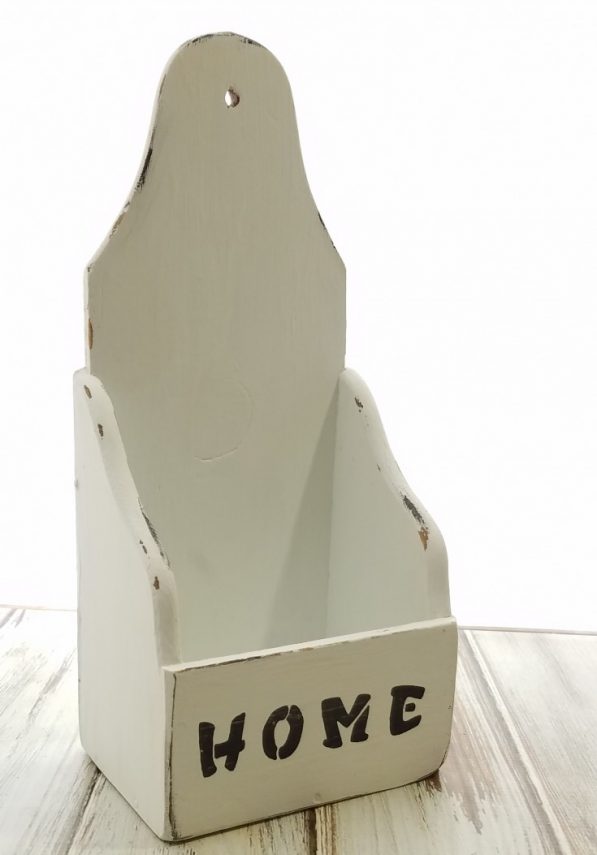
That’s how to update a hanging box in 4 easy steps!

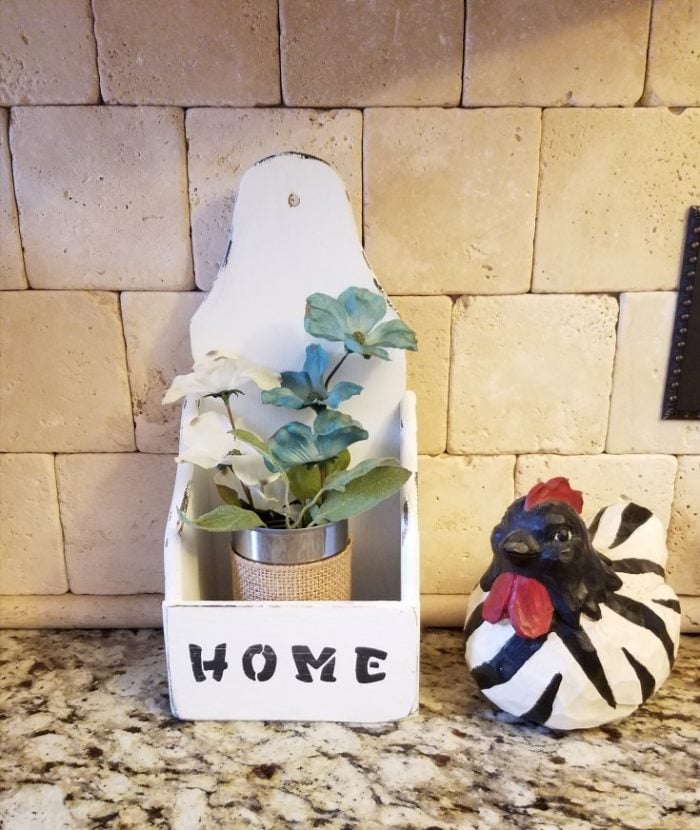
Since this little box is going to my craft booth I am going to add some pretty flowers. To do this I am going to use an empty can because I didn’t have a jar that would fit.

How to Update a Hanging Box in 4 easy steps

How to makeover a Hanging Box in 4 easy steps
Powered By the Tweet This Plugin
Tweet This

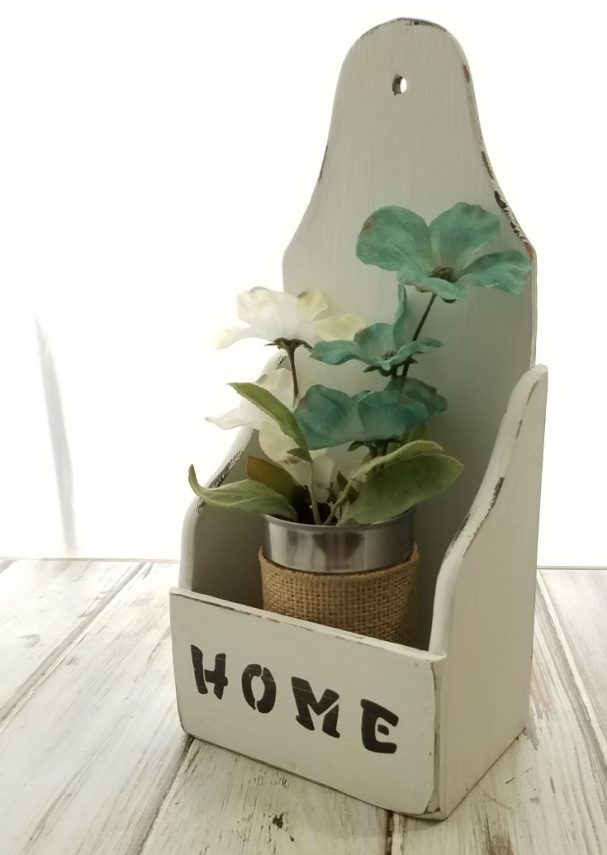
I wrapped some 3” burlap ribbon around the middle of the can, then hot glued it in place.

Next, I added a few pebbles to help hold the flowers in place, then added the flowers.

Now I have some cute farmhouse style décor. What do you think of the little box. How would you have painted it?

More Farmhouse Style Projects You May Enjoy!

Tissue box cover
Wood box farmhouse style
Farmhouse signs and thrift store makeover


how to update a hanging box in 4 easy steps

If you enjoyed this post, don't forget to pin it for later!

366 shares
  • Share
  • Tweet

If you enjoyed this post, would you mind taking the time to:
  • Share, or Pin for later reference.
  • Follow me on Facebook, Twitter, Pinterest
  • Leave a comment
Thank you so much for taking the time to comment. I love hearing from my readers, and appreciate the kind words.

Comments

  1. michelle says

    August 23, 2017 at 9:14 am

    I love the way you do things Linda. All your projects and the way you describe things makes it seem so “approachable”. I’m not sure if that’s the right word though. What I’m trying to say is that all the things you make are real and soooo doable. You make it okay for anyone to try it. That’s such a lovely skill to have

    Reply
    • Linda @ Mixed Kreations says

      August 24, 2017 at 10:12 am

      Thanks so much for the compliment Michelle! It means a lot to me. No one really knows how much I struggle with my writing, but I do love to create, and share what I create. I never was any good at writing, or grammar. A bad speller as well, but this blog, and tools have helped me improve my skills, and hopefully one day it won’t be such a struggle.

      I think that you are the amazing one Michelle. You come up with the most amazing projects thinking out side the box. Then you write it up in the most humorous way. I think that is a lovely skill to have. Maybe one day I will get there. 🙂

      Reply
  2. Mary says

    August 24, 2017 at 3:45 am

    Linda I love the makeover. The hanging box is so pretty now and can be used anywhere in the house that you need storage or for decorating purposes. . It is really a very versatile piece.

    Reply
    • Linda @ Mixed Kreations says

      August 24, 2017 at 9:51 am

      Thanks Mary! Yes it would be cute anyway you used it. In the craft room, kitchen, or just for some pretty decor.

      Reply
  3. Julia - Vintage with Laces says

    August 26, 2017 at 10:00 am

    Hi Linda, I’m sure your hubby doesn’t complain about you being frugal, lol. The box was a wonderful find and you turned it into a beautiful item that can be used for a lot of purposes.

    Reply
    • Linda @ Mixed Kreations says

      August 31, 2017 at 4:21 am

      Hi Julie! No he does’nt complain, just likes to tease me. Thanks for stopping by!

      Reply
  4. Wendi@H2OBungalow says

    August 28, 2017 at 12:07 pm

    Good up-cycle! Love the new distressed look and stencil. I’ve been on the look-out for wall hanging boxes lately and wouldn’t you know when I want one I can’t find one anywhere…as soon as I don’t need one they will be everywhere!

    Reply
    • Linda @ Mixed Kreations says

      August 31, 2017 at 4:18 am

      Thanks Wendi! Is’nt that the way it goes. When I’m looking for something I never see any, but if I’m not looking I see plenty. Lol

      Reply
  5. FLORENCE @ VintageSouthernPicks says

    September 27, 2017 at 7:17 am

    Wow, Linda! I LOVE that box! And love the treatment you gave it and distressing. That will sell in a heartbeat. Almost makes me wish I had a booth again.

    Reply
    • Linda @ Mixed Kreations says

      September 29, 2017 at 5:05 am

      Thanks Florence! I was happy how it turned out, and I hope your right and it sells quickly. So far the left over junk we take has been selling better. LOL It’s crazy what people buy.

      Reply
  6. Pam Jackson says

    May 24, 2018 at 10:03 am

    Adorable.

    Reply
    • Linda @ Mixed Kreations says

      May 29, 2018 at 3:12 pm

      Thank you Pam! 🙂

      Reply

Leave a Reply Cancel reply

Your email address will not be published. Required fields are marked *

CommentLuv badgeShow more posts

This site uses Akismet to reduce spam. Learn how your comment data is processed.

Thanks for sharing your thoughts and comments! I read and appreciate every single one!

Follow Mixed Kreations

Facebooktwitterpinterestyoutubeinstagram

My Favorites on Amazon

My Amazon Influencer Shop

Homemade Chalk Paint

diy chalk paint

How to Make Rusty Cans

how to make rusty cans

How to Make a Flag From a Wood Shutter

how to make a 2 sided american flag

Easter Egg Jar

How to make a Easter egg jar

Diy Texas Tile Coasters

Texas Tile Coasters

Update a Thrift Store Find

How to Update a Hanging Box in 4 easy steps

Categories

By Kelli & Crystal From Learn To Blog Hangouts

#LearntoBlog Hangouts

Dominate Course

LearntoBlog
Featured on Hometalk.com
Rakuten Affiliate Network Welcome Program
Grow and Make

Dollar Tree

Creative Fabrica Font Bundles

Font Banner - Free Fonts

Featured At

Featured At

Mixed Kreations featured in Country sampler

Featured at

mixed kreations is featured in Bella Crafts online magazine
The Pin Junkie

Canva Photo Editing

Amazon Affiliates

I am a participant in the Amazon Services LLC Associates Program, an affiliate advertising program designed to provide a means for sites to earn advertising fees by advertising and linking to Amazon.com.

Disclosures Statement

This policy is valid from 19 July 2013 This blog is a personal blog written and edited by me. For questions about this blog, please contact Linda @ ldkeesee@mixedkreations.com. This blog accepts forms of cash advertising, sponsorship, paid insertions or other forms of compensation. The compensation received will never influence the content, topics or posts made in this blog. All advertising is in the form of advertisements generated by a third party ad network. Those advertisements will be identified as paid advertisements. The owner(s) of this blog is compensated to provide opinion on products, services, websites and various other topics. Even though the owner(s) of this blog receives compensation for our posts or advertisements, we always give our honest opinions, findings, beliefs, or experiences on those topics or products. The views and opinions expressed on this blog are purely the bloggers' own. Any product claim, statistic, quote or other representation about a product or service should be verified with the manufacturer, provider or party in question. This blog does not contain any content which might present a conflict of interest. To get your own policy, go to http://www.disclosurepolicy.org

Copyright © 2023 · Modern Blogger Pro Theme By, Pretty Darn Cute Design