My layered rustic cross was really easy to make. All I did was make the bottom cross out of cedar, then added the middle cross that I had painted. Then I wired the smaller ceramic and wire cross to the top to form my layered rustic cross.
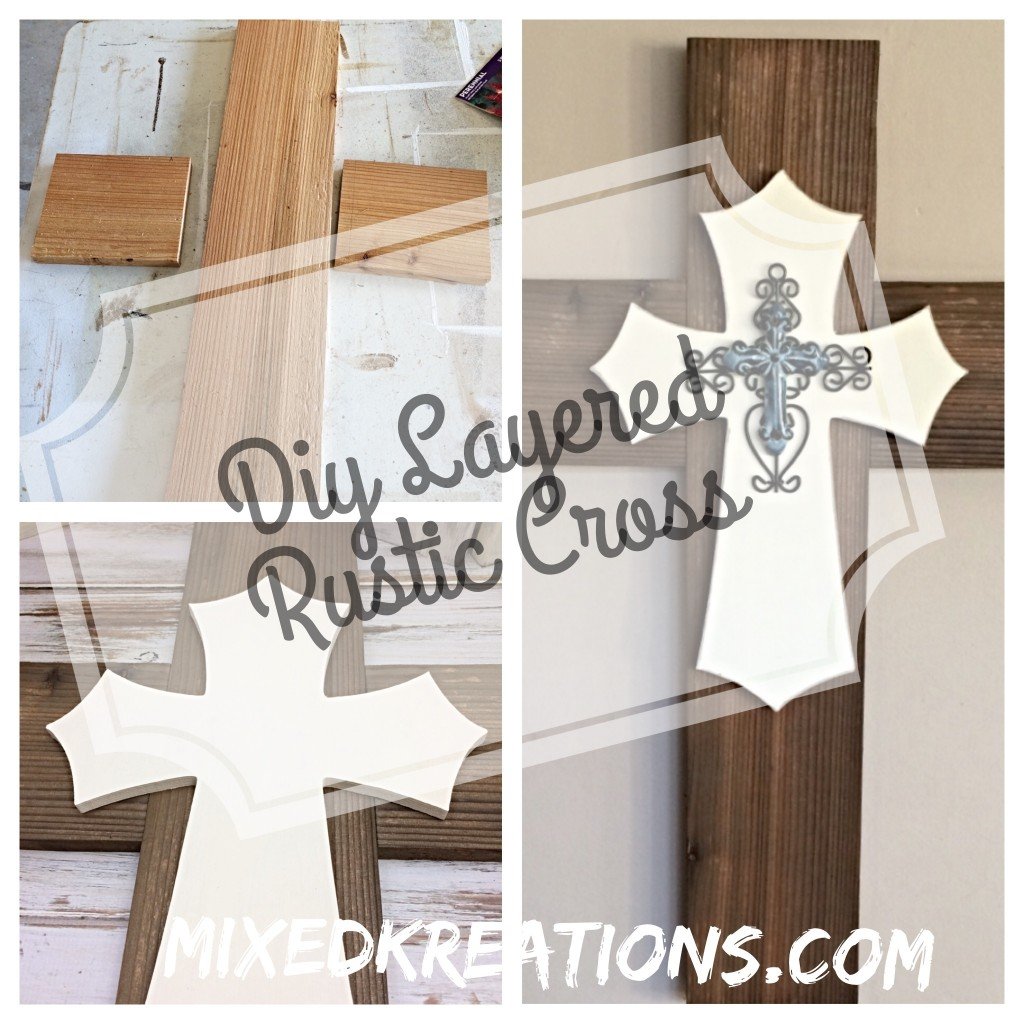
Layered Rustic Cross
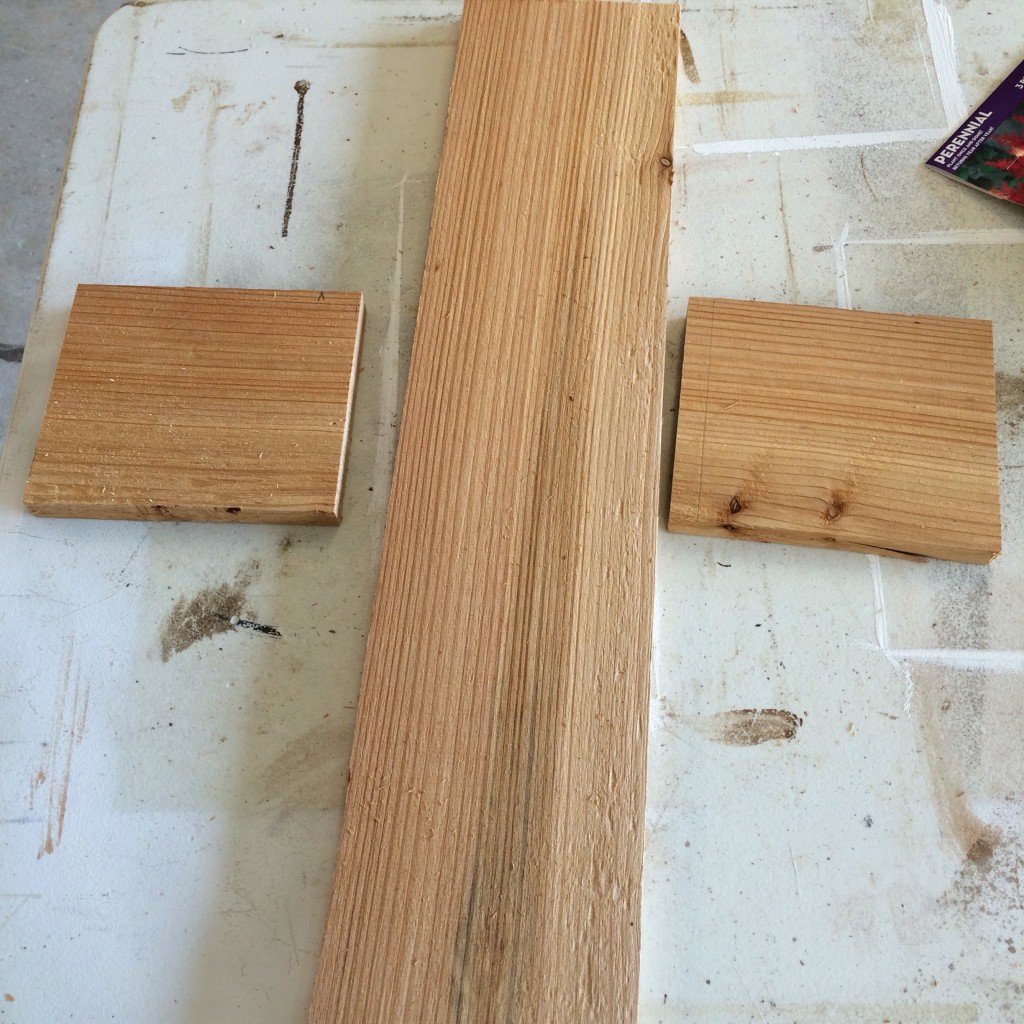
1. Start off by cutting your cedar pickets to make a cross. This depends on how large the middle cross will be. For mine I cut two pieces 6″ in length, and one at 24″ in length. You will have to decide what size would look best.
2. Sand your cut pieces.
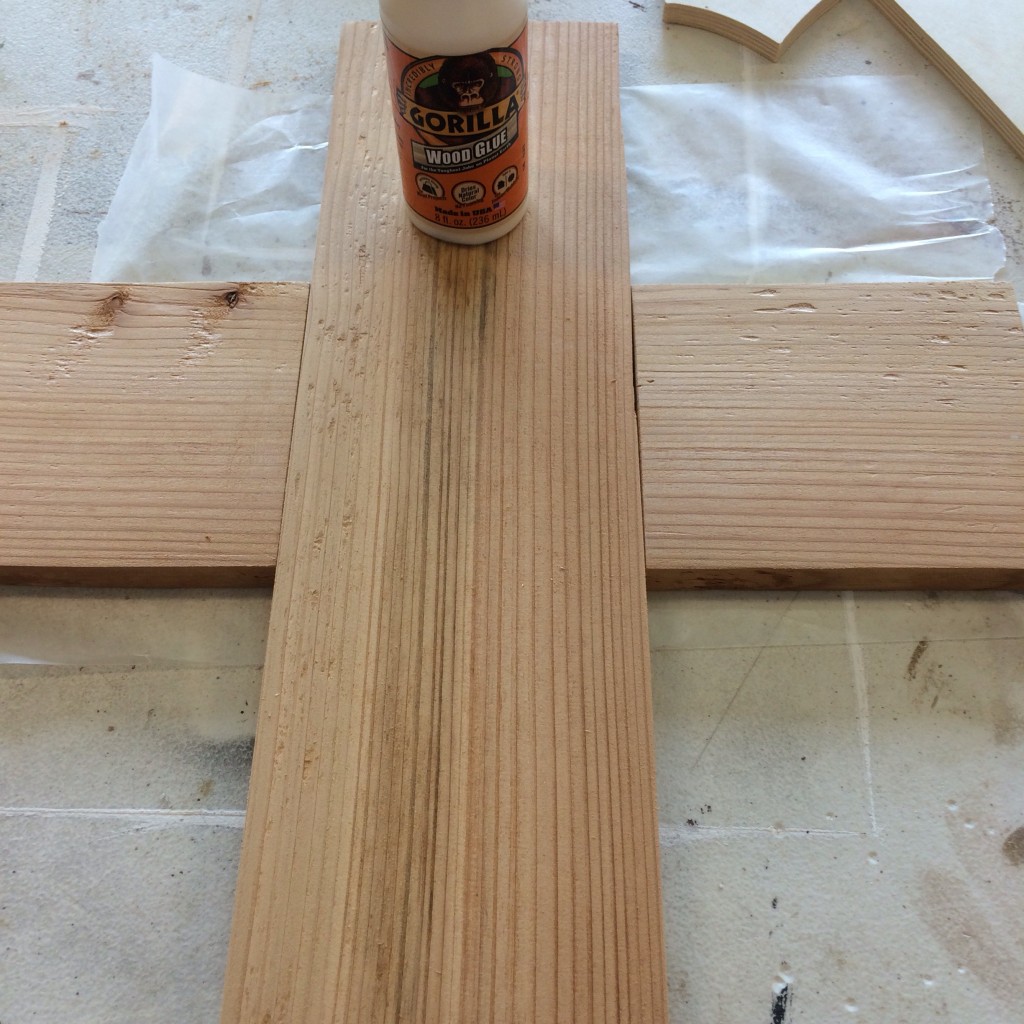
3. Add some wood glue to the edge of your smaller wood pieces and laying on a flat surface place them together to form your cross. Add clamps to hold together, or place a heavy object on each side of the smaller pieces to hold together while it dries.
4. Once glue is dry add an aging solution to the wood.
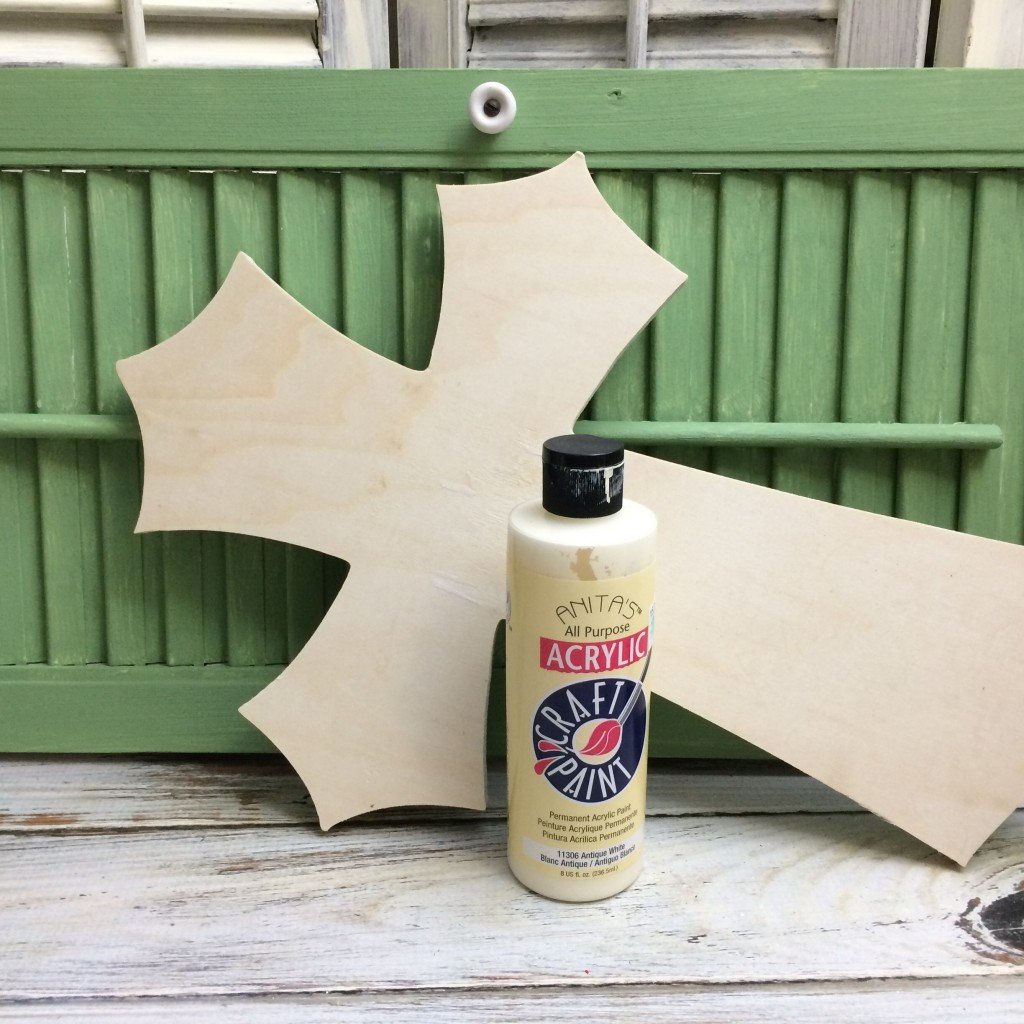
5. Paint the top and edges of your pre-cut middle cross antique white.
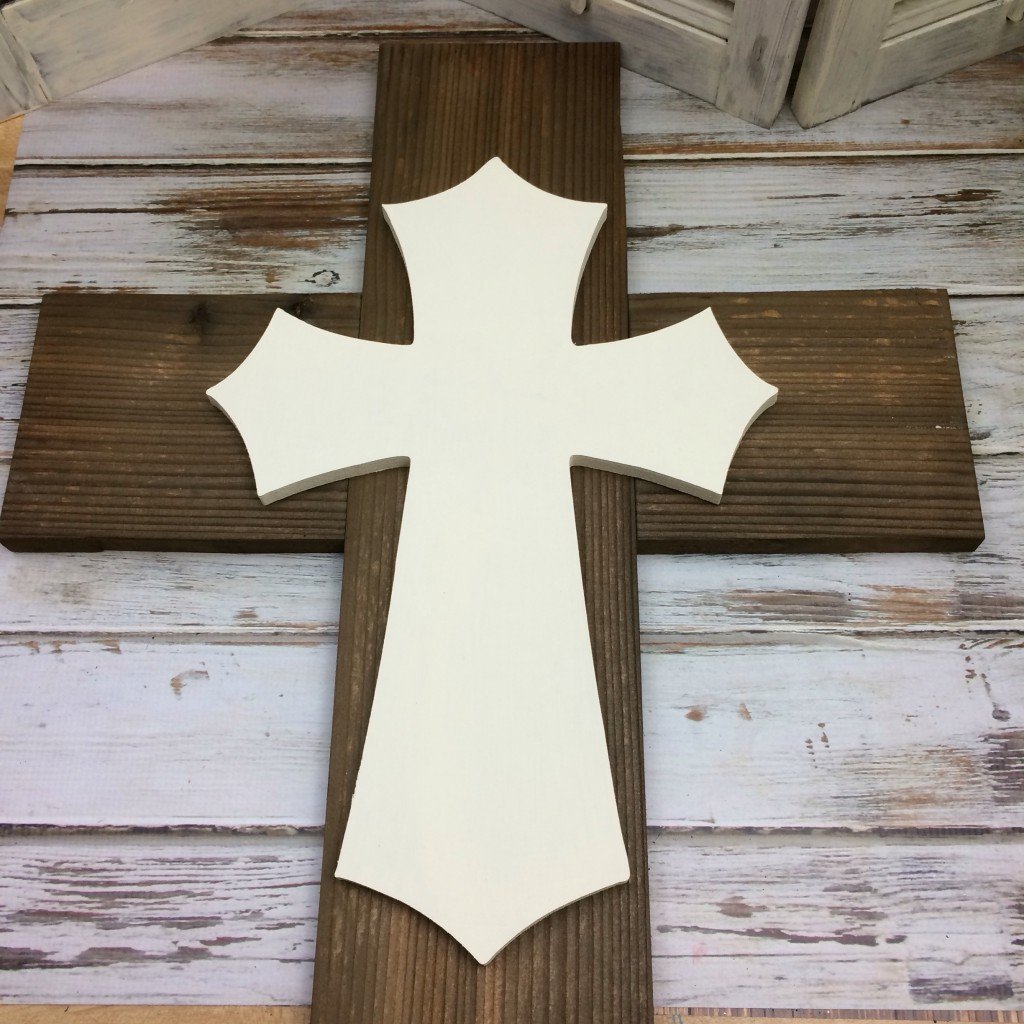
6. Glue your middle cross down using wood glue. Set something heavy on top till it dries.
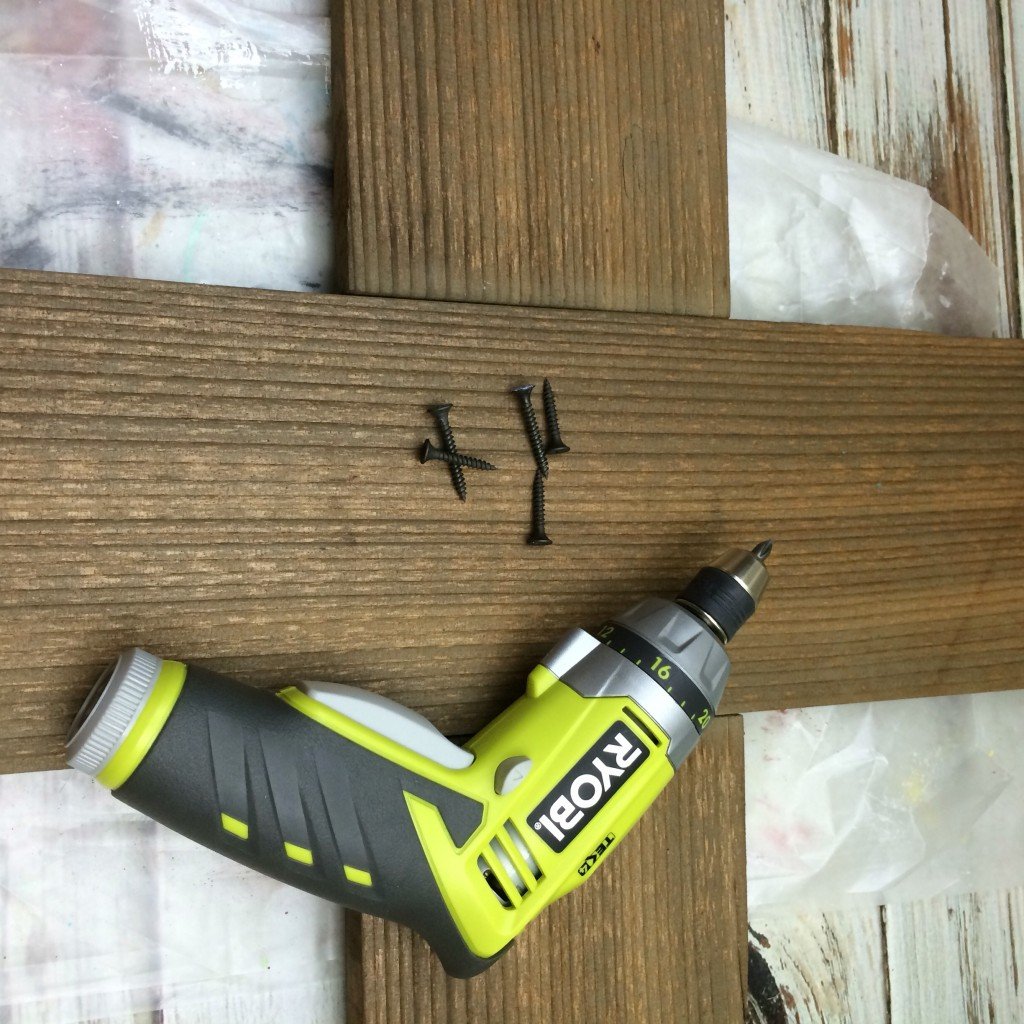
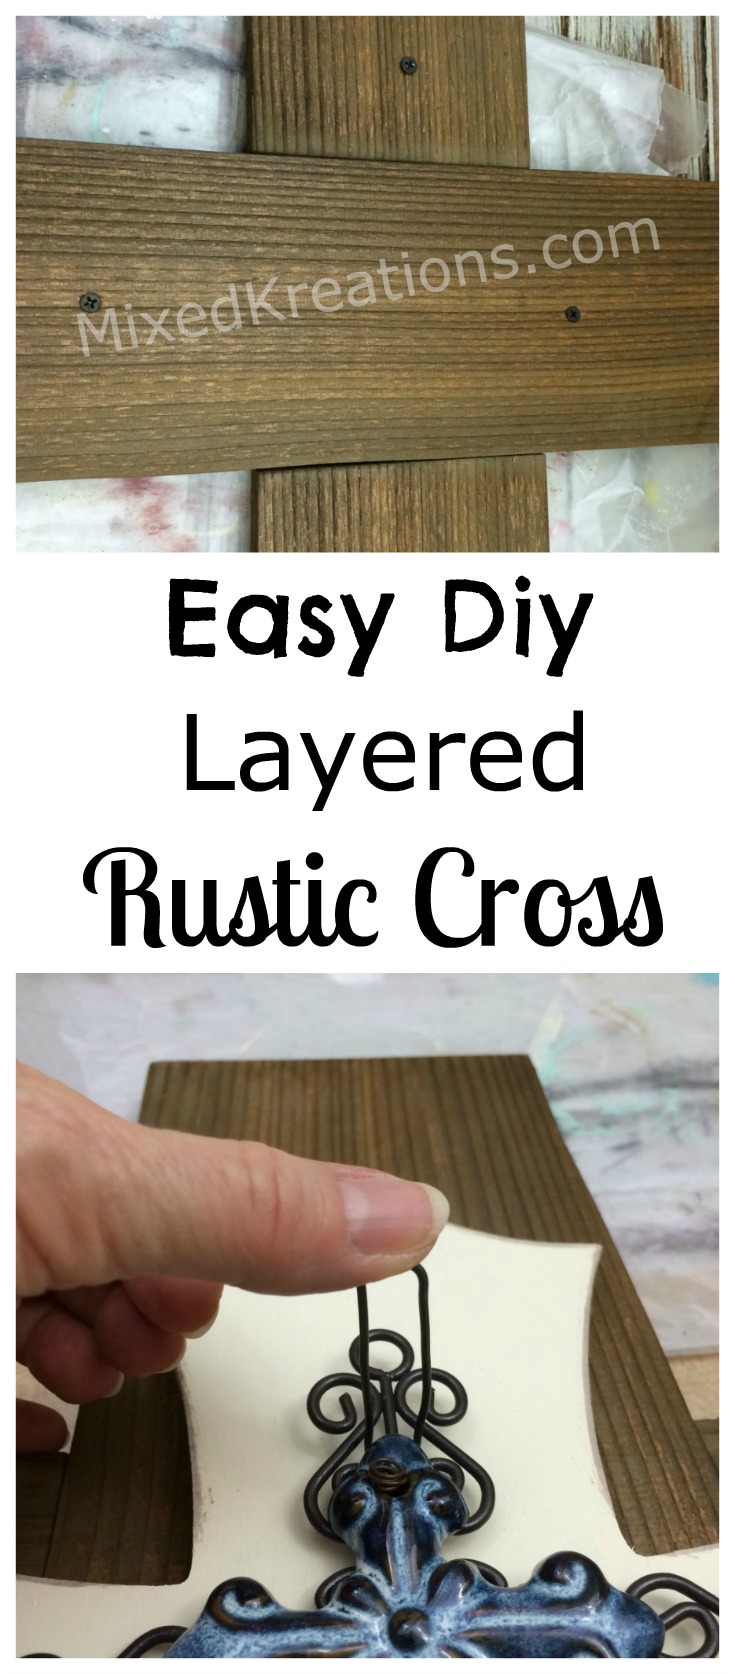
7. Now flip over and using wood screws that are long enough to go through cedar wood to the middle cross, but not so long that they go through the middle cross. (I used 1 1/2″)
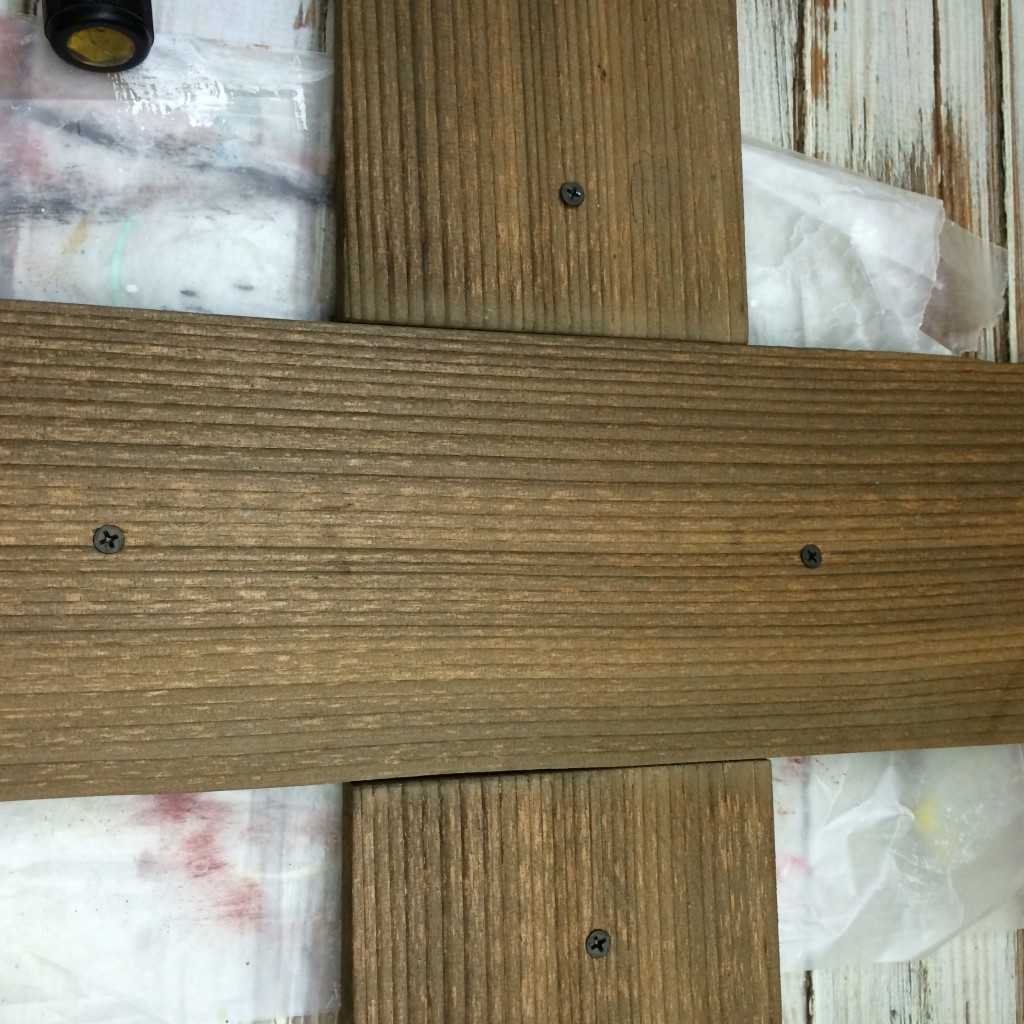
8. Four screws is enough to hold it secure.
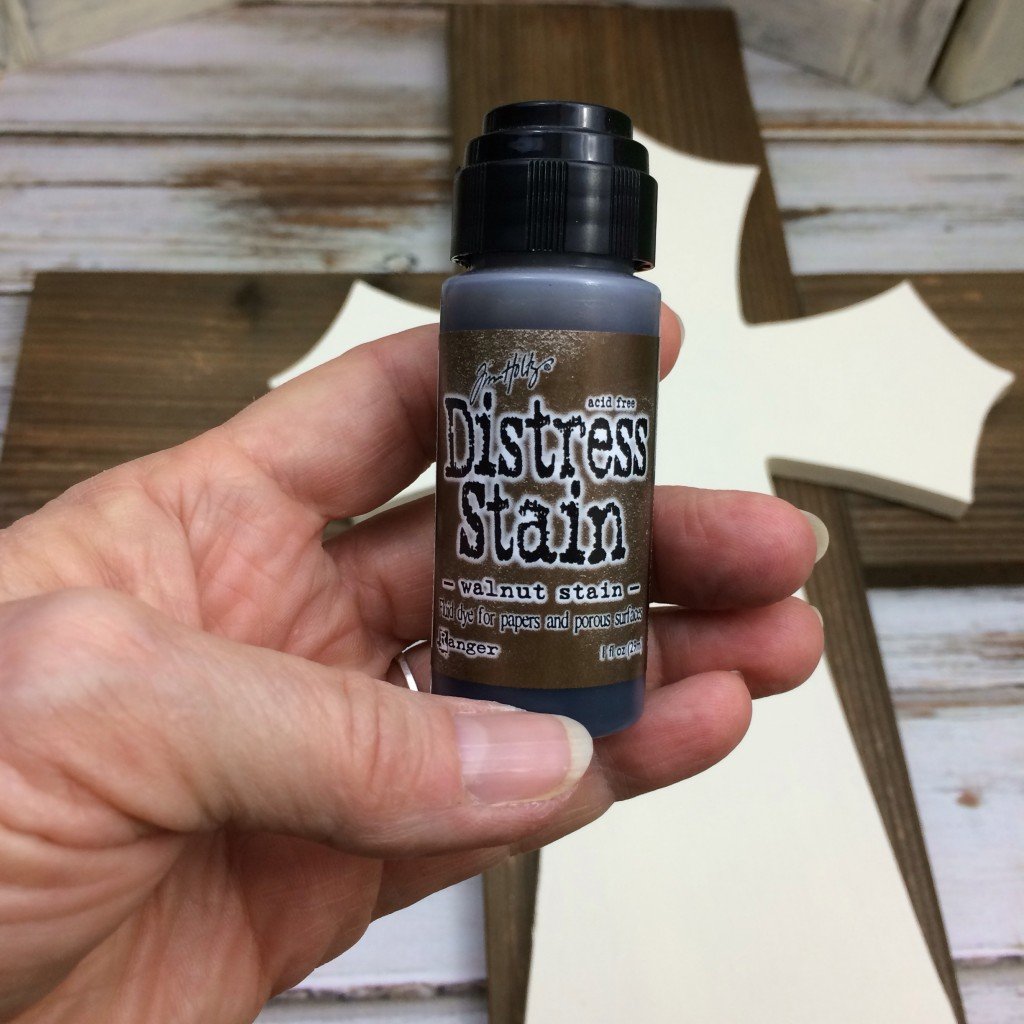
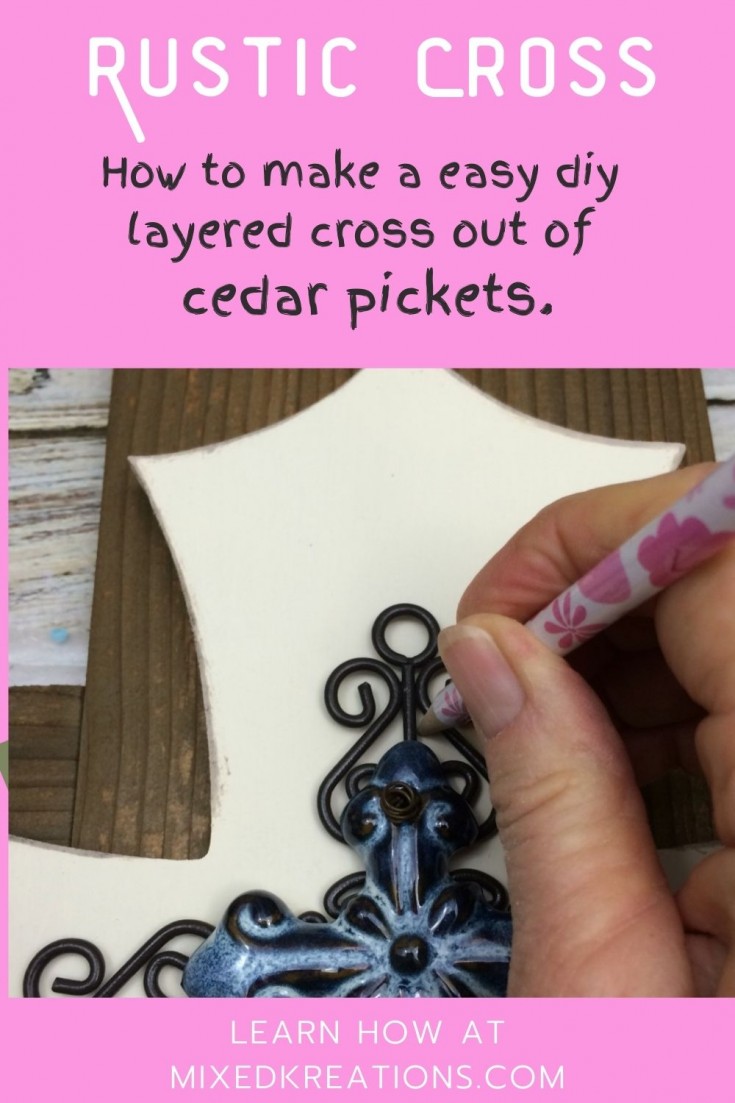
9. Next add some distress stain to the edges of your middle cross.
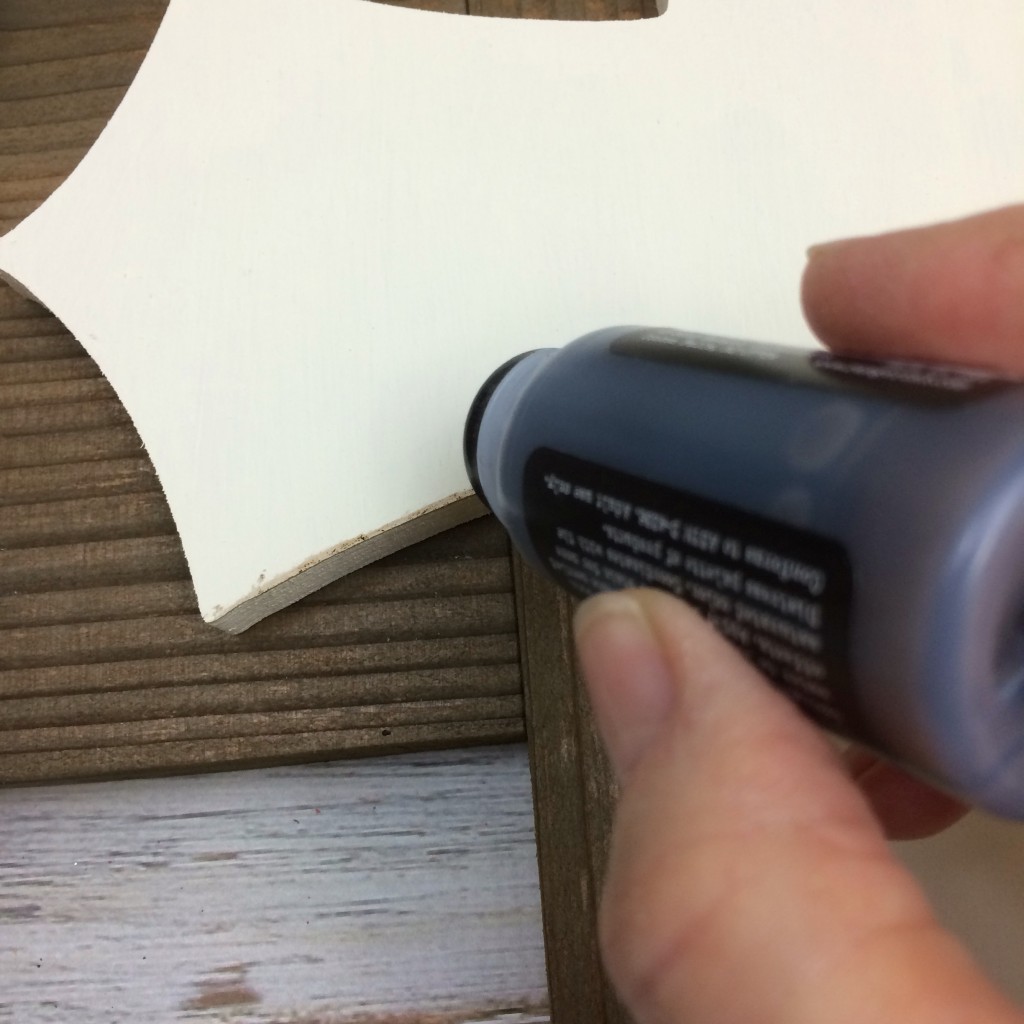
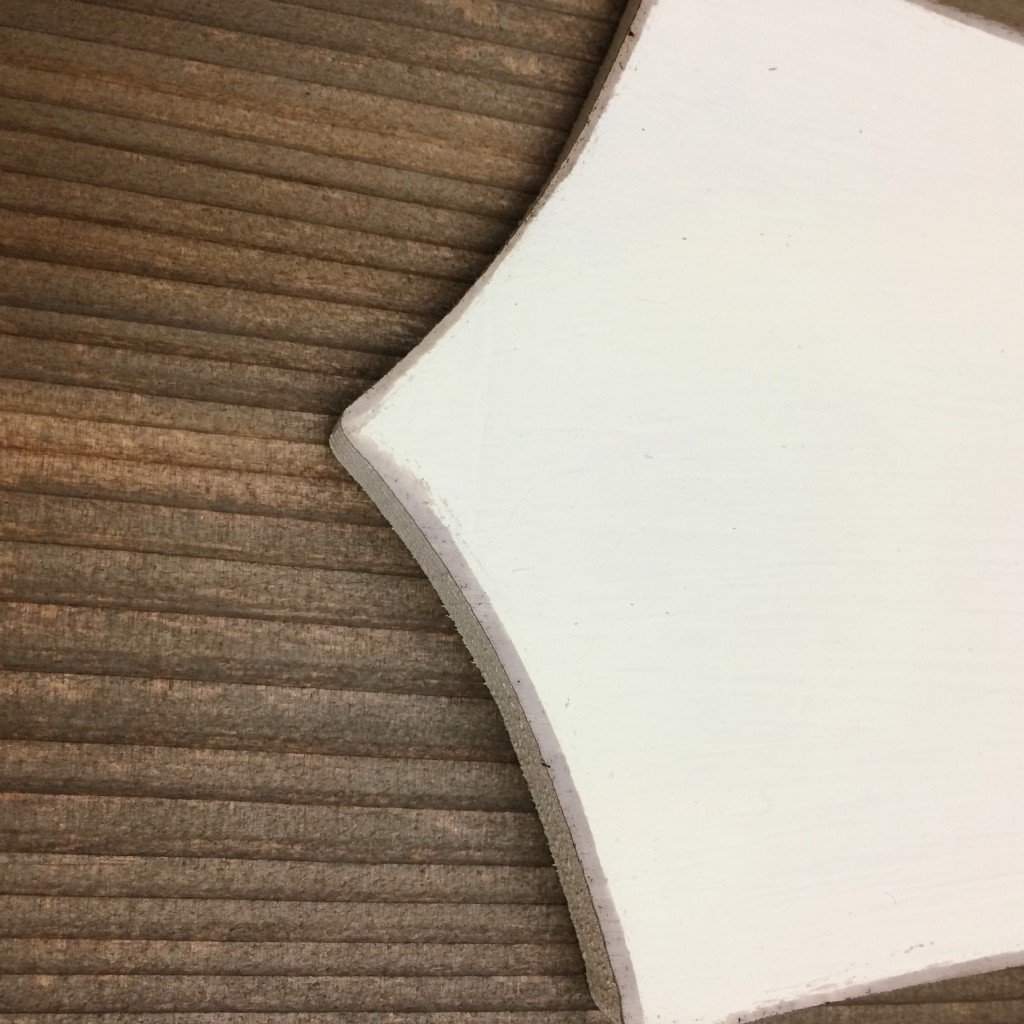
Add more or less of the distress stain to get the desires look you are seeking.
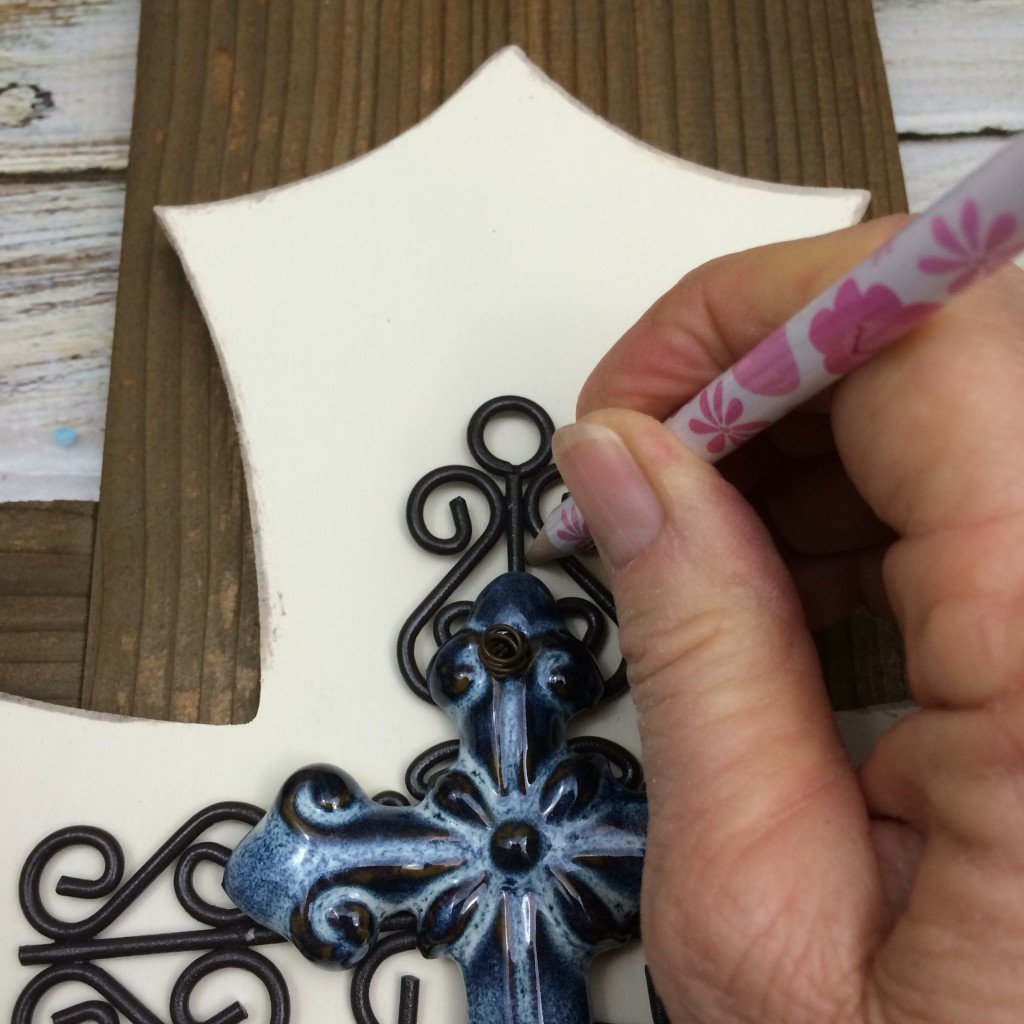
10. Place your top cross in position then mark off where you need to drill holds to secure the cross with wire, and drill two holes at the top and two at the bottom.
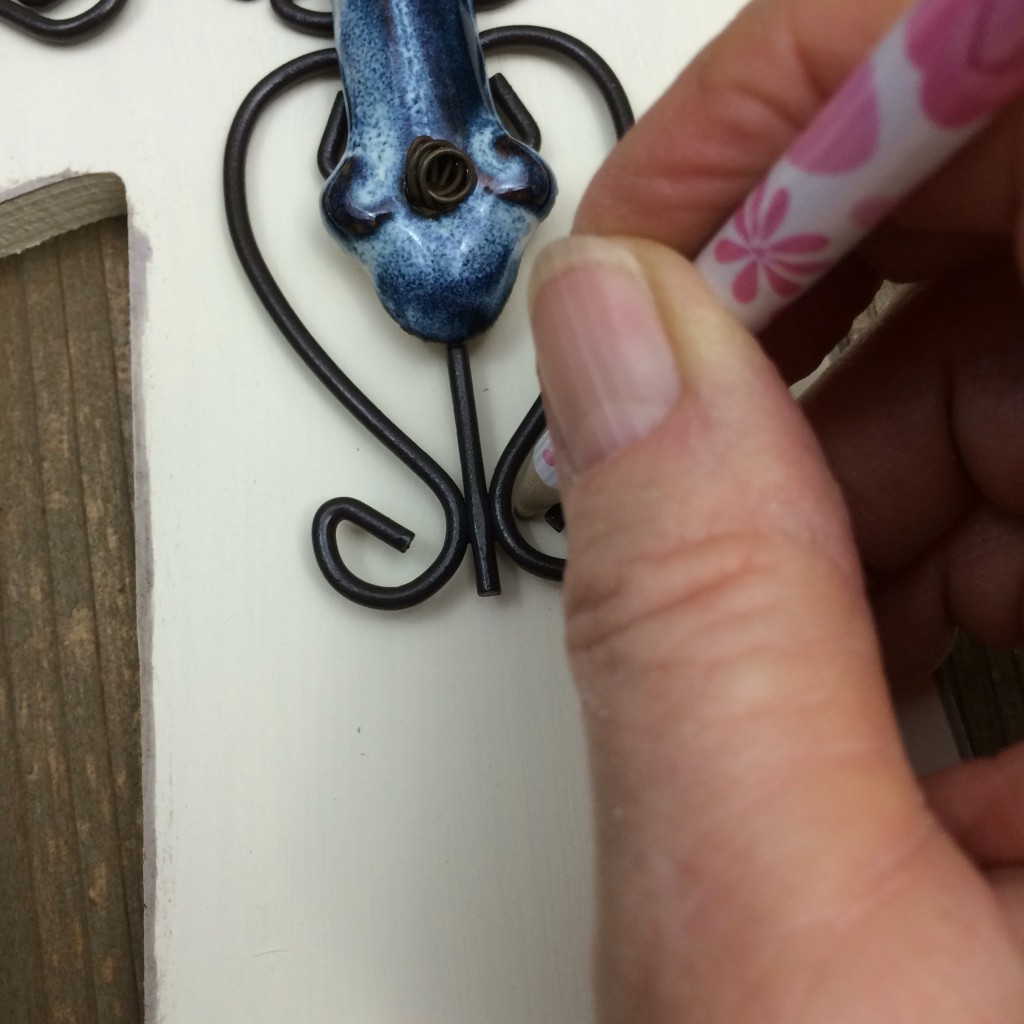
Top and bottom will be sufficient enough to hold the cross in place.
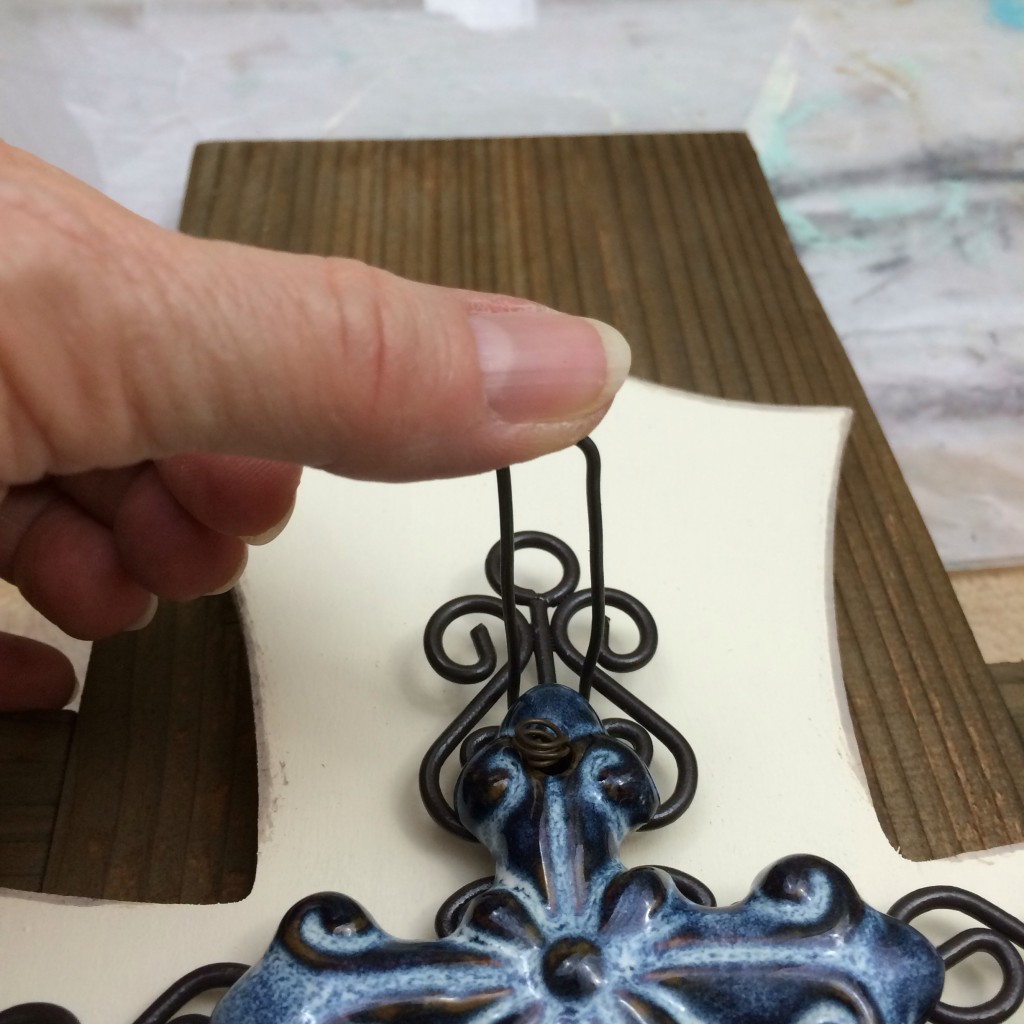
11. Now cut two pieces of wire approximately 6″ in length, and bend it kind of like a long staple. Run both ends through the top two holes with your cross in place.

Push down flat and snug.
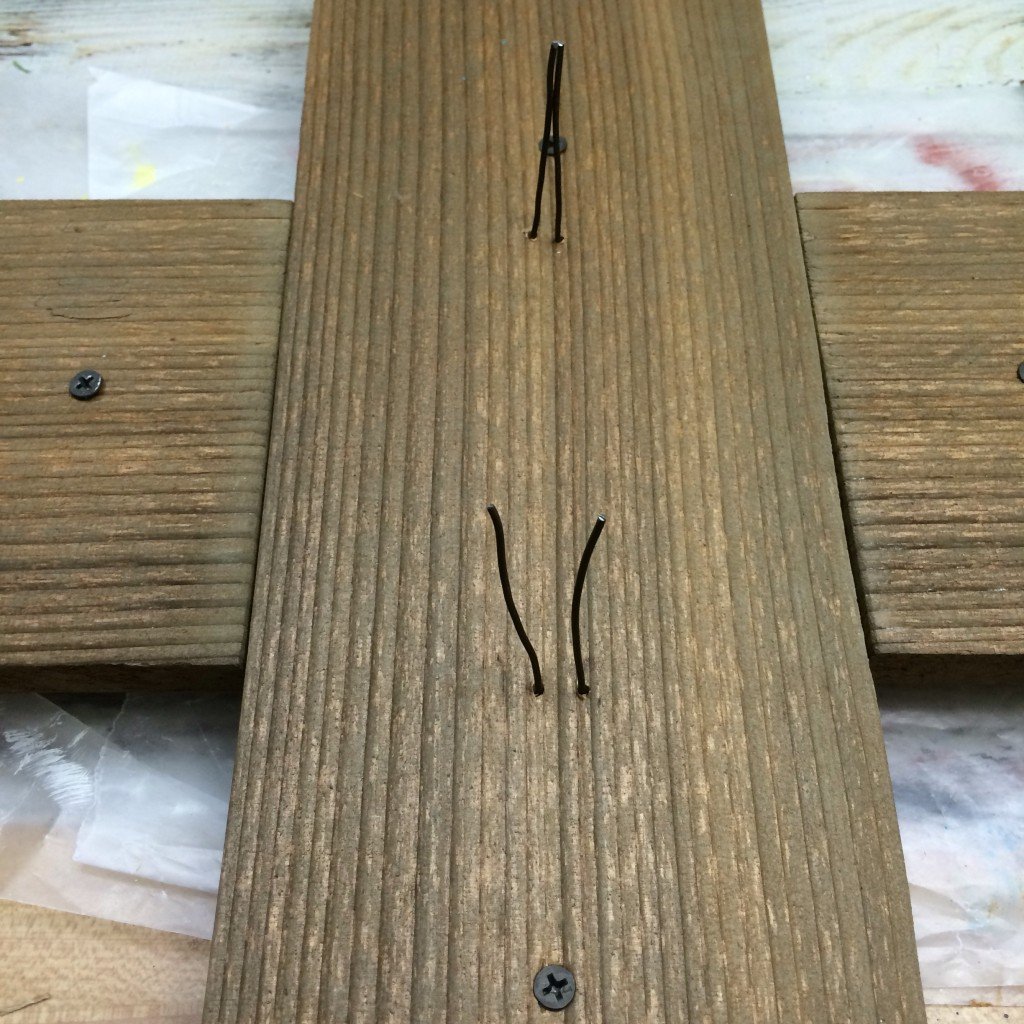
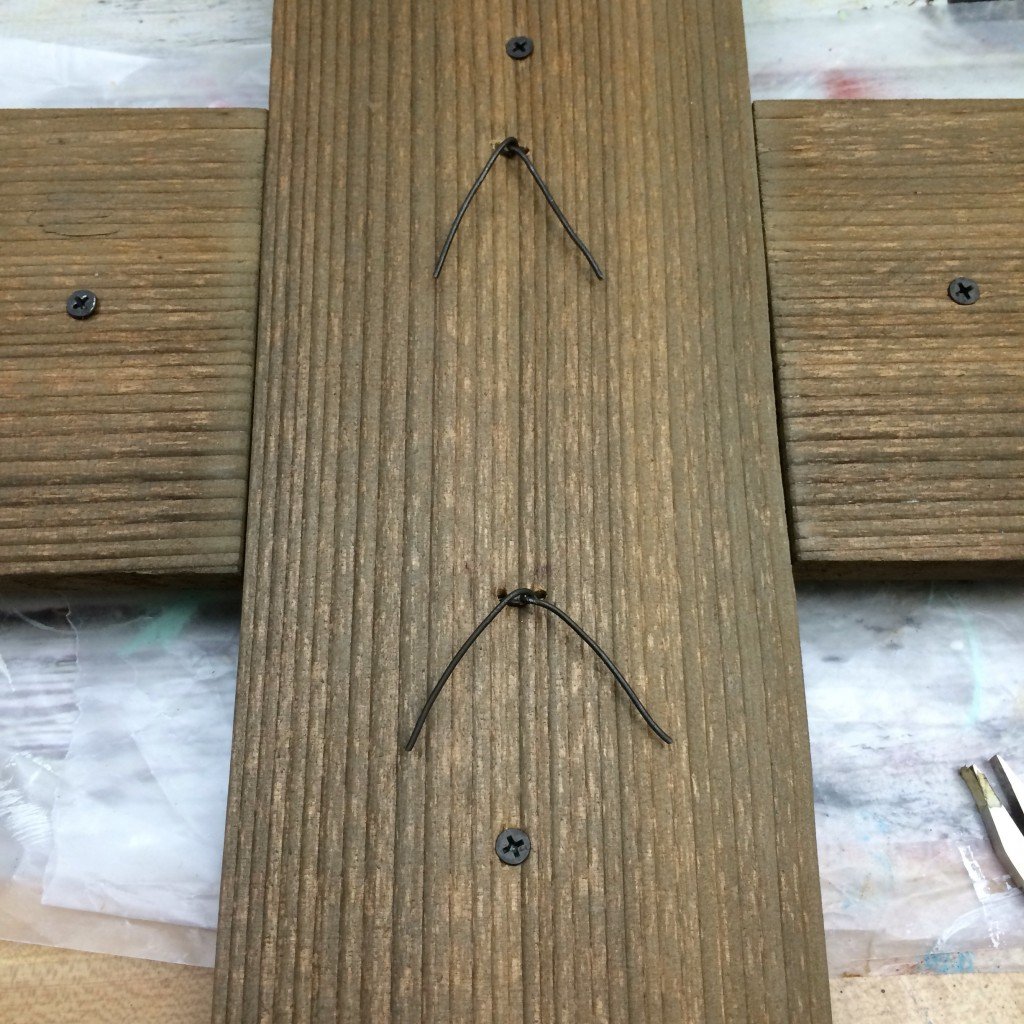
12. Flip layered rustic cross over and using pliers pull the wires tight and twist to secure. Then push wires flat against the board.
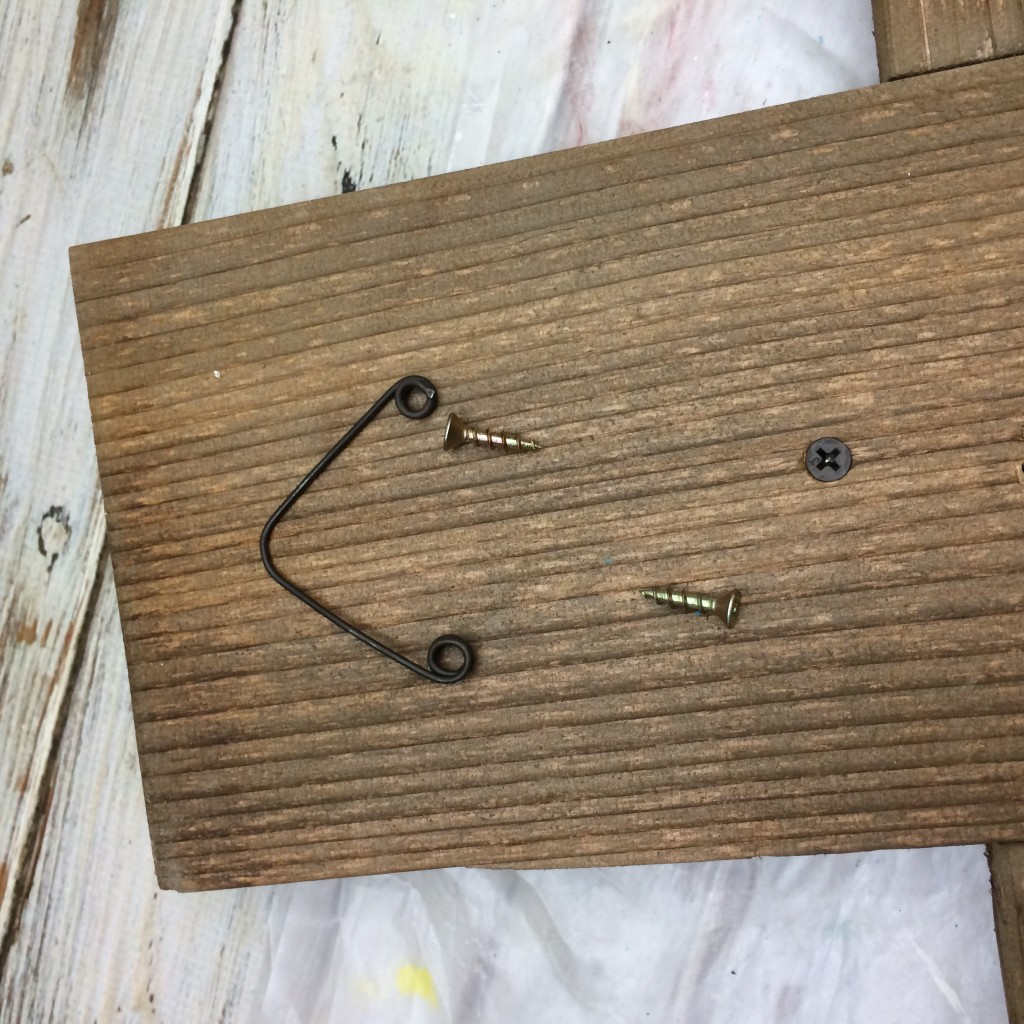
13. Make your wire hanging hardware.
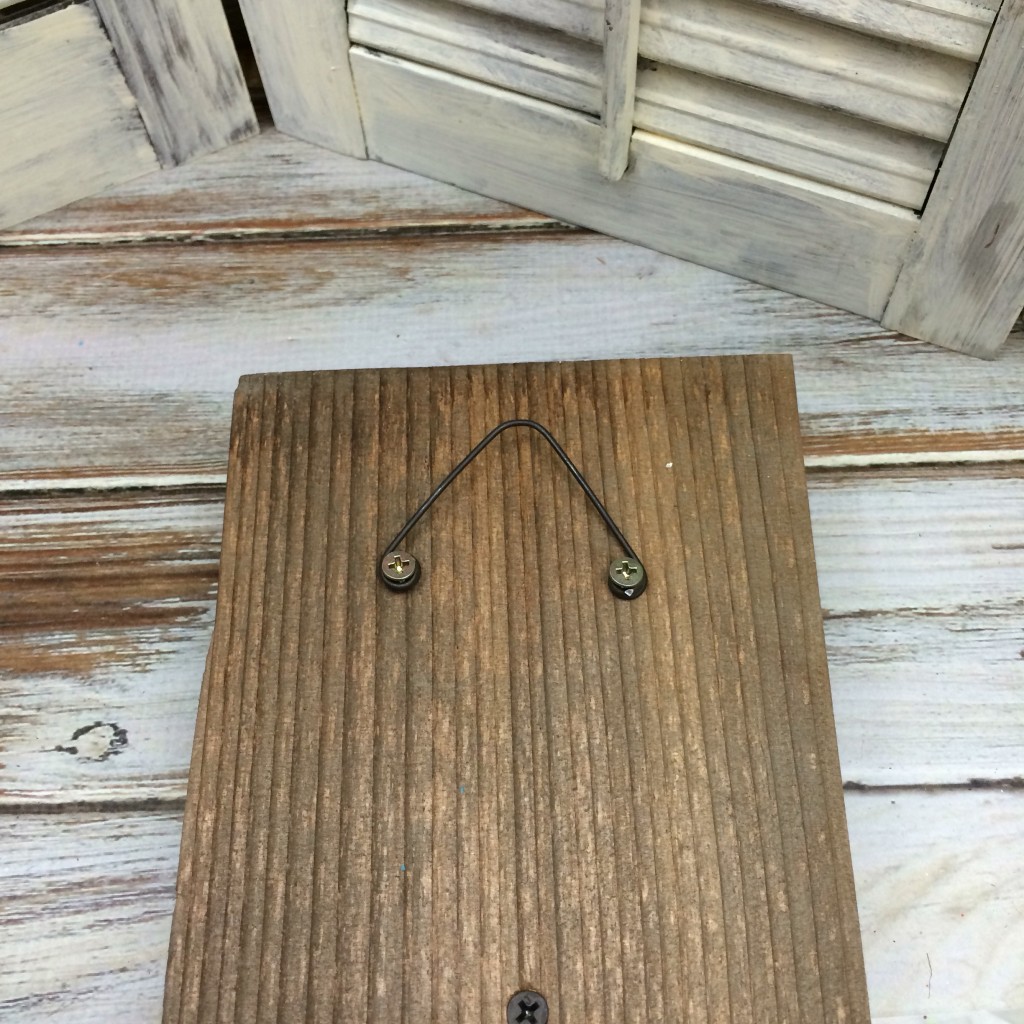
And screw it down.

That’s it for the layered rustic cross.
*This post contains affiliate links, if you click on an affiliate link & buy something I may receive a small commission at no extra charge to you. The affiliate money I earn helps pay the expenses to keep this site running. Please read my full advertising disclosure for more info. Thanks so much for your support!*
Material List
- Cedar fence picket
- Gorilla Wood Glue
- 1 1/4″ – 1 5/8″ wood screws (depending on how thick your pre-cut wood cross is)
- Pre-cut wood cross(affiliate)
- Acrylic paint antique white
- Distress stain
- Smaller cross for the top
- Wire
- Wire cutters
- Pliers
- Drill
- Screwdriver- Here’s my cordless screwdriver (affiliate) the hubby got me, love it.
- Jig Saw, circular saw (I used my miter saw)
Other Cross Projects You May Enjoy!
Vintage Book Page Block With Cross
Wood Box Get New Look With Cross
Zebra Print Block With Cross
What a cute craft idea. Thanks for sharing
Thanks Renee! Very easy project. Thanks for stopping by!
Great project. I love the overlay cross.
I love the overlay cross. Great project
Thanks Carol! I’m very happy how it turned out. It was a special order.
Thanks for the details. I really like the staple idea, in fact I’ve been using that for some of my crafts too!
Thanks Jacki! The staple makes things snug as a bug (-;
I do mine a little differently, for some things. I used it on my Spindle Angels to hold the wings on, and just drilled holes, then glued the wire staple in place that way.
That works too! I have done something similar to the spindle angels that I made a while back for their halo’s.
Linda, this is lovely. I am curious where you’ve hung this? Did you keep it or did you put it in your shop? I really like how you layered them to give the one cross so much depth and character.
Wishing you a lovely weekend .
Hugs, Lynn
Hi Lynn! No I didn’t keep this one either. It is hanging in my daughters house. My daughter and her husband send me pictures of things that they want for me to make and this one was a surprise birthday present for my daughter.
Have a Happy Mother’s Day!
This is so pretty! I love the way the metal and the wood look together!
Thank you Jessica! I do love metal and wood together too!
You did a great job with your cross. Great step by step instructions. I could see it hanging in many different rooms.
Thank you Erin! I really love how it turned out. Right now it’s hanging in my daughters living room, but I may have to make me one similar.
This turned out beautiful!
Thank you Carol! Hope you have a wonderful Mother’s Day!
I love the rustic look!
Hi Kellie! I really love the rustic look too! Thanks for stopping by!
This DIY is so gorgeous! I love the way you changed the edges and the colors look fantastic on it! Well done!!
Hi Gina! Thank you for the sweet compliment! Have a Great Day!
Beautiful! Love the way it turned out!
Thank you Cathy! Hope you have a wonderful Mother’s Day!
You are so creative, I love the way you layered with the different textures.
Thank you Celeste! This one was an easy one. My faux leather cross with wings that my daughter asked for was a new challenge for me.
Linda, this turned out just gorgeous. I absolutely love the dark stain against the White and then the ceramic wire cross on top. It’s just gorgeous. I saw above that you gave it to your daughter for her birthday, I’m sure that it is in a treasured place. What a wonderful gift. She’s lucky to have such a crafty mother.
Thank you Nikki! I love how it turned out, and yes it was a birthday gift for my daughter. It was a special order from my son inlaw. They both send me pictures of stuff they like and ask me to make it. This one was easy, but some of their request are a little challenging.
I can’t believe I missed this one Linda. It’s beautiful. I love the layered look you’ve created, it’s so gorgeous. Did you make the wire cross?
Thanks Michelle! This cross was made for my daughter and her hubby. No I didn’t make the wire cross, I bought it at Hobby Lobby!
I love this look Linda! I’ve always loved wooden crosses, and really love the layered look. You have it put together so nicely too with good hanging hardware.
Thank you Florence! I was really happy how this one turned out and wanted to keep it for myself. Oh well I will just have to make another. LOL
I got tired of having to buy hardware, so I decided to come up with something easy, and sturdy for hanging.
How far down/inches did you go for the cross piece on the 24 inch length of the cross
Hi Shawnah! I no longer have the cross but I’m guessing about 5-6″. Thanks for stopping by!