Mixed Kreations

The Creative Life & Journey Of A DIY'ER

  • Home
  • Diy Projects
    • Handmade Cross Projects
    • Holiday & Seasonal Projects
    • Mason Jars
    • Fun Upcyled Shutters & Spindles
    • Texas Projects
    • Upcycled Cans
    • Wood Projects
    • Jewelry Tutorials
  • Quick and Easy Recipes
  • Shop Mixed Kreations
    • Etsy Shop
    • Mixed Kreations Amazon Influencer
  • DISCLOSURES STATEMENT & PRIVACY POLICY
  • About Me
  • Recommendations
You are here: Home / DIY/Craft Projects / repurposed/upcycled / Mason Jar Tissue Holder

Mason Jar Tissue Holder

April 11, 2016 By: Linda @ Mixed Kreations82 Comments

If you enjoyed this post, don't forget to pin it for later!

12713 shares
  • Share1
  • Tweet

I’ve been wanting to make one of these mason jar tissue holders ever since I seen one. I think they are so cute and would make a perfect gift for a teacher or anyone that has a limited amount of space like a desk to place things on.

How to make a tissue holder from a Mason Jar #Repurposed #MasonJar
Powered By the Tweet This Plugin
Tweet This

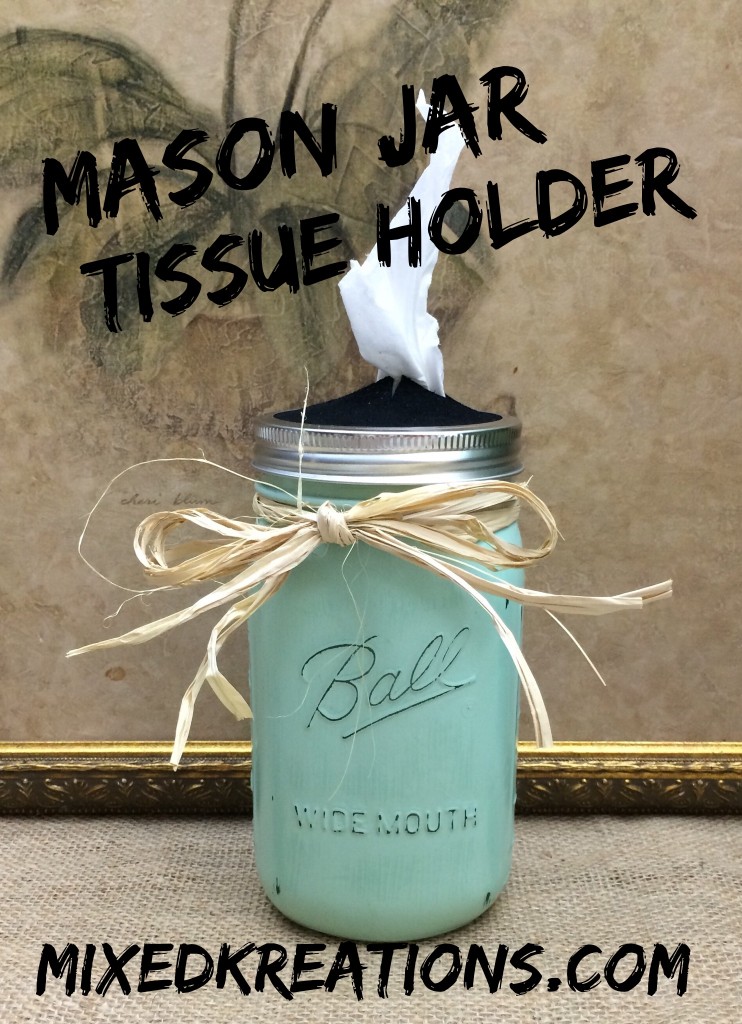
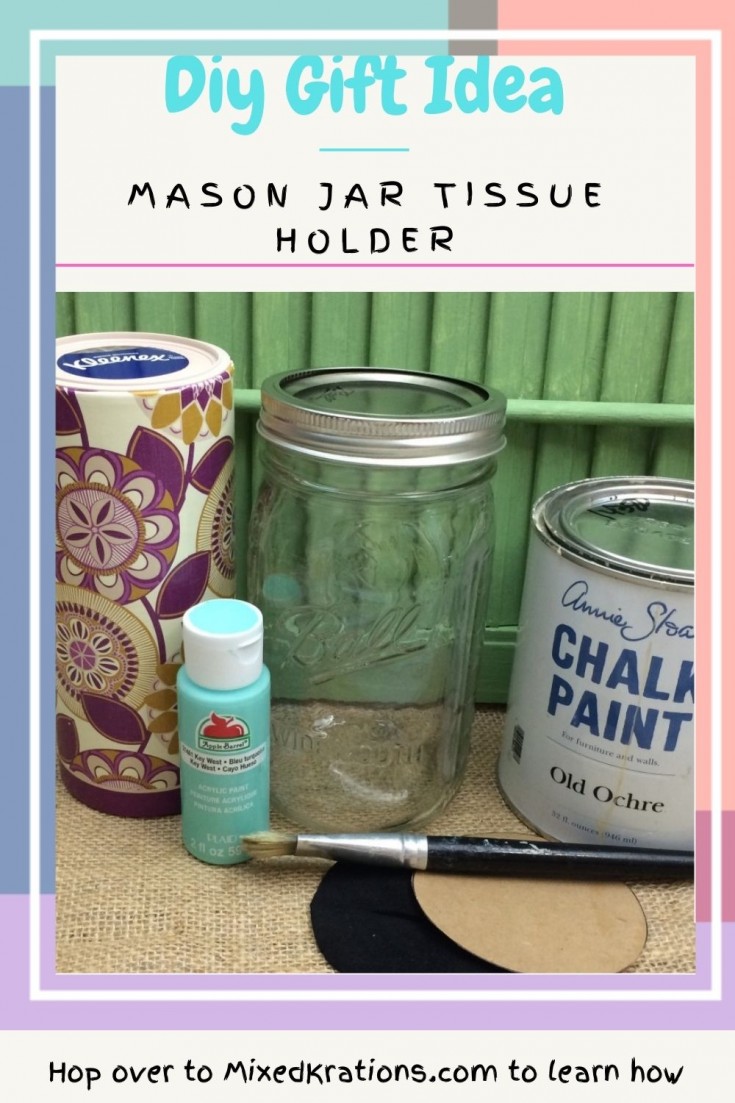
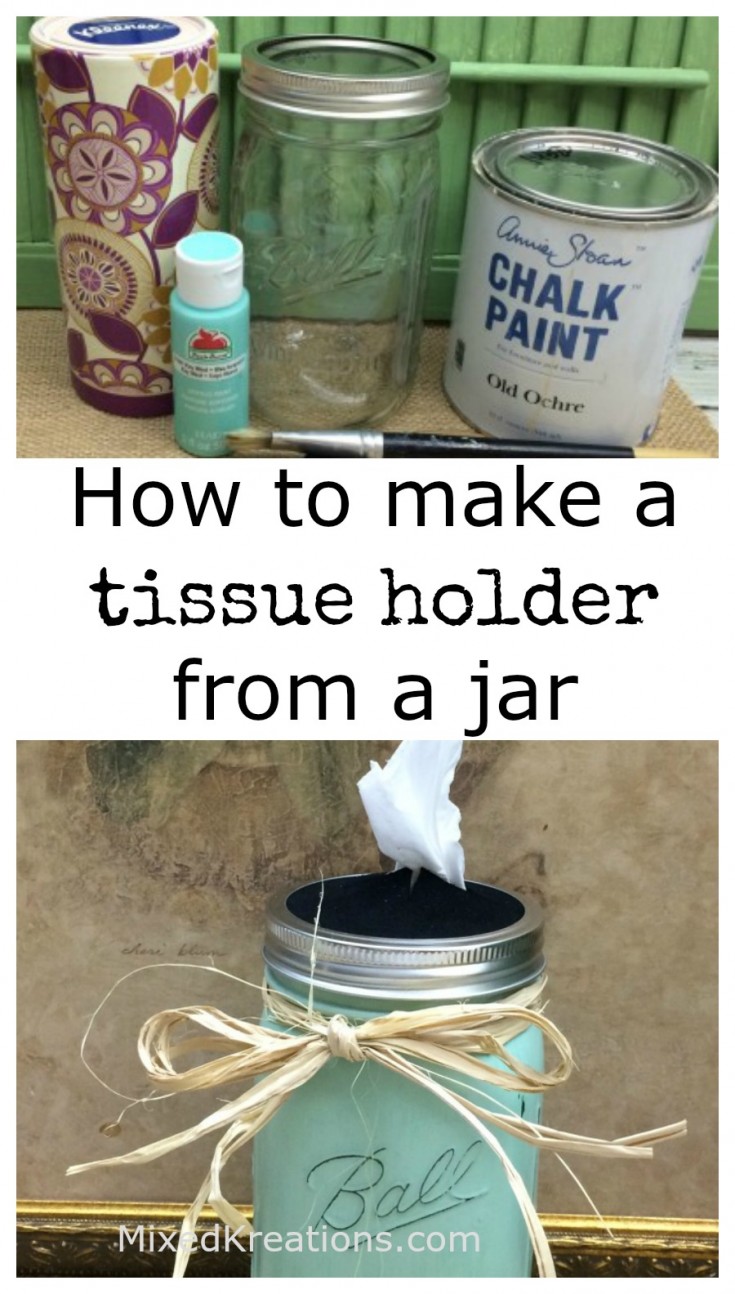
How To Make A Mason Jar Tissue Holder


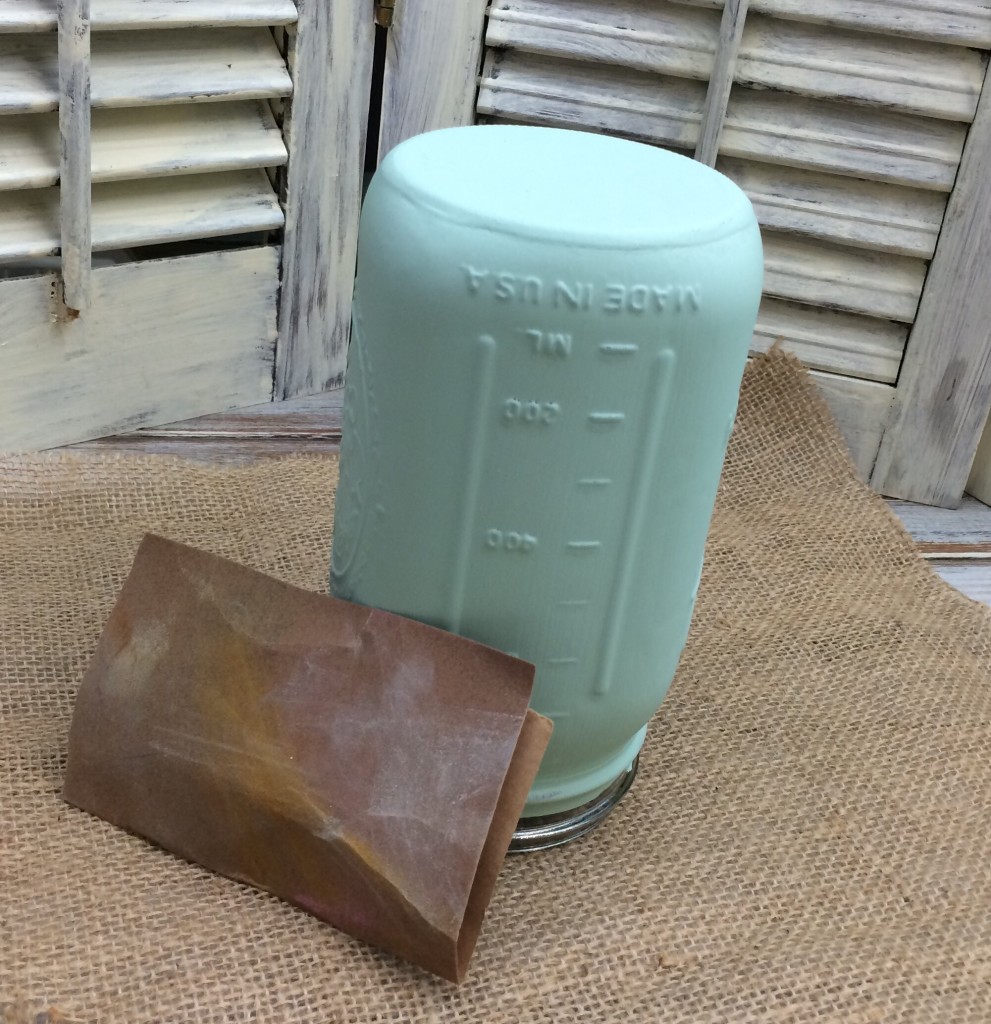
Add two coats of chalk paint and let dry. I didn’t paint the rim because I will be putting the lid back on.

Once throughly dry take some sandpaper and scuff up your mason jar to give it a worn rustic look.

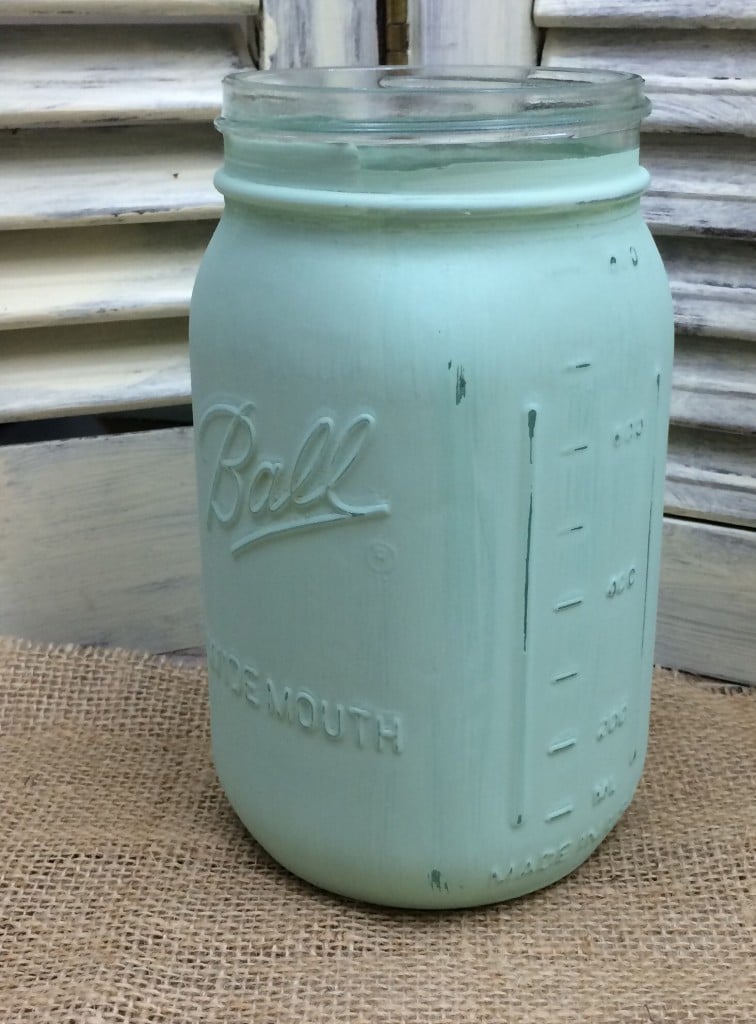
Continue sanding until you get the desired look you are going for.

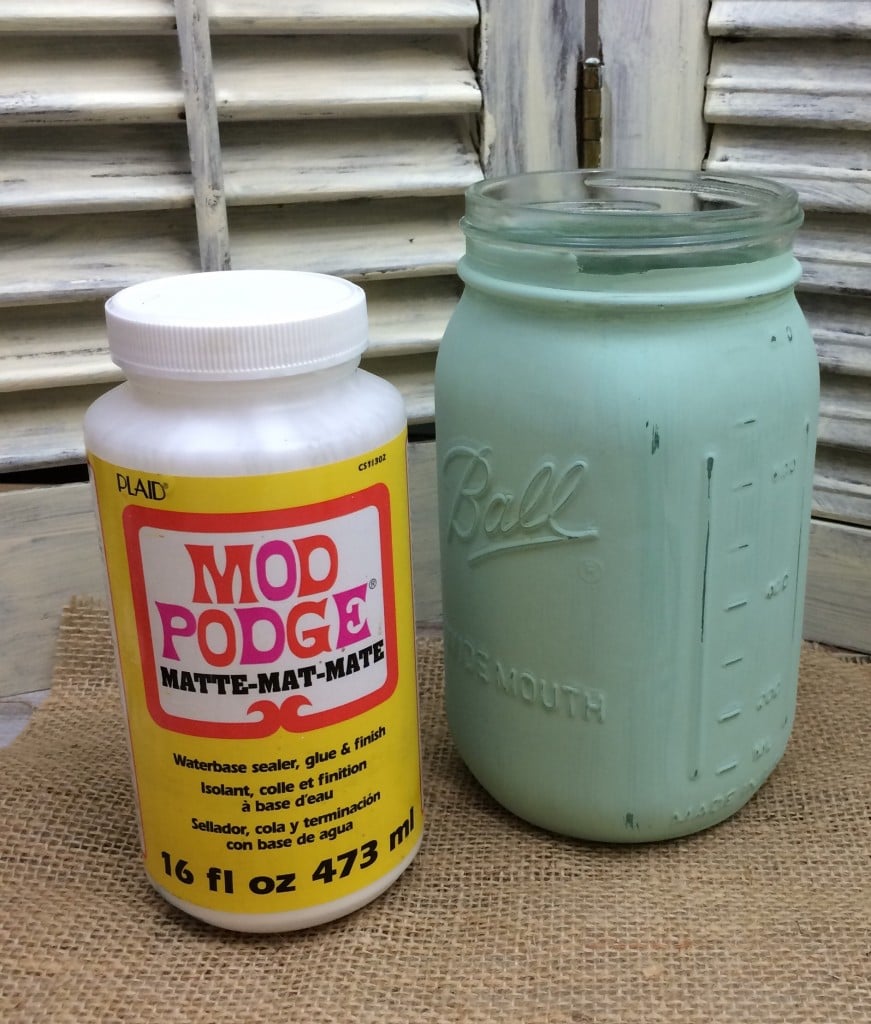
Add a coat of mod podge for protection.

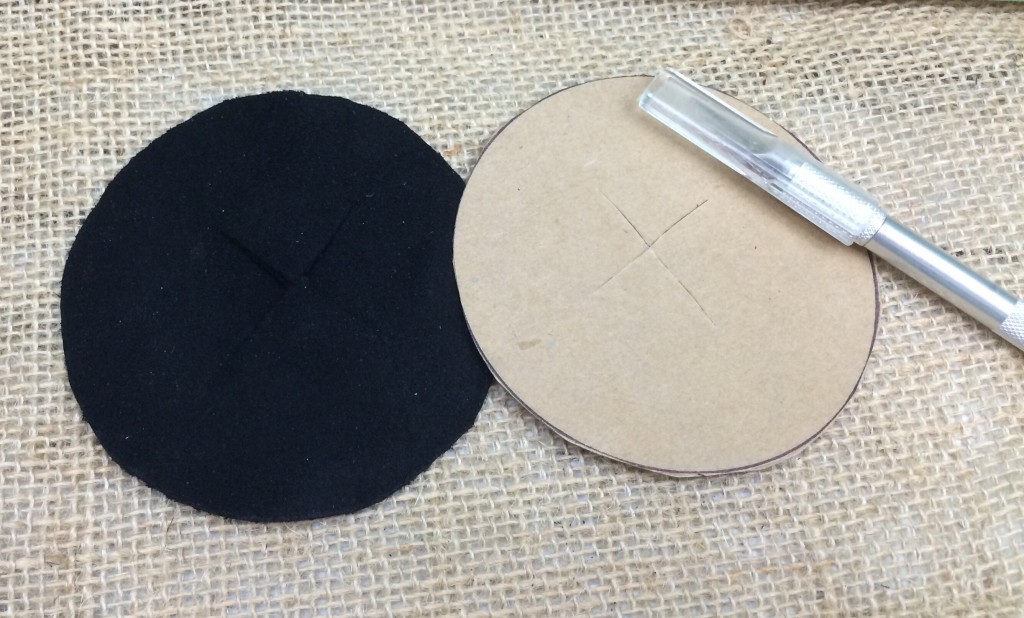
Trace around the inner part of your mason jar lid onto a piece of cardboard and leather. You are going to replace the  inner part of the mason jar lid with cardboard and leather circles.

This #diy tissue holder made from a #MasonJar would make a cute gift.
Powered By the Tweet This Plugin
Tweet This

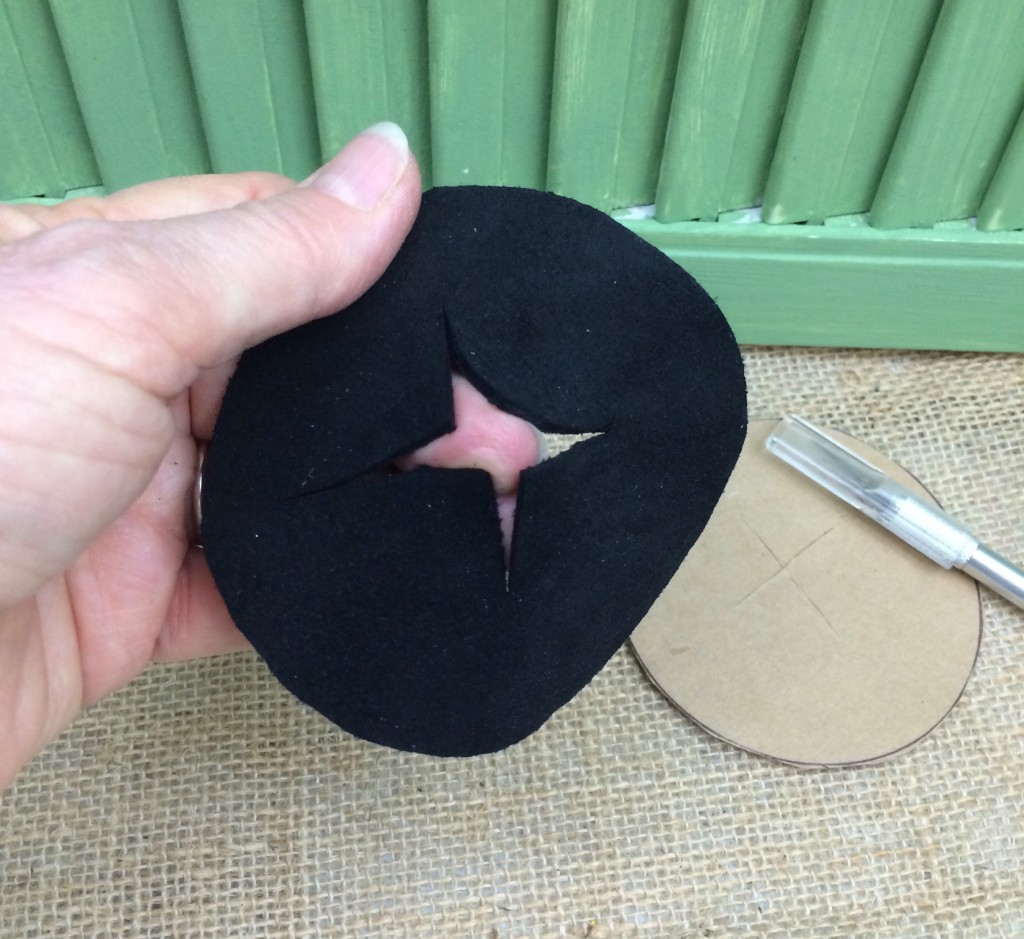
Cut a cross in the middle of your leather.

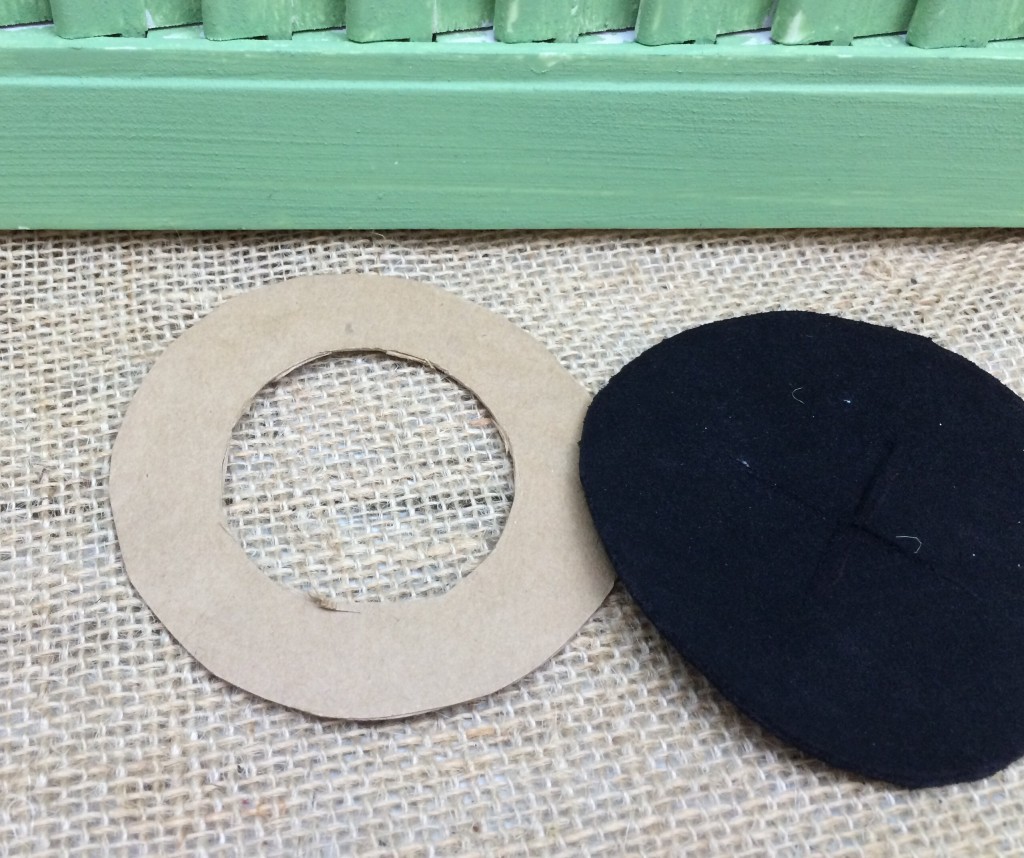
Cut out the middle of your cardboard circle. I tried cutting a cross in the cardboard but it wasn’t flexible enough.

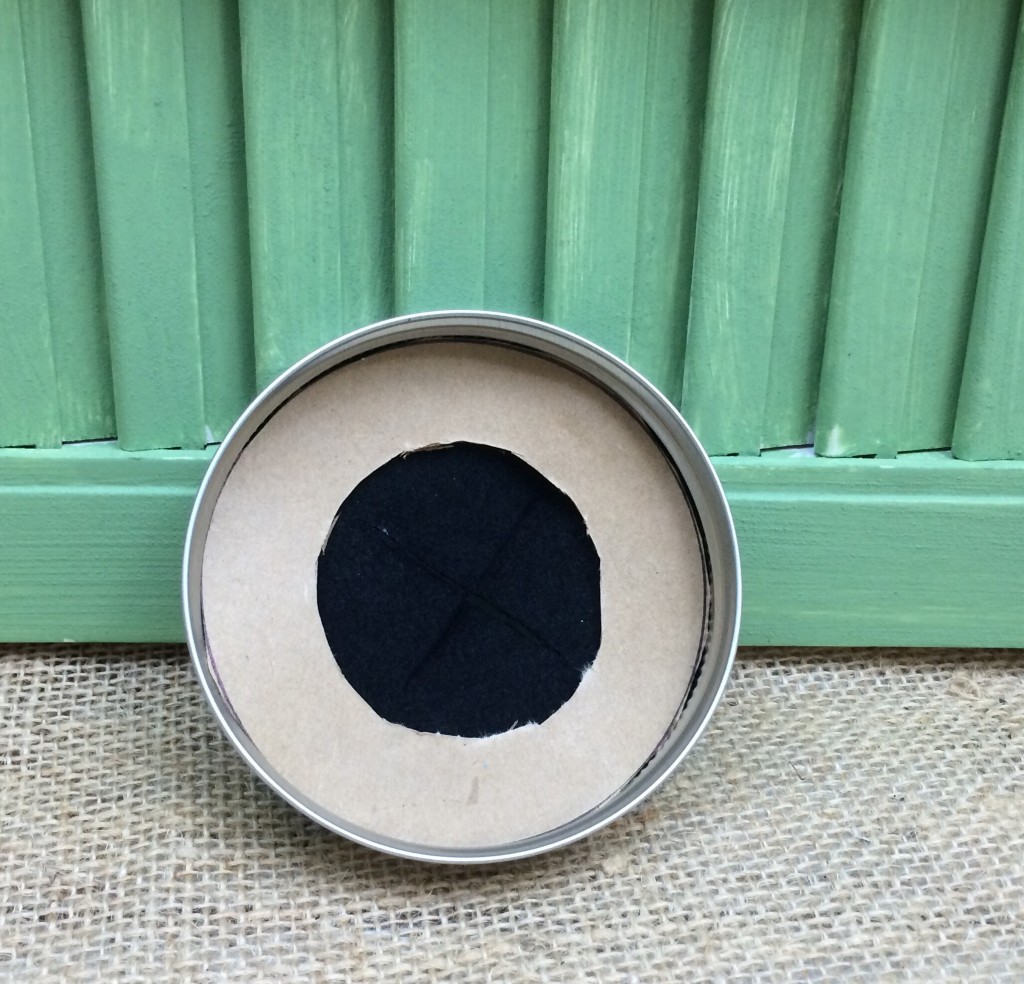
Place the leather piece in the lid first, then the cardboard ring.

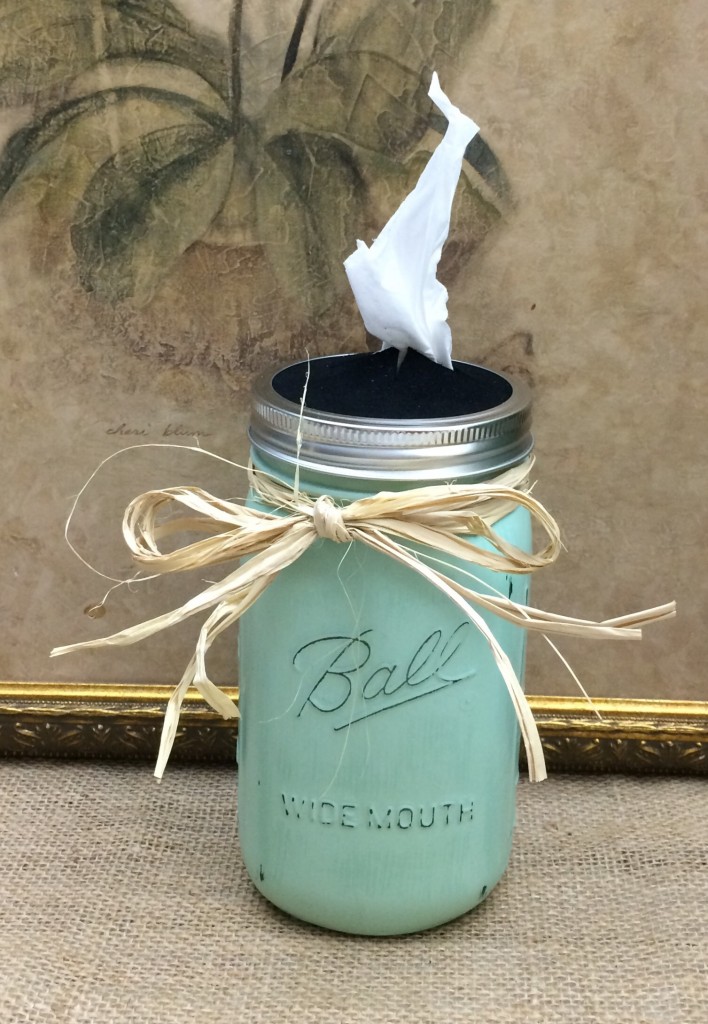
Take the roll of Kleenex out of the container and drop down in the mason jar. Pull up a tissue end through the leather cross hole of your lid, then screw the lid onto the jar.

Tie a few pieces of raffia around the rim of your Mason jar tissue holder and that’s it.

*This post contains affiliate links, if you click on an affiliate link & buy something I may receive a small commission at no extra charge to you. The affiliate money I earn helps pay the expenses to keep this site running. Please read my full advertising disclosure for more info. Thanks so much for your support!*

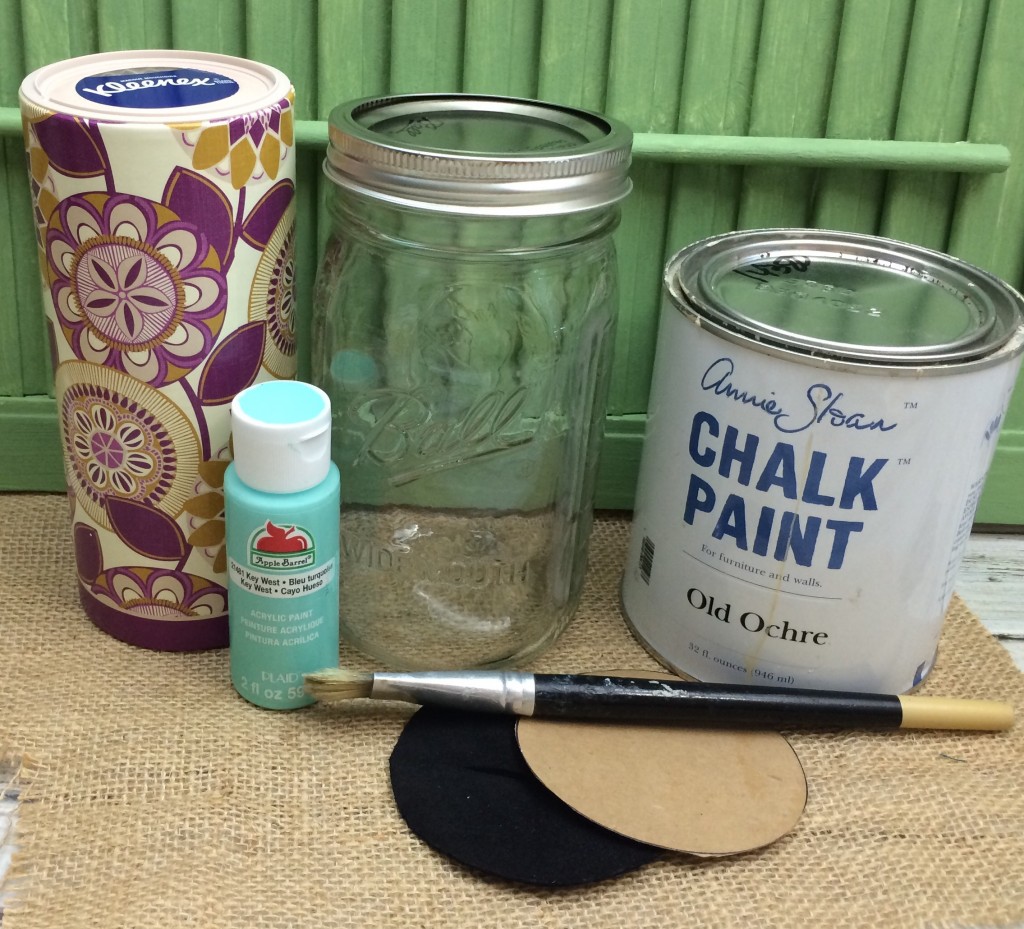
Mason Jar Tissue Holder Material List

  • Large Wide Mouth Mason Jar
  • Chalk paint (old ochre)
  • Kleenex in a tube
  • Mod Podge
  • Cardboard
  • Leather
  • Scissors
  • Exacto knife
  • Raffia
  • Paint brush
  • Acrylic paint to mix with chalk paint to make your desired color (optional)

More Post You May Like

Faux Sea Glass Mason Jars
Rustic Mason Jar Storage Rack
Loose Change Jar

how to make a tissue holder out of a mason jar

how to make a tissue holder from a jar | repurposed jar into a tissue holder | diy tissue holder #RepurposedJar #Upcycledjar #DiyTissueHolder #giftidea MixedKreations.com
how to make a tissue holder out of a glass jar, repurposed jar tissue holder MixedKreations.com

If you enjoyed this post, don't forget to pin it for later!

12713 shares
  • Share1
  • Tweet

If you enjoyed this post, would you mind taking the time to:
  • Share, or Pin for later reference.
  • Follow me on Facebook, Twitter, Pinterest
  • Leave a comment
Thank you so much for taking the time to comment. I love hearing from my readers, and appreciate the kind words.

Comments

  1. Carol says

    April 11, 2016 at 3:17 pm

    I saw these on Facebook the other day and LOVED them. So pretty!

    Reply
    • Linda @ Mixed Kreations says

      April 14, 2016 at 5:56 am

      Thank you Carol! I already have another one started.

      Reply
    • JOANNA cribb says

      August 8, 2018 at 5:10 pm

      Yes I love this idea. I saw on Pinterest and decided that’s what I’m making for Christmas gifts . Thanks for posting!!

      Reply
      • Linda @ Mixed Kreations says

        August 10, 2018 at 10:43 am

        Thank you Joanna, I am sure the receivers will be pleased with their Christmas gifts. Who wouldn’t love a handmade tissue holder. 🙂 Thanks so much for stopping by!

        Reply
    • ViCky says

      March 17, 2019 at 4:54 am

      Can you use spray paint or regular arcrylic paint?

      Reply
      • Linda @ Mixed Kreations says

        March 19, 2019 at 5:33 am

        I used acrylic but I guess you could do base coat with spray paint then come back and do the details with acrylic. That is if it will stick to the spray paint.

        Reply
  2. Renee says

    April 11, 2016 at 6:41 pm

    What a cute idea for tissues! thanks for sharing

    Reply
    • Linda @ Mixed Kreations says

      April 14, 2016 at 5:56 am

      Thank you Renee! Thanks for sharing!

      Reply
  3. Lynn says

    April 12, 2016 at 5:21 am

    I hereby pronounce you…(trumpets and drumroll) “Queen…of…the…Mason…Jar…crafts!” Linda…that tissue holder is so charming and, even better, very handy and useful. I’m thinking that the exact one you made would look great in one of my bathrooms! I see a project looming!
    Thanks for sharing your brilliance.
    Hugs, Lynn

    Reply
    • Linda @ Mixed Kreations says

      April 14, 2016 at 5:55 am

      Thank you Lynn! I love reusing mason jars and cans, there free. I have another one started for the guest bath to match the animal print decor!

      Reply
  4. Joy | Yummy Seconds says

    April 13, 2016 at 8:31 pm

    What a wonderful idea. Sounds easy to make. Stumbling.
    #WAYWOW.

    Reply
    • Linda @ Mixed Kreations says

      April 14, 2016 at 5:53 am

      Thank you Joy! It is really easy and there so cute!

      Reply
    • Gina says

      January 26, 2019 at 2:42 pm

      It’s easier to pry off the top of the round tissues as it fits perfectly in the mason jar lid. No need to make a cover.

      Reply
      • Linda @ Mixed Kreations says

        January 28, 2019 at 5:32 pm

        Thanks for that tips Gina!

        Reply
      • Diane Williams says

        September 16, 2019 at 2:45 pm

        Where do you get the round tissues?

        Reply
        • Linda @ Mixed Kreations says

          September 16, 2019 at 3:40 pm

          You can find them at Walmart, or click on the link in the post to purchase online.

          Reply
  5. LZ Cathcart@ The Summery Umbrella says

    April 17, 2016 at 8:15 am

    Oh wow!! LOVE this idea! So pretty and rustic! I could definitely see it in a basket full of goodies as a “get well soon” or something of this nature gift. 🙂

    Reply
    • Linda @ Mixed Kreations says

      April 20, 2016 at 7:30 pm

      Thank you LZ! That’s a great idea, this would be great in a get well basket.

      Reply
  6. Nikki says

    April 19, 2016 at 11:18 am

    Linda, I love rustic and cool. This is both! A mason jar is so charming, it would look great in any room, and for a teacher this would be a great gift! You are so thoughtful in your repurposing! And I am becoming a huge fan of chalk paint. I am amazed at how many items you have used it on!

    Reply
    • Linda @ Mixed Kreations says

      April 21, 2016 at 2:58 pm

      Thanks Nikki! I love repurposing mason jars, there’s so many fun projects to make, and I Love Love chalk paint. You can use it on just about anything.

      Reply
  7. Mary-the boondocks blog says

    April 22, 2016 at 5:38 pm

    Linda this is a really cute repurpose. I love the color you chose it is nice and warm and earthy. Happy Earth day!

    Reply
    • Linda @ Mixed Kreations says

      April 25, 2016 at 3:13 pm

      Thank you Mary! I’m really happy how it turned out. Now I need to get one made for my guest bath.

      Reply
  8. Kathryn says

    April 25, 2016 at 7:37 am

    Linda, I love the blue you chose. And the leather is a great idea. At first I assumed it was felt. The leather would be much sturdier. This is a great idea!

    Reply
    • Linda @ Mixed Kreations says

      April 25, 2016 at 4:10 pm

      Thank you Kathryn! When I first started I was going to use cardboard, but then I decided on the leather because it’s more flexible and will last forever unlike the cardboard.

      Reply
  9. Erin - Suburban Simplicity says

    April 25, 2016 at 10:22 am

    Cute, cute, cute Linda. I love the color…it’s one of my favorite…but then again, so are mason jar crafts! Thanks for sharing!

    Reply
    • Linda @ Mixed Kreations says

      April 25, 2016 at 4:15 pm

      Thank you Erin! I love Mason jar crafts too! There fun easy crafts, and so many cute things you can make.

      Reply
  10. Emily @ My MOm Made That says

    April 27, 2016 at 2:46 pm

    I’ve never seen this idea with a mason jar before! Brilliant!

    Reply
    • Linda @ Mixed Kreations says

      April 28, 2016 at 7:49 am

      Thanks Emily! I love mason jar crafts, and this one had been on my to do list for quit a while. Love how it turned out, now I need to make more.

      Reply
  11. Charlene Asay says

    April 27, 2016 at 4:06 pm

    This is such a great idea. Thanks for sharing with us all. Have a wonderful week!

    Reply
    • Linda @ Mixed Kreations says

      April 28, 2016 at 7:48 am

      Thank you Charlene! Hope you have a great week as well!

      Reply
  12. Helen says

    April 28, 2016 at 7:35 am

    I love this idea! It would be great if you would share it at the DIY party!
    http://www.pleasuresofthenw.com/diy-party-2/

    Reply
    • Linda @ Mixed Kreations says

      April 28, 2016 at 7:45 am

      Thank you Helen! Thanks for stopping by and the invite. Have a great day!

      Reply
  13. Jennifer says

    April 29, 2016 at 6:58 am

    What a great idea! I have never seen a mason jar used for tissues before but I love it. It takes up so much less room on my counters than a box and it looks much prettier too! Your tutorial is very clear too…thanks! I’m glad you linked it up to Dishing It! & Digging It! this week!

    Reply
    • Linda @ Mixed Kreations says

      April 29, 2016 at 4:24 pm

      Thank you Jennifer! It does take up less room so that makes for a great gift idea for a teacher or someone that doesn’t have a lot of room. Thanks for stopping by! Have a great day!

      Reply
  14. Jean says

    July 25, 2016 at 8:05 pm

    I made this but used craft foam for the top. I bought a small sheet of white adhesive craft foam and applied a piece of leftover contact paper to the adhesive side. I cut this in a circle and made an X in the center. It is perfect in place of the leather, much cheaper and I was able to customize the color and pattern. I tied a piece of Aqua twine around the top, tied it in a bow and attached 2 pretty ocean themed charms to each end of the twine.

    Reply
    • Linda @ Mixed Kreations says

      July 27, 2016 at 3:43 pm

      Sounds like a good idea. I had some scrap leather on hand, but next time I will try the craft foam and contact paper. Thanks for stopping by!

      Reply
  15. Kim says

    July 26, 2016 at 3:01 pm

    How cute & clever & what a great gift this would make. Stopping by to let you know you are being featured on Friday’s P3 Party post! Have a great week! Thanks for pinning!
    Best,
    Kim

    Reply
    • Linda @ Mixed Kreations says

      July 27, 2016 at 3:28 pm

      Thanks Kim! This would make a great gift and it’s easy to make as well.

      Reply
  16. Sally says

    April 22, 2017 at 10:26 pm

    The lid of the tube of Kleenex fits on the wide mouth canning jar. It makes it easier then trying to make a different one.

    Reply
    • Linda @ Mixed Kreations says

      April 24, 2017 at 4:53 pm

      Hi Sally, I did start to use the tube lid, but it had gotten somewhat bend up, so I decided to just make my own.

      Reply
  17. Stephanie Salas says

    May 18, 2017 at 1:57 pm

    Hi, great idea btw! I just had a question. After you paint the jar with chalk paint, then you add a locals of Mod Podge all over the jar. Does that not change the texture of the chalk paint? I’m an amateur crafter so please bare with me lol

    Reply
    • Linda @ Mixed Kreations says

      May 23, 2017 at 9:50 am

      Hi Stephanie! Yes the Mod Podge will change the texture of the paint making it smooth. It is not necessary to add the Mod Podge, I guess I just did it out of habit. But it will be find without! If you have any other questions feel free to ask 🙂 Thanks for stopping by, and be sure to share if you decide to make a tissue holder jar.

      Reply
  18. Mayra says

    October 14, 2017 at 7:10 am

    Love it!

    Reply
    • Linda @ Mixed Kreations says

      October 20, 2017 at 3:56 pm

      Thank you Mayra!

      Reply
  19. Brooke skertchly says

    November 13, 2017 at 9:25 am

    Hello, what a cute idea, so why leather and what type of tissue box? I used the long short ones and every time I try to pull through the tissue it rips…..

    Reply
    • Linda @ Mixed Kreations says

      November 14, 2017 at 3:36 pm

      Hi Brooke! I used leather because that is what I had on hand that I thought would work for what I needed. I used the kleenex in a tube, it fits nicely in the jar. Thanks so much for stopping by!
      Linda @ Mixed Kreations recently posted…A Violin Made Of WHAT??My Profile

      Reply
  20. Brooke skertchly says

    November 16, 2017 at 8:30 am

    Hello, you said you used tube Kleenex. Do you have a photo?not sure what tube Kleenex is. Not sure how everyone else got it to work except me, because you didn’t show how to do Kleenex, please help.

    THANK YOU!

    Reply
    • Linda @ Mixed Kreations says

      November 17, 2017 at 7:32 am

      Hi Brooke! There is a picture of the kleenex tube in the second picture of the post, just left of the jar. You just remove the kleenex from the tube, and slide them down into the jar. Hope this helps!

      Reply
      • Debi says

        December 3, 2017 at 8:19 pm

        I’ve never seen Kleenex in a tube! The cardboard you used was black. Where did you find it?

        Reply
        • Linda @ Mixed Kreations says

          December 5, 2017 at 6:11 am

          Hi Debi! I found the kleenex at Walmart, but I’m sure any grocery store probably sells it in the tube as well. There is also a link in the post. For the top I used cardboard and a piece of black leather because that is what I had on hand. You could use any color of cardstock, or just a piece of plain cardboard and felt. I hope this help! Thanks for stopping by, and I would love to see your tissue holder once you get done.

          Reply
  21. Heather says

    March 24, 2018 at 1:00 pm

    This is a super cute idea! Love it!

    Reply
    • Linda @ Mixed Kreations says

      March 26, 2018 at 9:55 am

      Thank you Heather! 🙂

      Reply
  22. Linda Wilson says

    July 8, 2018 at 9:12 am

    I can’t get the tissues to come out. What’s the secret.

    Reply
    • Linda @ Mixed Kreations says

      July 9, 2018 at 4:52 pm

      That’s strange! I don’t have any problem getting them out. Did you use the round kleenex canister type?

      Reply
  23. Valorie says

    January 12, 2019 at 8:32 pm

    What is the measurements of the bless you on the jar

    Reply
    • Linda @ Mixed Kreations says

      January 14, 2019 at 5:03 pm

      Hi Valorie! My Mason jar tissue holder doesn’t have bless you on it. But I would start by writing it on paper until I got the size and font I wanted then transfer it with graph paper.

      Reply
  24. Bev says

    January 13, 2019 at 8:42 am

    Where do you find the tissues on a roll?

    Reply
    • Linda @ Mixed Kreations says

      January 14, 2019 at 5:01 pm

      Hi Bev! I bought mine at Walmart. 🙂

      Reply
  25. Rita says

    February 7, 2019 at 11:14 am

    Such a wonderful and yet another creative way of using mason jars,thank you so much for sharing this great idea. I will definitely be making some of these for this coming Christmas.

    Reply
    • Linda @ Mixed Kreations says

      February 11, 2019 at 6:06 pm

      Thank you Rita! I’m glad you enjoyed this project. I do love upcycling glass jars and these would make a great gift for Christmas. Thanks so much for stopping by!

      Reply
  26. Lisa Schaal says

    October 30, 2019 at 7:57 pm

    Love making these. I am making them for Christmas gifts. Can they be wiped off with a damp rag?

    Reply
    • Linda @ Mixed Kreations says

      November 12, 2019 at 3:51 pm

      Hi Lisa! These would make perfect Christmas gifts. Yes if you give it a coat of Mod Podge then it can be wiped off with a damp rag.

      Reply
      • Lisa says

        November 23, 2019 at 12:46 pm

        Great! Thank you! I have made 10 so far for Christmas gifts!

        Reply
        • Linda @ Mixed Kreations says

          November 24, 2019 at 12:23 pm

          Oh that’s great, and I’m glad I could be helpful. I need to get some more jars and get some more made for Christmas.

          Reply
  27. Lacy says

    March 11, 2020 at 11:24 am

    Will waverly chalk pain work?

    Reply
    • Linda @ Mixed Kreations says

      March 30, 2020 at 11:24 am

      Hi Lacy! Most of the chalk paint that I use is the Waverly brand. So yes it will work. Just make sure each coat dries thoroughly before adding the second coat. Thanks for stopping by!

      Reply
  28. Tammie Hanel says

    September 13, 2020 at 2:54 pm

    Thanks so much for the instructions! I am making them for Christmas presents. I thought that would be appropriate for this year. Where did you find the tissues in a roll like that ?

    Reply
    • Linda @ Mixed Kreations says

      September 13, 2020 at 7:40 pm

      Hi Tammie! I am so happy that you enjoyed the project. I’m sure they will be big hits for Christmas.
      I found the rolls at Walmart, but you should be able to find them at any supermarket. They sell in sets of three.

      Reply
  29. linda m Battershall says

    November 7, 2022 at 11:03 pm

    I made one. I used the top of the cylinder tissue container for the top of the jar. It fits perfectly.

    Reply
    • Linda @ Mixed Kreations says

      November 9, 2022 at 10:21 am

      Hi Linda! Thanks for the tip, great idea! Thanks for stopping by!

      Reply
  30. Linda @ Mixed Kreations says

    May 5, 2016 at 4:59 am

    Thanks for the feature!

    Reply

Trackbacks

  1. Creative Spark Link Party #101 | two purple couches says:
    May 4, 2016 at 4:01 am

    […] […]

    Reply
  2. Simple Spring DIY Decor Ideas | Inexpensive DIYs for Spring says:
    May 9, 2016 at 5:44 pm

    […] from Mixed Creations did a wonderful job making this Mason Jar Tissue Holder.  You could customize it to any color you wish.  This one is even a good gift […]

    Reply
  3. Top Five Most Popular Post For 2017 - Mixed Kreations says:
    December 31, 2017 at 4:44 pm

    […] #1 Drum roll please! My top most popular post of 2017 is the mason jar tissue holder. […]

    Reply
  4. Repurposed Ironing Board Wash Dry Fold Repeat - Mixed Kreations says:
    January 17, 2018 at 7:01 am

    […] How to upcycle a table with paint and a napkin Repurposed wood chair turned shelf Mason jar tissue holder […]

    Reply
  5. Bloggers Share Their Top Upcycle Projects of 2017 - Salvage Sister and Mister says:
    February 2, 2018 at 7:01 am

    […] MIXED CREATIONS, Mason Jar Tissue Holder […]

    Reply
  6. Bloggers Best Upcycle Projects - Salvage Sister and Mister says:
    January 11, 2019 at 6:44 am

    […] MASON JAR TISSUE HOLDER, Mixed Creations […]

    Reply
  7. Creative DIY Mason Jar Projects | Ecotek Green Living says:
    May 6, 2019 at 4:20 am

    […] Image via: mixedkreations […]

    Reply
  8. Δημιουργίες Με Γυάλινα Βάζα | Ecotek Green Living says:
    May 6, 2019 at 10:13 am

    […] Image via: mixedkreations […]

    Reply
  9. 30 Fabulous Painted Mason Jar Ideas from Cutesy to Classic - Trend Gut says:
    May 29, 2019 at 2:31 am

    […] Source: mixedkreations.com […]

    Reply
  10. 30 Amazing Ways to Organize with Glass Jars says:
    July 2, 2021 at 12:37 pm

    […] of tissues on your dresser or table when you can keep them in a gorgeously rustic glass jar from Mixed Kreations? You can also paint the glass jar to match your […]

    Reply
  11. Diy Scarecrow Tissue Dispenser - Mixed Kreations says:
    November 3, 2021 at 2:09 pm

    […] Hi all! Today I am going to share how to make a fun Scarecrow tissue dispenser for the holidays. If you like this mason jar tissue dispenser then you may also like my pencil jar tissue holder, or this farmhouse style mason jar tissue holder. […]

    Reply

Leave a Reply Cancel reply

Your email address will not be published. Required fields are marked *

CommentLuv badgeShow more posts

This site uses Akismet to reduce spam. Learn how your comment data is processed.

Thanks for sharing your thoughts and comments! I read and appreciate every single one!

Follow Mixed Kreations

Facebooktwitterpinterestyoutubeinstagram

My Favorites on Amazon

My Amazon Influencer Shop

Homemade Chalk Paint

diy chalk paint

How to Make Rusty Cans

how to make rusty cans

How to Make a Flag From a Wood Shutter

how to make a 2 sided american flag

Easter Egg Jar

How to make a Easter egg jar

Diy Texas Tile Coasters

Texas Tile Coasters

Update a Thrift Store Find

How to Update a Hanging Box in 4 easy steps

Categories

By Kelli & Crystal From Learn To Blog Hangouts

#LearntoBlog Hangouts

Dominate Course

LearntoBlog
Featured on Hometalk.com
Rakuten Affiliate Network Welcome Program
Grow and Make

Dollar Tree

Creative Fabrica Font Bundles

Font Banner - Free Fonts

Featured At

Featured At

Mixed Kreations featured in Country sampler

Featured at

mixed kreations is featured in Bella Crafts online magazine
The Pin Junkie

Canva Photo Editing

Amazon Affiliates

I am a participant in the Amazon Services LLC Associates Program, an affiliate advertising program designed to provide a means for sites to earn advertising fees by advertising and linking to Amazon.com.

Disclosures Statement

This policy is valid from 19 July 2013 This blog is a personal blog written and edited by me. For questions about this blog, please contact Linda @ ldkeesee@mixedkreations.com. This blog accepts forms of cash advertising, sponsorship, paid insertions or other forms of compensation. The compensation received will never influence the content, topics or posts made in this blog. All advertising is in the form of advertisements generated by a third party ad network. Those advertisements will be identified as paid advertisements. The owner(s) of this blog is compensated to provide opinion on products, services, websites and various other topics. Even though the owner(s) of this blog receives compensation for our posts or advertisements, we always give our honest opinions, findings, beliefs, or experiences on those topics or products. The views and opinions expressed on this blog are purely the bloggers' own. Any product claim, statistic, quote or other representation about a product or service should be verified with the manufacturer, provider or party in question. This blog does not contain any content which might present a conflict of interest. To get your own policy, go to http://www.disclosurepolicy.org

Copyright © 2023 · Modern Blogger Pro Theme By, Pretty Darn Cute Design