Hi All! Just one more day till Thanksgiving, and 33 more till Christmas. So, I guess it’s ok to go ahead and share a Christmas project today. My Rustic Farmhouse Style Christmas Tree.
Before we get started on todays project, I would like to thank all my blogging friends & followers for following along with me on my creative journey, and wish you a safe and Happy Thanksgiving!

***This post contains affiliate links, if you click on an affiliate link & buy something I may receive a small commission at no extra charge to you. The affiliate money I earn helps pay the expenses to keep this site running. Please read my full advertising disclosure for more info. Thanks so much for your support!***
Supplies Needed
Variety of thin wood strips
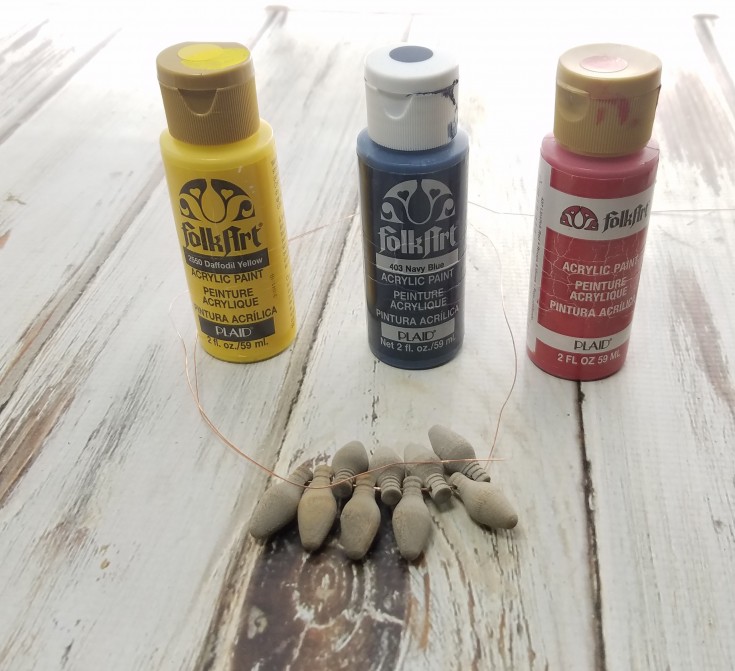
Acrylic paint, green, white, silver metallic, red, blue, yellow, grey, charcoal grey, black
Thin wire
Wood star cut-out
Mini wood light bulbs
Heavy duty stapler
Small thrift store pot
Wire cutters
Paint brushes
Spanish moss
Clear Gorilla glue
Wood screw
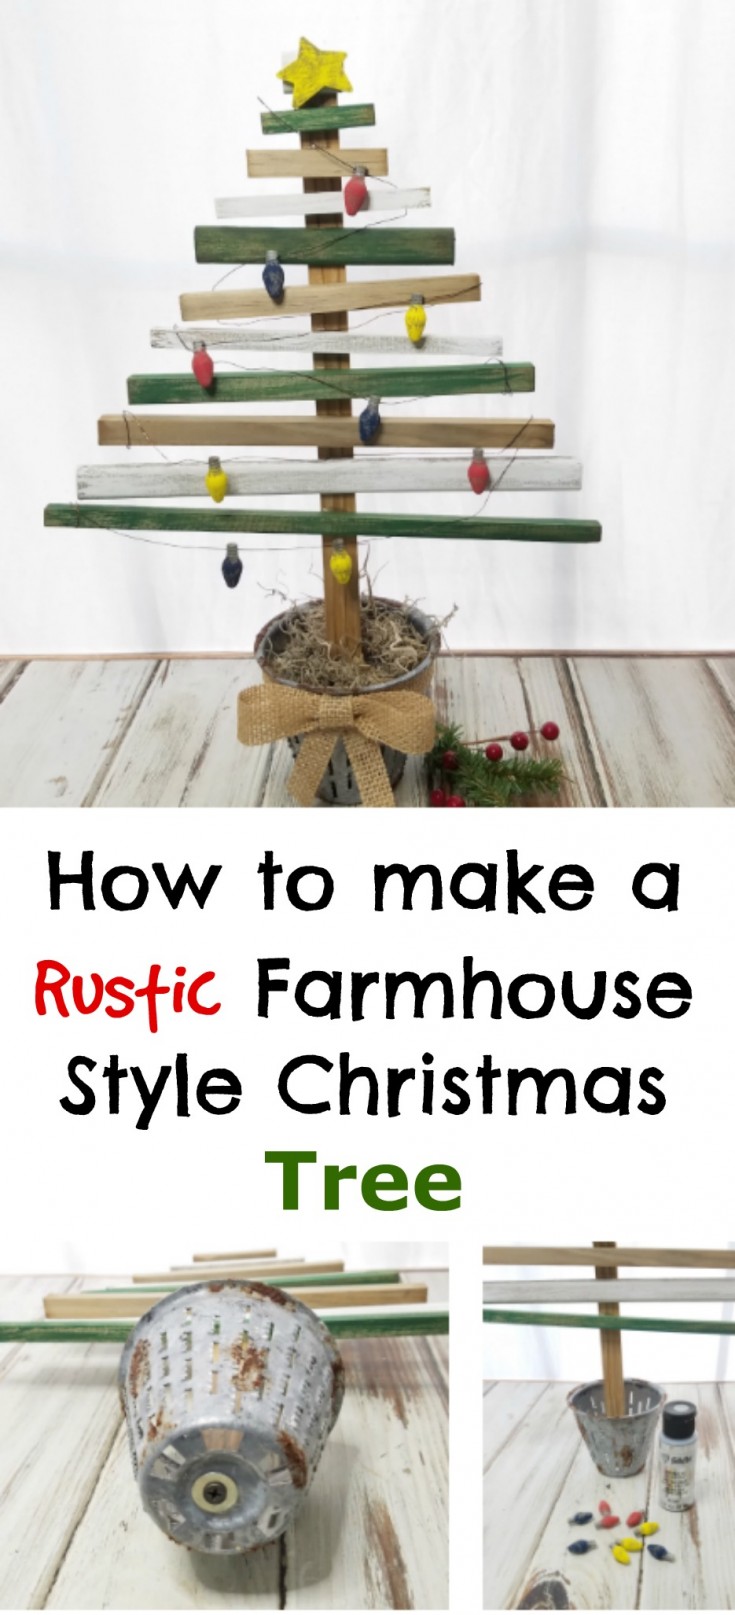
How to Make a Rustic Farmhouse Style Christmas Tree
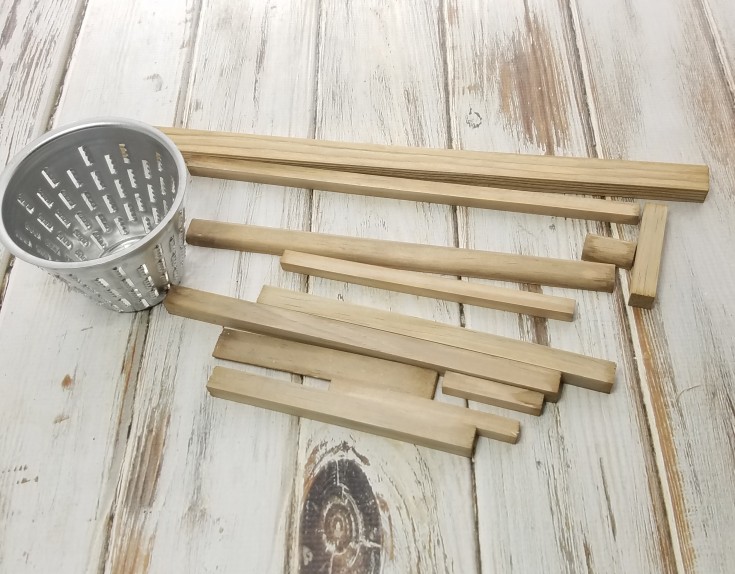
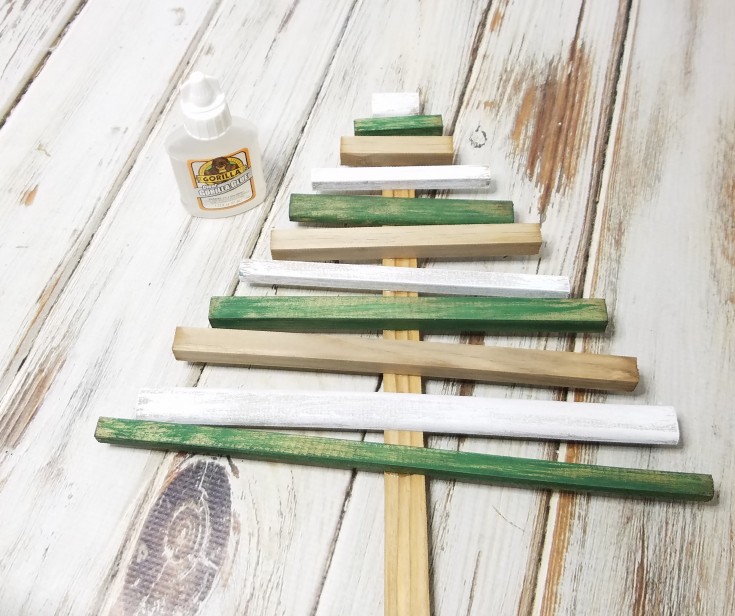
To make this farmhouse style Christmas tree you will need to use some small pieces of would different lengths to form a tree. I also used a variety of different width’s of wood, and laid them out as I cut them to form the branches for the rustic tree so that I knew what lengths to cut. Some I turned a little crooked so they weren’t all straight on the tree.
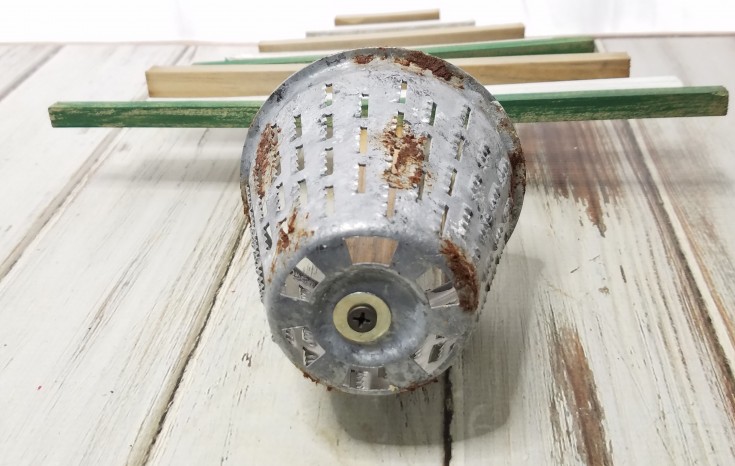
Once I had the rustic farmhouse style tree the shape that I desired I cut the trunk for the tree, leaving enough of the trunk to go inside of a metal pot that I had picked up a while back at the thrift store. (Which I believe it is actually a greater that goes inside a food processor).
Once all the wood was cut for my wooden tree Christmas tree I used some of my homemade aging solution on the wood.
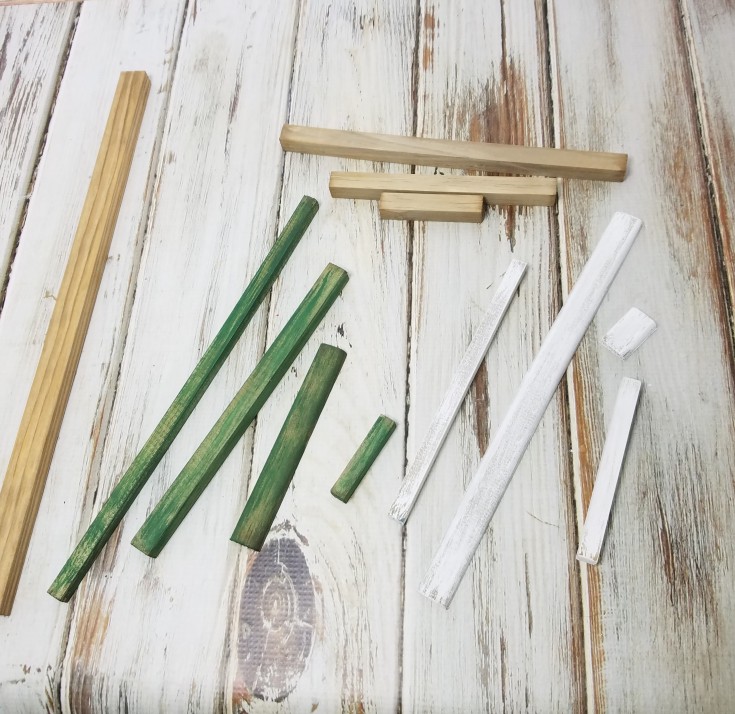
For the tree I decided on three colors for the branches, green, white, and weathered. I divided my branches so that they would be alternating colors once the tree was together, then started dry brushing the tree branches leaving a good part of the weathered wood showing.
While looking through my wood parts for a star to go on top. I ran across some mini tree lights. I was going to leave the tree plain but since I had the mini wood lights I decided to add them as well. So, I took the star, and mini lights, and dipped them into my homemade aging solution to give them a weathered look as well.
While those pieces were left to age I started to work on the stainless-steel grater which was going to be the Christmas tree pot. I used a faux galvanized metal technique that I’ve used before (which you can find here). Plus, a new faux rust technique that I recently learned about, except I put my own twist on it by just using Mod Podge, and cinnamon together instead of the technique used at Grillo-Designs.
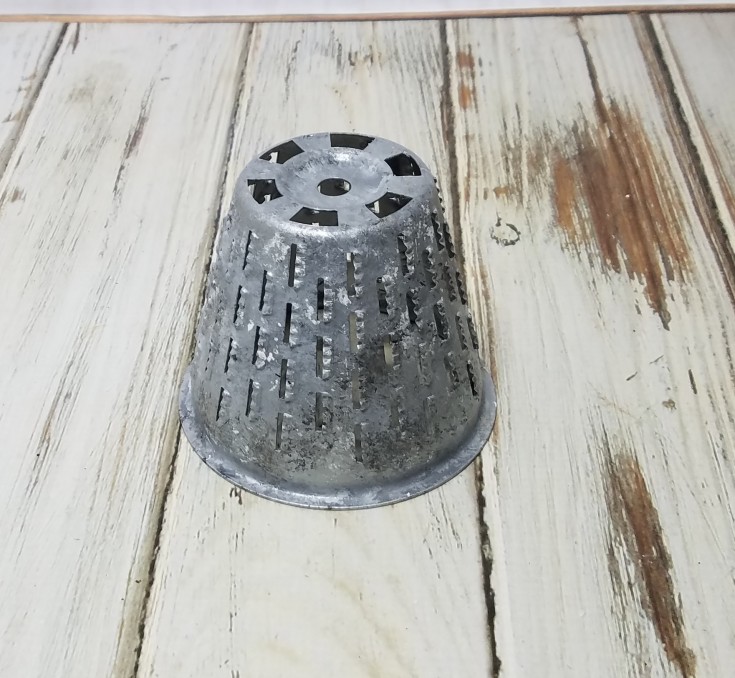
After I got the faux galvanized metal look that I was seeking I then proceeded with the new rust technique. I then mixed the Mod Podge, and cinnamon together making it a pretty thick paste. Then I started dapping it on here, and there on the faux galvanized Christmas tree pot. Giving it the appearance of rust.

I am really loving this new Diy rust technique, it works great, and is so easy to do. It not only looks like rust, but it is rough to the touch like actual rust feels. Pretty cool, huh?
Now back to the star topper, and the mini light bulbs. I did the same here as I did with the rustic farmhouse style Christmas tree, and dry brushed my chosen colors on leaving some of the faux weathered wood showing through.

The base part of the mini tree bulbs I painted with silver metallic acrylic paint.
Next, I used clear gorilla glue to put the rustic tree together, adding the star at the top, then letting dry overnight.
Now that everything is dry it’s time to put it all together. I drilled a hole in the bottom of the tree trunk carefully, which if I had been thinking I would have done that before I had glued it all together.
Next, I screwed the tree trunk into the faux galvanized pot firmly.
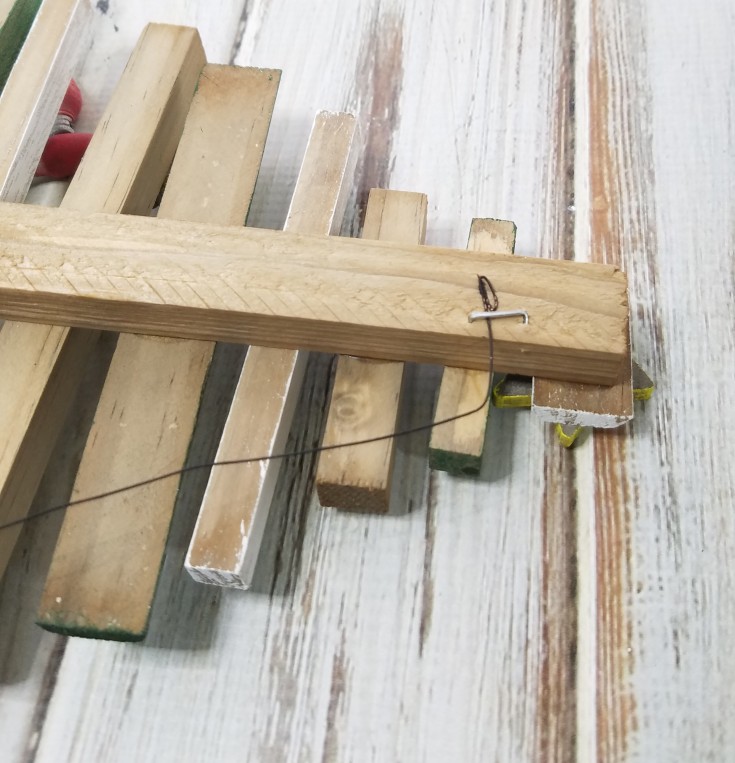
Now the tree can stand so it’s time to add the bulbs using thin wire, and my heavy-duty stapler.
A burlap bow was added to the pot, then I stuffed some Spanish moss in the pot, and that’s it for This Rustic Farmhouse Style Christmas Tree. How do you like it? Would you have painted it differently?

Have a Blessed and Happy Thankgiving!
More Fun Christmas Tree Projects
Diy yard stick Christmas tree
Burlap tree on wood picket
Hand painted Christmas tree on a cedar picket
Linda this is such a feast for my eyes. The Rust, the way you got to reuse those old bulbs, and the cute base. What a great imaginative project. Why I can just see farmer John putting this together over at the shed.
LOL! I hope farmer Johns is larger! I think it turned out pretty cute, but what I like the best is the new rust technique.
Linda, I love how you put all this together, and each step unique. Love the aging solution (pinned that) & love the rust technique you used (pinned that). The tree turned out just perfectly!
Thank you Florence! I use the aging solution on pretty much everything, and the rust technique I diffidently will be using it again as well.
Awesomeness Linda. I love how your tree turned out. Where did you find those wooden Christmas lights. I don’t think I’ve ever seen that before. They’re so cool and your rustification technique looks great. Hope you and your family had a wonderful Thanksgiving my friend
Thank you Michelle! I got these wood light about 20 years ago from a place called Woodworks Lts. They sell all kinds of wood cut-outs and parts. They use to have a store here, now I guess it’s all online sales.
Yes I thought the rust technique was pretty cool. I will be using it again.
I had a wonderful time. Both my girls came up with their families. Got to see the grandkids, and the grandbaby which is 2 now is hilarious. Her expressions, she has an amazing vocabulary for so young. She even corrects others. She had us laughing the whole time she was here.
I hope you and your family had a wonderful Thanksgiving as well, and if you didn’t celebrate Thanksgiving then I hope yall had a wonderful Day/Weekend.<3
Your tree looks fabulous. The wooden bulbs are a special touch.
Thank you Claire! I have lots of wooden parts from years ago and I thought these would be perfect on my new tree. 🙂