Hi all! I hope you all are having a great summer, and staying cool. Today I will be sharing a diy solar light Chandelier, that the hubby made out of an old chandelier that we picked up a few weeks ago at Habitat for Humanity, I love that place! They have raised their prices but you can still find some deals. Like the chandelier that we picked up for making our solar lighting to hang out by the pool.
We both loved the chandelier when we saw it. I was thinking LED candles, and the hubby was thinking solar lights. Since he was the one that was doing most of the work on this project I let him choose, and he chose solar. Which I guess that really makes more sense. With LED candles we would have to climb the ladder to turn them on every time we wanted them on.
***This post contains affiliate links, if you click on an affiliate link & buy something I may receive a small commission at no extra charge to you. The affiliate money I earn helps pay the expenses to keep this site running. Please read my disclosure for more info. Thanks so much for your support!***
Material List
Chandelier
Rust-Oleum spray paint
Solar lights
Non-foaming Gorilla Glue
Wood clamps
Cardboard pieces
16 ft. of chain
Wood block 1 inch
Keeper Quick Link
Nuts
DecoArt Chalky Finish – Refreshing
Diy Solar Light Chandelier
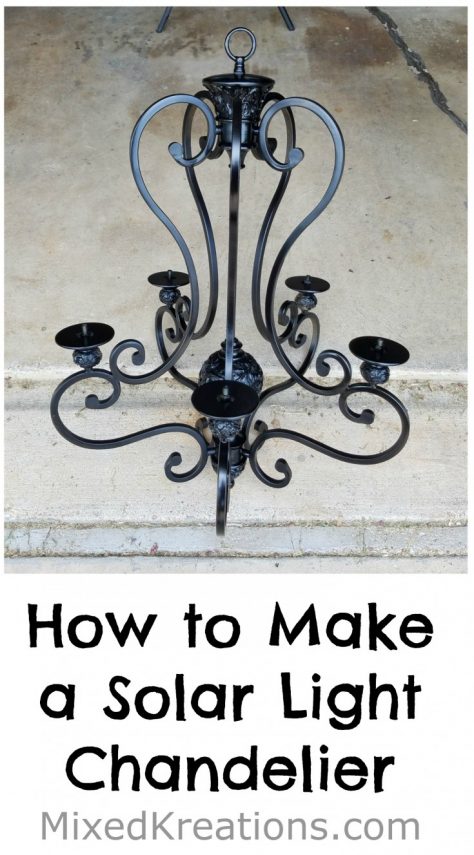
For our diy solar light Chandelier, the hubby first removed all the electrical wiring, and the metal tubing which is what held the candle looking bulbs.
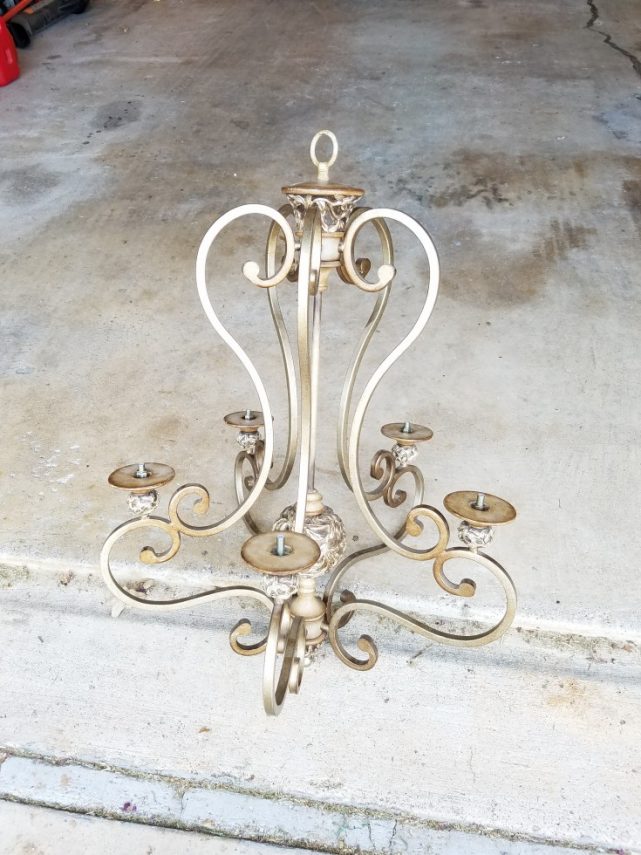
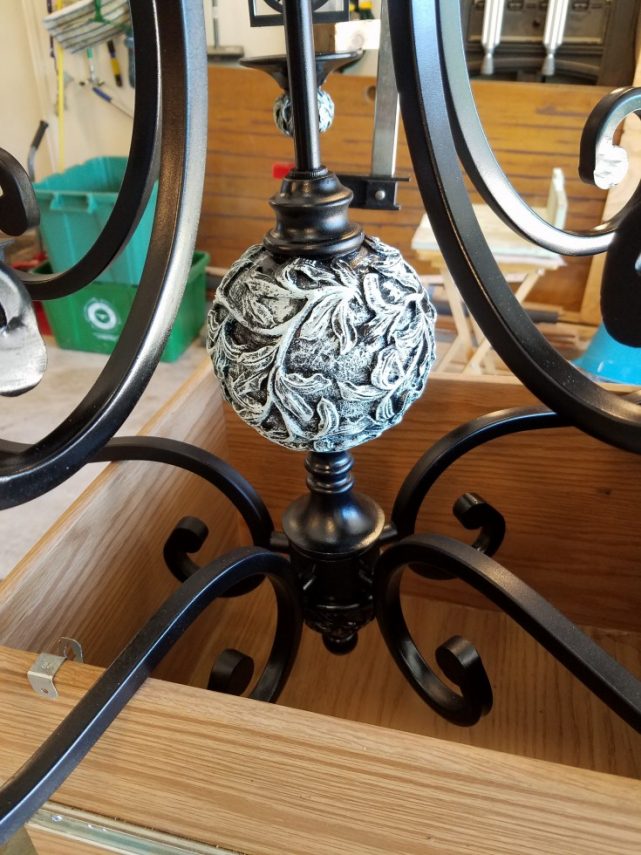
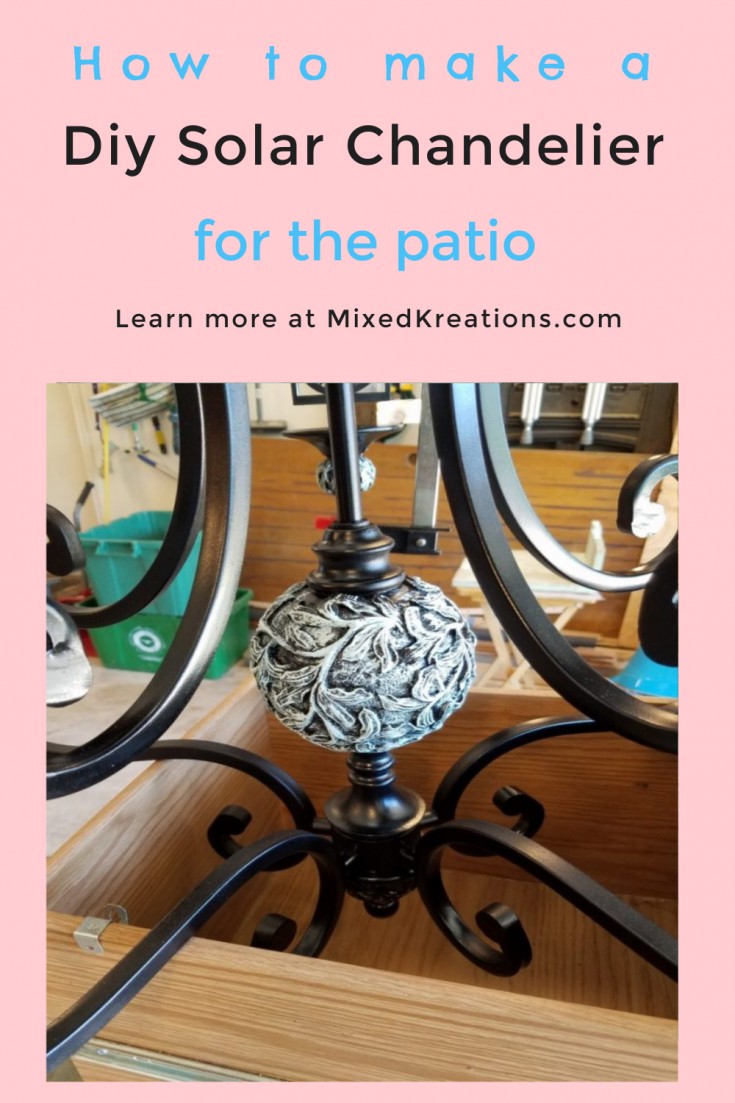
We chose black paint for the Chandelier. So the Hubby proceeded to spray paint the repurpose lighting black. Notice the ornamental balls on the chandelier? I had thought about sanding them down till the original color of the chandelier shows through. But the hubby’s idea was for me to dry brush some chalk paint on to the ornamental balls. I was skeptical about this idea but went ahead and went with it, and loved it once done!
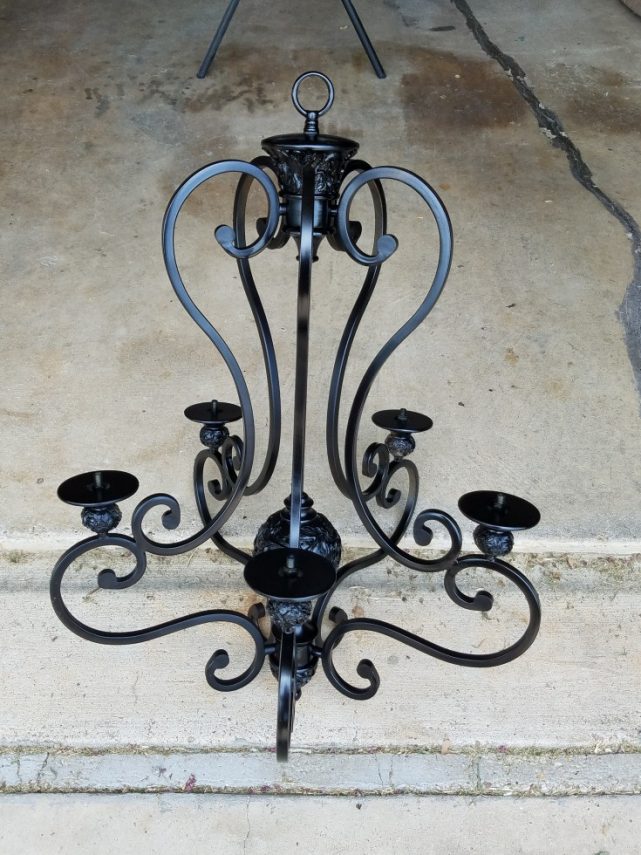
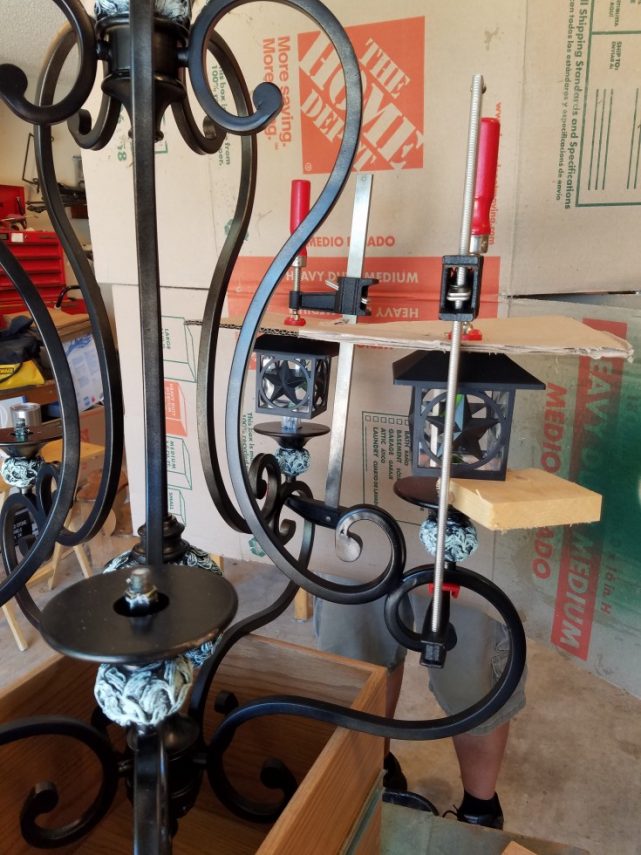
We propped the chandelier up on a drawer to hold it upright, and sturdy. Then the hubs added some hex nuts to the metal rods that were sticking up on the chandelier for more stability for gluing the solar lights on.
We bought the solar lights that you stake into the ground. The hubby took them apart down to just the head of the solar lights. So once the head is pulled off you have a little cap area that is where we will be squirting the glue, and will also add some on to the metal rod and nut on the chandelier. Then we will fit the solar light cap down onto the rod and nut in the position that we want.
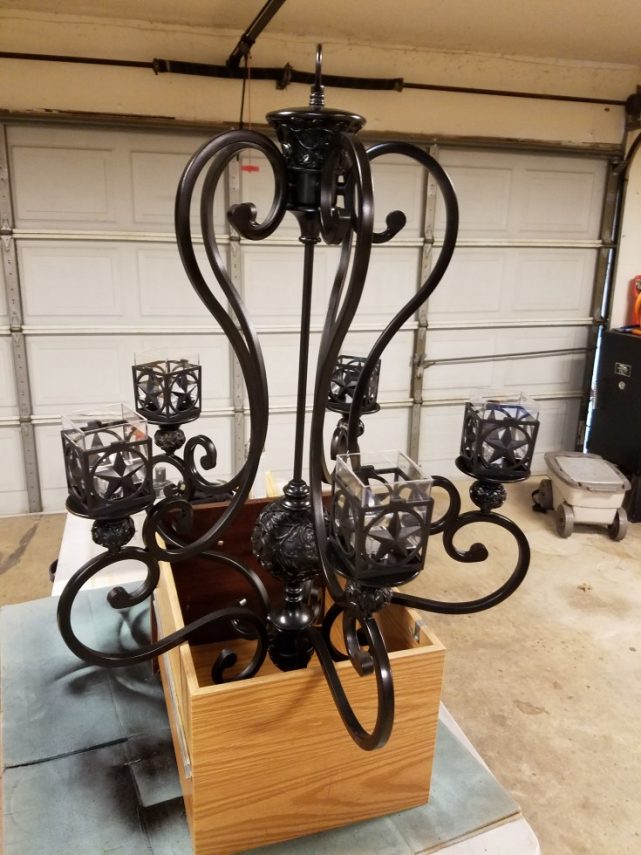
But first I am going to dry brush some chalk paint onto the decorative balls. Isn’t that pretty?
Adding The Cap And Clamping Down The Solar Lights
We were afraid to use regular Gorilla Glue because how the foam expands. But we found a non-foaming version of the glue, and it seemed to do the trick. But the hubs first tried silicone, then Liquid Nails. They did not dry hard for some reason. I thought for sure the Liquid Nails would work but it didn’t in fact one light fell off once we unclamped it.
Using the non-foaming gorilla glue we placed the solar lights, and the caps in place on the chandelier. Then we used a clamp with a piece of cardboard placed on top of the solar light panel so not to damage it once tightened. We also added a 1-inch block of wood under one side of the light to hold it level then we tighten the clamp. Left until the glue dried.
We only had two clamps so this process took a few days to let the glue dry and get all 5 attached.
Hanging Our Diy Solar Light Chandelier
Since the hubby wanted to hang our new solar light Chandelier from a tree branch we had to hang a chain from the chosen branch.
The chain was going to be doubled for extra strength, and because the limb was way up there and neither one of us are a monkey. I’m not good with extension ladders, and we can’t climb up there and add anything to hang it by. So, doubling it was our solution for getting it up over that limb way up in the tree.
The hubby first tied something heavy on one end of an old extension cord then threw it over the limb. Then he tied the chain (which we spray painted the same color as the chandelier because we couldn’t find a heavy duty Black chain) to the end of the extension cord.
As he was pulling the extension cord to raise the chain up over the limb it came untied, and down came the chain.
First Attempt Unsuccessful, Let’s try It My Way
I told the hubby I had an idea, and off I went to get some twine. Once he threw the cord back over the tree limb I tied the extension cord and chain together with the twine. No coming loose now unless the twine breaks.
Then I grabbed a long pole and handed it to the hubby because he’s taller. I pulled on the extension cord while the hubby uses the pole to lift and work the chain up over to where he wanted it positioned.
Then he climbed up on the ladder, and pulled both sides down evenly, and removed the twine. He then added the clip for the chandelier. We wanted to be able to remove it easily from the chain if there was any bad weather with lots of wind expected.
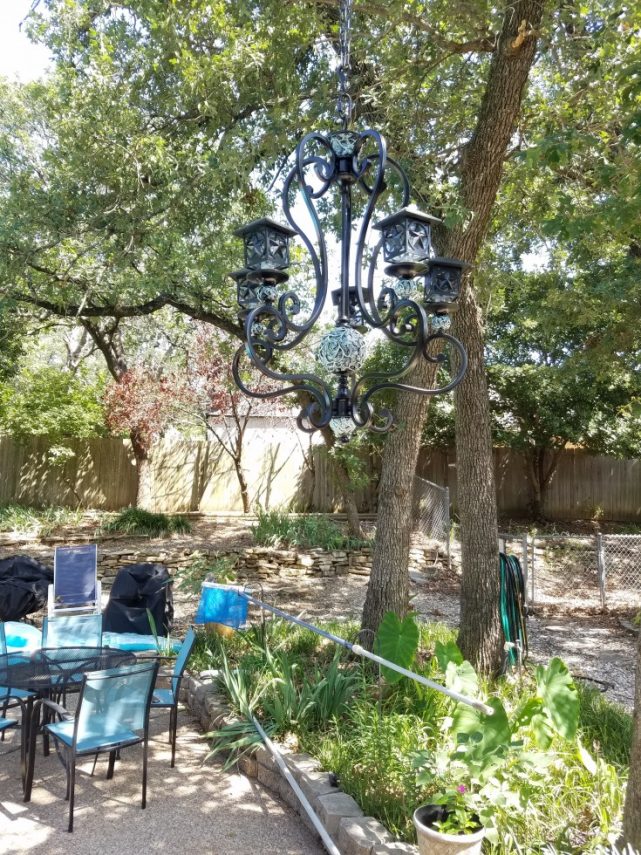
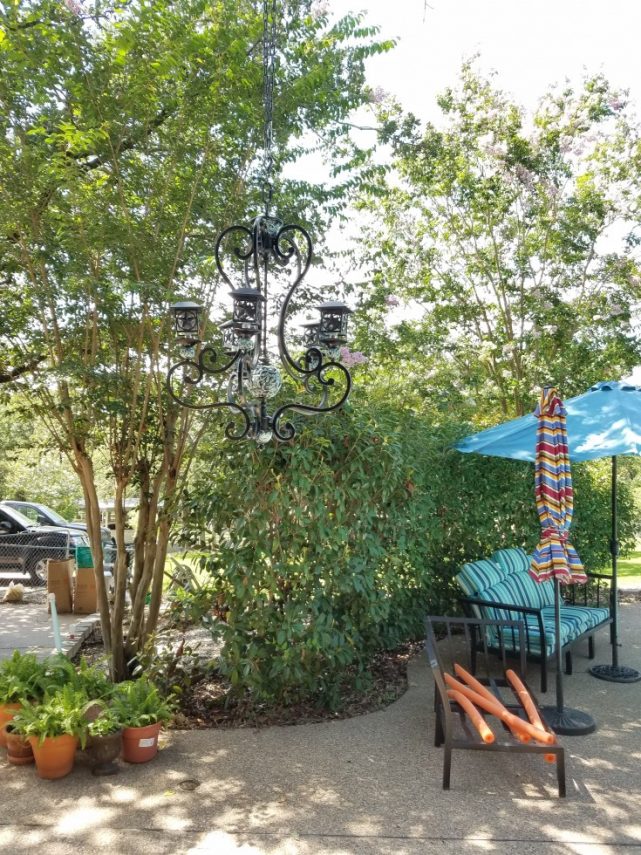
While I held the ladder, the hubby hung our new DIY solar light Chandelier with no mishaps like with my previous ladder mishaps like years ago, but then this wasn’t an extension ladder either.
As we were standing there looking up admiring our new solar chandelier I tell the hubby that the raccoons, and opossums should really enjoy their new lighting. LOL
I say this because I have terrible hours. The hubby’s are more normal since he changed jobs. But I’m hoping maybe on the next 6-month shift bid I can get a later start time so I won’t have to go to bed, or wakeup before the chickens I can go to bed with the chickens. LOL!!!
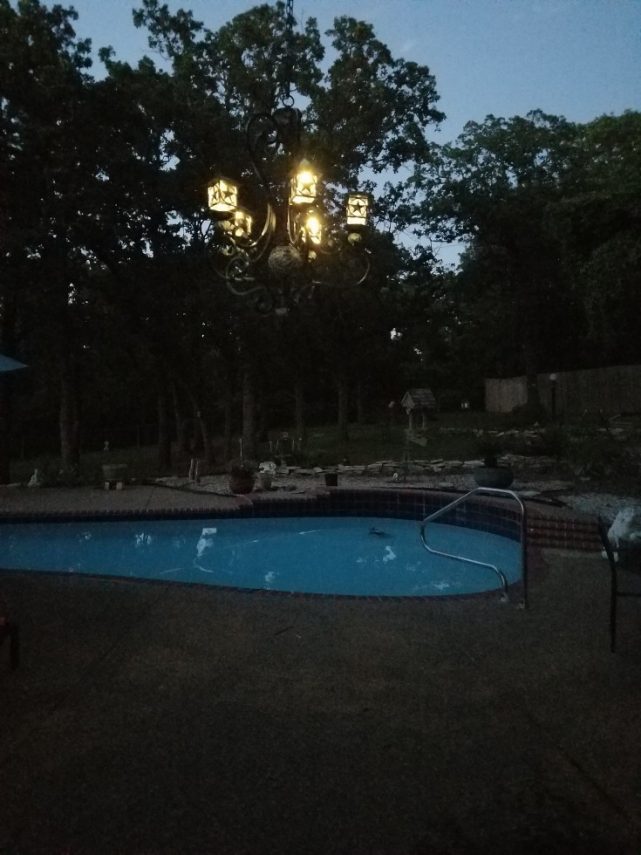
Well anyway that night (my Saturday) we stayed up till the solar lights came on. It wasn’t completely dark but at least we got to see the lights come on, and I do enjoy seeing the chandelier lit up when I get up in the mornings to get ready for work.
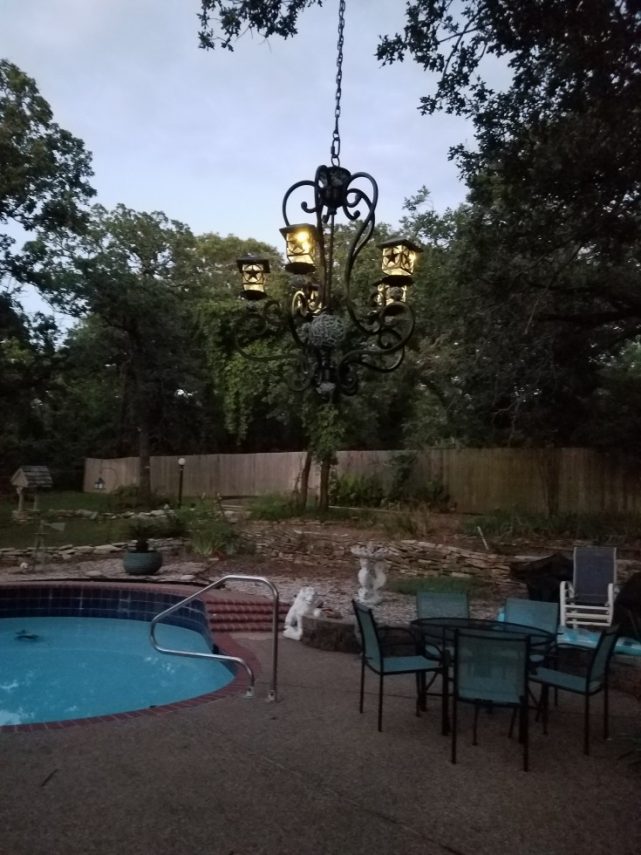
I am really happy how it turned out, even the color of the ornamental balls. The hubby did a wonderful job on our diy solar light Chandelier. Don’t you think?
More Repurposed Projects You May Enjoy!
Repurposed wood chair turned shelf
Repurposed light fixture turned herb planter
Old drawer turned pet bed
Wow! What a cool idea. It turned out great, and I bet it’s so pretty to look out at when it’s lit up. Great job!
Thanks Amy! It is beautiful! I really love haven’t a light out by the pool now.
I’m so glad there were no ladder mishaps this time Linda 😉 I love the idea of having a solar powered chandelier in the garden so much and have been wanting to try it in ours for some time, but I haven’t found a tutorial that explains it as beautifully as what yours does. Thanks so much, yours turned out lovely
Thanks Michell! I am happy for no ladder mishaps as well, next time I might not be as lucky. I do believe all your little garden fairies would love to have a solar chandelier, and as creative as you are I haven’t a doubt that you will come up with something spectacular!
Linda, I absolutely love this! I’m going to head out to find a chandelier for us too, this would be a perfect addition to our pergola or the tree in the backyard. Your husband did a great job, love that you don’t need electricity or need to climb up and turn on each light. The dry brushing was a great idea, it looks fantastic!
Thank you Nikki! I was skeptical when the hubs told me what he was going to do,and I really didn’t think that it would get enough sun to recharge handing in the tree but it does. This would be a great addition to your pergola, and I bet you can get you one made a lot quicker then I will get the pergola that I’ve been telling the hubby we need. LOL
Linda that is such an elegant touch to our backyard. You really made it shine with the paint job and adding the white to the decorative balls was a smart idea. Now you can lay back and enjoy the fruits of your labor.
Mary recently posted…Mehndi Designs
Thank you Mary! I am loving it. The hubby did an excellent job on it, and the little bit of color on the balls was just the right amount.
This is so cool, Can be used as a wedding gift too. I’m now thinking of making one for my grandma. Thanks for this! : )
Thanks Macs! I think for a wedding gift is a great idea!
LInda…I love the Restore too and I think your light looks fantastic! Hubby did a great job, but of course it took a woman to finish the job.
Enjoy the beautiful ambiance!
Hugs, Lynn
Thank you Lynn! You are absolutely right, always a woman to finish a man job. LOL
Linda @ Mixed Kreations recently posted…Breast Cancer Awareness Month: My Story
I love this idea! You guys did a great job!
Thank you Teri! I am really happy how it turned out.
I love this! What a beautiful chandelier that is!! Great job you two!
Thank you Handan, we are really happy how it turned out. Even made one for my daughter 🙂
This is so beautiful! I know When i did mine I was worried about falling off the ladder.
Maria
Thank you Maria! I don’t do ladders. LOL The hubby hung it.
Great project! Thanks for sharing!
Glad you enjoyed it! Thanks for stopping by!
Do you know if these solar lights are still made? I can’t find them anywhere….
Great job on it!
Thank you Stephanie! I don’t know if they still sell the same ones, but Walmart, Home Depot, and Lowes all have a variety to chose from.